How to check the speed of the network card on Windows 10
Wondering about the connection speed of your network adapter (network adapter)? Here are 4 ways to find out this information on Windows 10..
How to check the speed of the network adapter using Settings
To see the connection speed for the network card, follow these steps:
Step 1. Open Settings .
Step 2. Click Network & Internet .
Step 3. Click Status .
Step 4. In the "Change your network settings" section , click the View your network properties option .

Step 5. In the "Properties" section , find the network adapter (WiFi or Ethernet).
Step 6. Specify the connection speed in the Link speed (Receive / Transmit) field .

After completing the steps, you will know how fast the adapter is using to connect to the network.
How to check the speed of the network adapter using Control Panel
To determine the network adapter speed using Control Panel settings, follow these steps:
Step 1. Open Control Panel .
Step 2. Click Network and Internet .
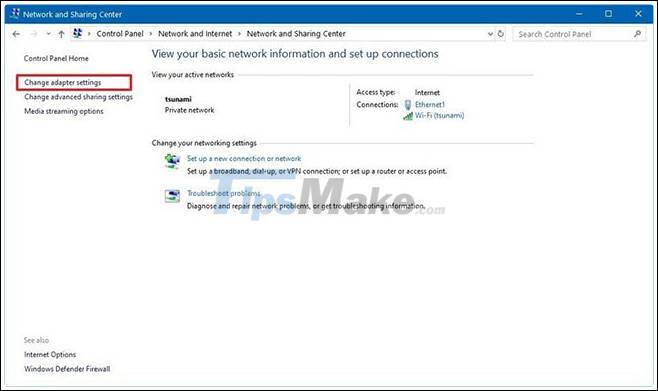
Step 3. Click Network and Sharing Center .
Step 4. Click Change adapter settings on the left.
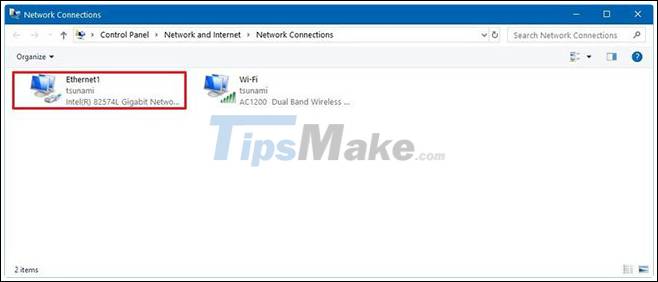
Step 5. Double-click the network adapter (Ethernet or WiFi).
Step 6. Check the connection speed in the Speed field .
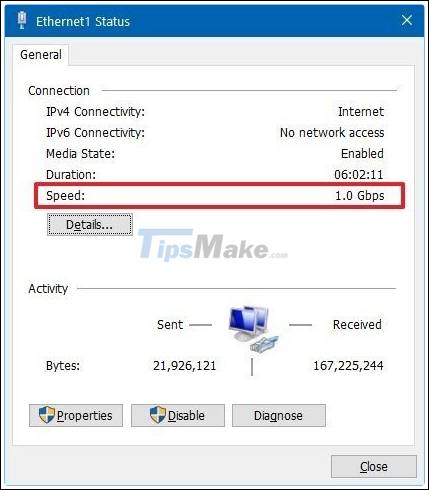
Note : If you are watching the WiFi adapter, you can also confirm the signal quality.
After completing the steps, you should have a better understanding of the connection speed of the network card connected to the network.
To find out the speed for your wireless or wired adapter using Command Prompt, follow these steps:
Step 1. Open Start .
Step 2. Search for Command Prompt and click on the top result to open Command Prompt.
Step 3. Type the following command to define the connection speed for all network cards, and then press Enter :
wmic nic where netEnabled=true get name, speed
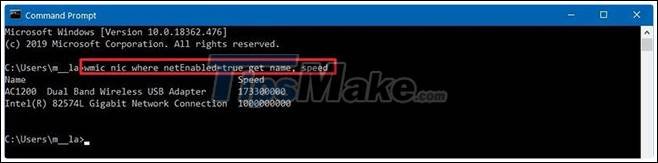
Step 4. Confirm the network adapter speed.
After completing the steps, you should be able to determine the speed (in bits) the card is using to connect to the network.
How to test the speed of the network adapter using PowerShell
To check the speed of Ethernet or WiFi connection on Windows 10 using PowerShell, follow these steps:
Step 1. Open Start .
Step 2. Search for PowerShell and click on the top result to open the dashboard.
Step 3. Type the following command to define the connection speed for all network cards, and then press Enter :
Get-NetAdapter | select interfaceDescription, name, status, linkSpeed
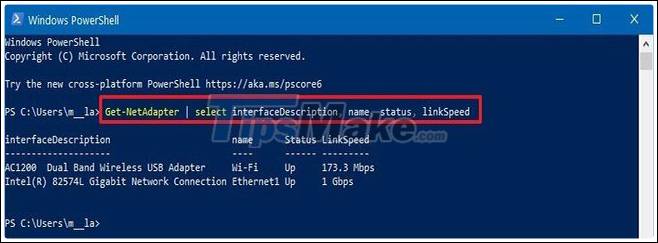
Step 4. Check the WiFi or Ethernet network card connection speed.
After you complete the steps, the PowerShell output will display the connection speed in a user-friendly format (eg 780Mbps and 1Gbps).
Hope you are succesful.