Table of Contents
Black bars around a Windows desktop usually mean the PC is sending a resolution or aspect ratio that does not match the display, or a scaling setting is centering the image instead of filling the panel. Start by selecting the monitor's native (Recommended) resolution under Settings > System > Display. If the bars remain, check the monitor's aspect-ratio menu and the Intel, AMD, or NVIDIA scaling controls.
Identify the kind of black border
| What you see | Likely cause |
|---|---|
| Black bars only at the left and right | A 4:3 or 5:4 image is being preserved on a 16:9 or 16:10 panel |
| A border on all four sides over HDMI | Underscan or “center image/no scaling” is active |
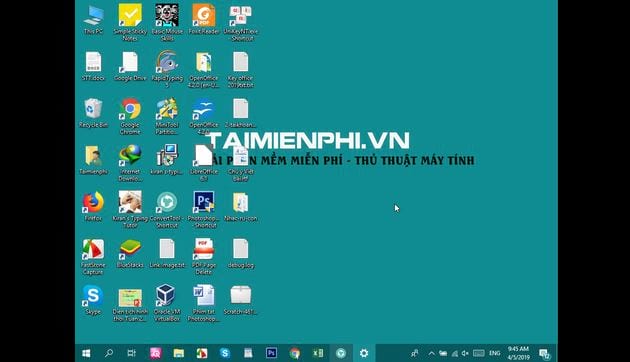
| The entire Windows desktop is small and text is less sharp | Windows is using a non-native resolution without full-panel scaling |
| Only one game or video has bars | The content or game uses a different aspect ratio; the Windows desktop is probably configured correctly |
| The desktop extends beyond the screen edges | Overscan is active on the TV, monitor, or GPU |
| Bars appeared after adding a monitor, dock, or projector | The duplicated display mode may be using a resolution that both screens support rather than either panel's native mode |
Black bars are not always an error. Preserving a 4:3 game's aspect ratio on a widescreen display requires side bars; stretching it to fill the screen changes the shape of the image.
1. Restore the recommended Windows resolution
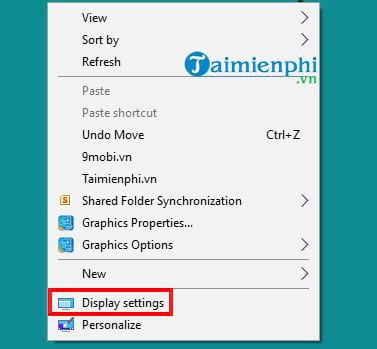
- Press Windows + I and open System > Display.
- If several monitors are shown, select Identify and choose the one with black borders.
- Under Scale & layout, set Display resolution to the option marked Recommended.
- Set Scale to the recommended value separately. Scale changes the size of text and apps; it does not change the number of pixels sent to the display.
- Select Keep changes if the result is correct.
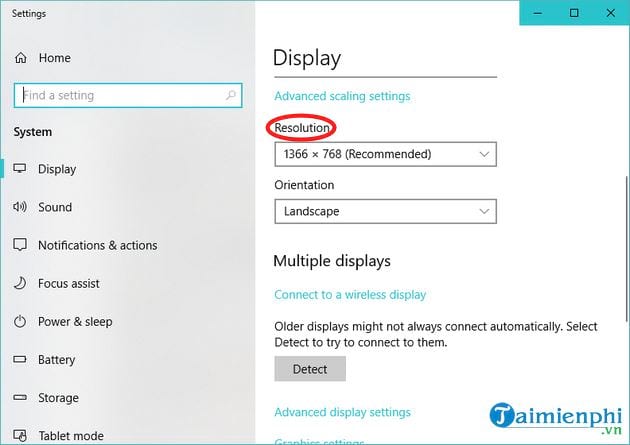
The resolution in the screenshot is only an example. Do not copy 1366 × 768 unless Windows marks that value as Recommended for your panel.
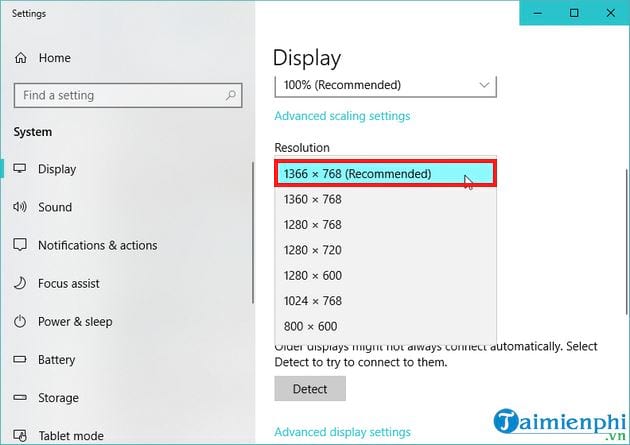
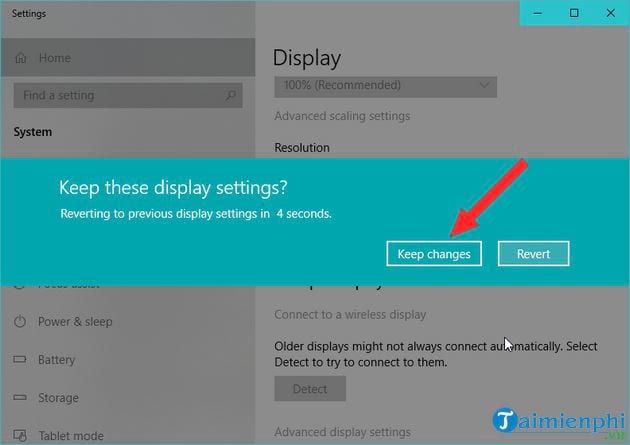
TipsMake's screen-resolution guide explains the relationship between resolution, image sharpness, and scaling.
2. Check the display's aspect-ratio or picture-size menu
Use the monitor or TV's physical controls and look for Aspect Ratio, Picture Size, Screen Fit, Just Scan, 1:1, Auto, or a similar option. For a normal PC desktop at the display's native resolution, Auto, Original, or Screen Fit/Just Scan is usually appropriate.
Do not blindly choose Zoom: it may remove bars by cutting off the taskbar and desktop edges. On a TV, label the HDMI input as PC if the manual recommends that mode. Disconnect an AV receiver or adapter temporarily to see whether it is altering the signal.
3. Correct GPU scaling
If Windows is at the native resolution but the image is still small, open the graphics control app associated with the GPU driving that display.
NVIDIA
In NVIDIA Control Panel > Display > Adjust desktop size and position, compare these scaling modes:
- Aspect ratio: enlarges the image without changing its proportions; bars may remain when source and panel ratios differ.
- Full-screen: stretches a lower-resolution image to fill the display; this removes bars but can distort the picture.
- No scaling: centers the source at its original size, which can leave a border.
At the native Windows resolution, scaling normally should not be necessary. Use Full-screen only when you intentionally want a non-native game or app stretched.
AMD
In AMD Software: Adrenalin Edition > Settings > Display, check GPU Scaling and Scaling Mode. Preserve aspect ratio may add bars to avoid distortion; Full panel stretches the source; Center can leave a border. For an HDMI border on all sides, set the display to its native resolution and adjust HDMI Scaling toward 0% as appropriate.
Intel
In Intel Graphics Command Center > Display, select the affected screen and review Scale. Depending on the hardware and resolution, options may include Maintain Display Scaling, Maintain Aspect Ratio, Stretched, Centered, or Custom. Choose the mode that matches your intent; Stretched can remove bars from a lower-resolution source but changes its proportions.
4. Check the game or media settings
If Windows fills the screen but one game does not, leave the desktop configuration alone. In the game, choose the monitor's native resolution and its native aspect ratio, then select Borderless or Fullscreen as appropriate.
Older 4:3 games and films can legitimately show side bars. Filling a widescreen panel requires either cropping or stretching. TipsMake's article on display orientation and layout covers a different problem—rotation—so confirm that the image is not simply set to Portrait or a flipped mode.
5. Review a multi-display or projector setup
- Press Windows + P and test Extend instead of Duplicate.
- In Extend mode, set each display to its own recommended resolution.
- If Duplicate mode is required, Windows may choose a shared resolution or timing. Bars can be unavoidable on screens with different aspect ratios.
- Connect the display directly to the PC to test the dock, cable, adapter, or AV receiver.
- Under Advanced display, choose a refresh rate supported by the monitor at its native resolution.
TipsMake's dual-monitor setup guide explains display identification and extension modes.
6. Update or repair the display driver safely
Use driver work only after checking resolution, display menus, and scaling. A bad or generic driver can remove native modes, but black bars do not automatically mean the graphics card is damaged.
- Install Windows updates and restart.
- Identify the PC, GPU, and monitor model.
- Download the supported graphics driver from the PC manufacturer, GPU manufacturer, or Windows Update. Avoid generic “driver updater” programs.
- Open Device Manager by right-clicking Start, then expand Display adapters.
The older screenshots below open Device Manager through Computer Management; right-clicking Start is faster on current Windows.
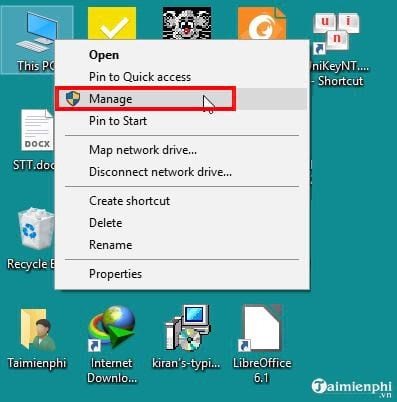
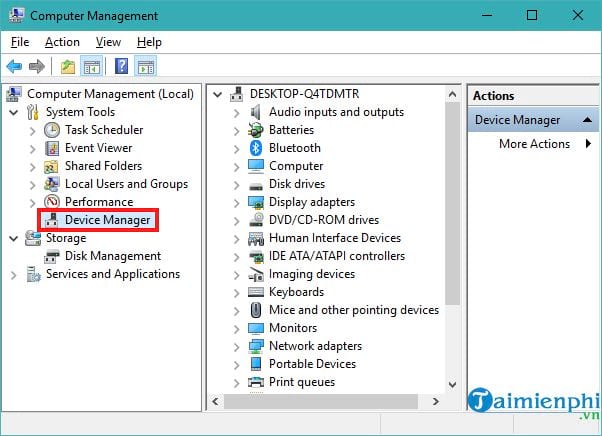
If the problem started immediately after a driver update, open the adapter's Properties > Driver tab and try Roll Back Driver. If the driver is corrupt, obtain the correct installer first, then uninstall the device only as part of a documented reinstall process.
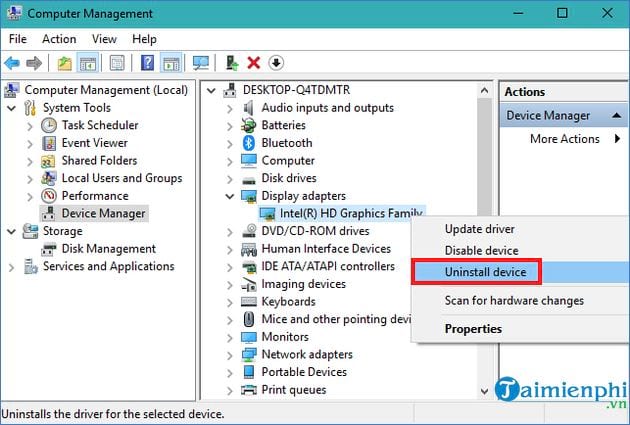
Do not reset or reinstall Windows before testing the native resolution, the display's own picture-size setting, a direct cable, and supported drivers. A Windows reinstall cannot fix a TV's overscan menu or a deliberate aspect-ratio choice.
Legacy Windows 7 and 8 controls
On an older offline or legacy system, right-click the desktop and select Screen resolution, choose the display's native value, and select Apply.
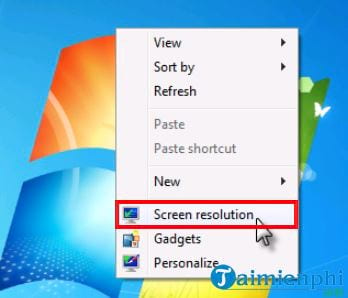
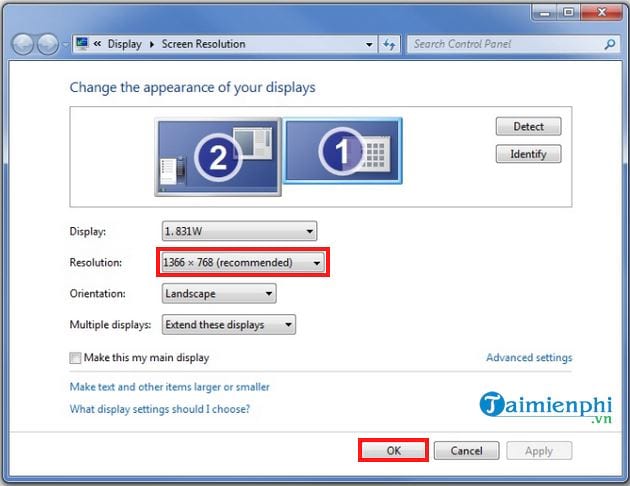
These Windows versions are no longer suitable for ordinary internet-connected use because their standard security support has ended. Windows XP-specific steps have been removed from this guide for the same reason.
When to suspect hardware
Hardware is more likely if the monitor's own setup menu is also shrunken or distorted, the border changes when a cable moves, native resolution is unavailable with multiple known-good cables and computers, or the GPU produces artifacts and crashes as well as scaling problems. Test another cable, input, monitor, and computer before replacing a graphics card.
Recommended order
- Set Windows to the affected display's Recommended resolution.
- Set the monitor or TV to an appropriate PC/Auto/Just Scan picture size.
- Use GPU scaling only for a non-native source or an HDMI underscan problem.
- Correct game-specific resolution and aspect-ratio settings.
- Test a direct cable and Extend mode.
- Update or roll back supported graphics drivers.
- Investigate hardware only after the signal and scaling path has been isolated.
Related Articles
 How to Fix the Error of the Computer Screen Being Minimized 2 Sides5 minutes read
 How to Fix Black Computer Screen Error on Windows 105 minutes read
 Computer Screen Ink Leaks - Causes & Solutions: Complete Overview6 minutes read
 Laptop Has Maximum Screen Width3 minutes read
 Computer Screen Is Upside Down - Causes and Solutions11 minutes read
 HCOM – Leading Enterprise Providing LED Screen Display Solutions7 minutes read
Reader Comments 0
Sign in with email or Google to join the discussion.