Table of Contents
Understanding PowerPoint 2016 requires more than a headline. The overview below breaks down the key facts, changes, and user impact.
Document Inspector
Whenever creating or editing a presentation, certain personal information can be added to the file automatically (for example, document author information). Users can use Document Inspector to delete this type of information before sharing a presentation with others.
Because some changes may be permanent, use Save As to create a backup copy of the presentation before using Document Inspector.
How to Use Document Inspector
1. Click the File tab to go to the Backstage view mode.
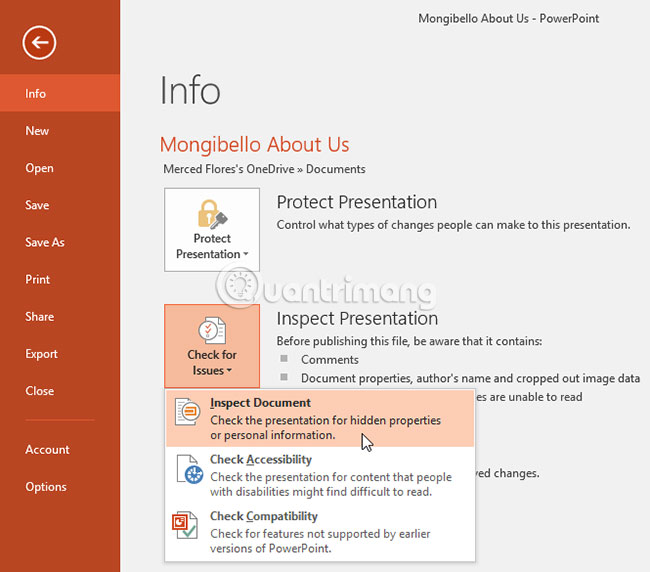
2. From the Info panel, click Check for Issues, then select Inspect Document from the drop-down menu.
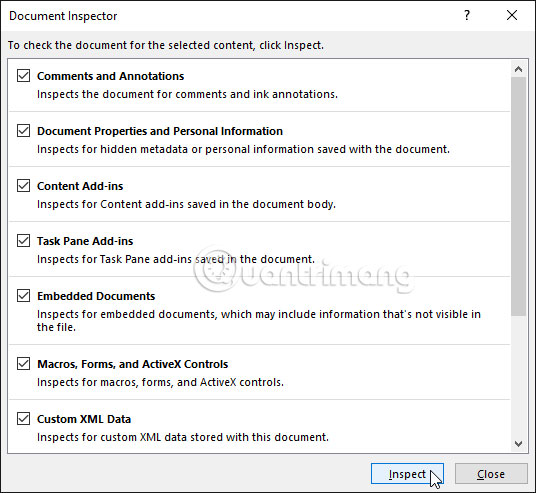
3. The Document Inspector will appear. Check or uncheck the boxes, depending on the content you want to review, then click Inspect. In the example in this article, we will use the default options.
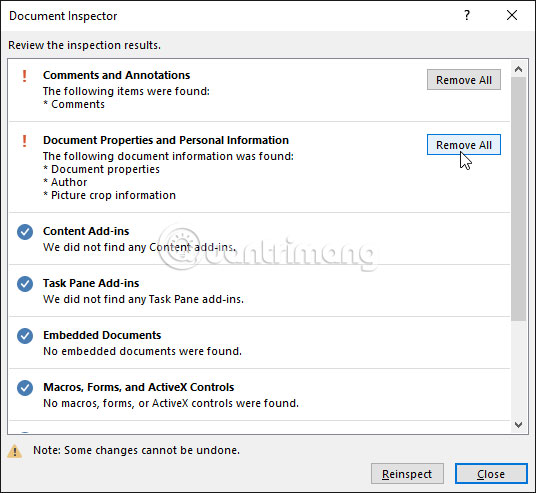
4. The test results will display an exclamation point for any category that finds sensitive data and also has the Remove All button for each of these categories. Click Remove All to delete the data.
5. When finished, click Close.
Protect the Presentation
By default, anyone with access to a presentation can open, copy and edit content unless the creator protects it. There are several ways to protect a presentation, depending on each person's needs.
How to Protect Documents
1. Click the File tab to switch to the Backstage view mode.
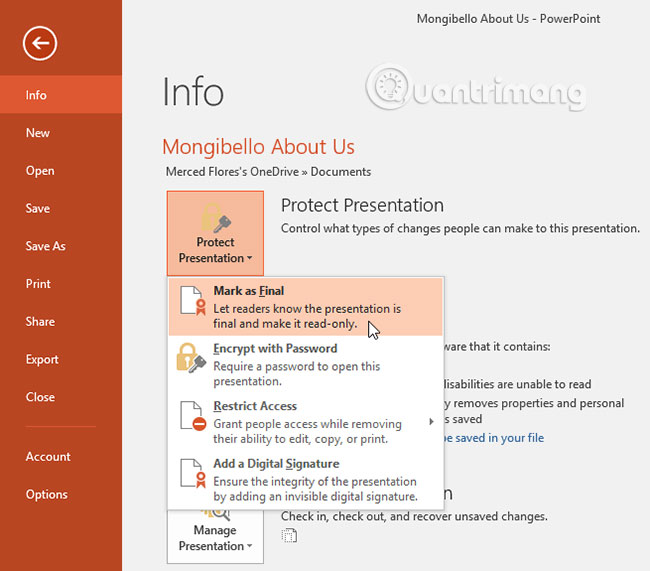
2. From the Info panel, click the Protect Presentation command.
3. In the drop-down menu, select the option that best suits your needs. In this example, we will select Mark as Final. The Mark as Final option is a good way to discourage others from editing the file, while other options allow users to have more control if needed.
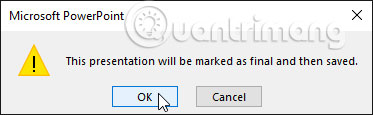
4. A dialog box will appear, prompting you to save. Click OK.
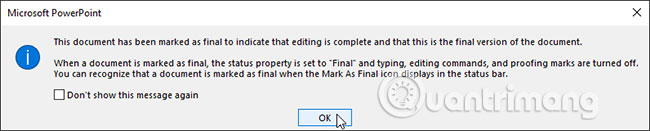
5. Another dialog box will appear. Click OK.
6. The presentation will be marked as the final version. Whenever others open the file, a bar will appear at the top to discourage them from editing the document.
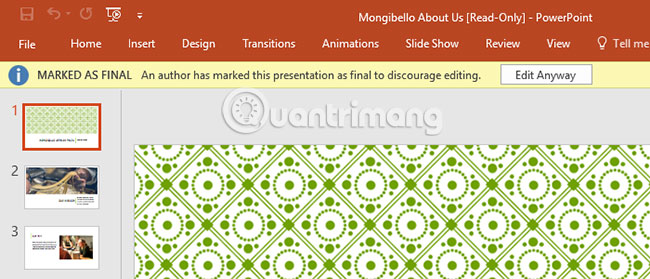
Marking the presentation as the final version will not prevent anyone from editing the document because they can still choose Edit Anyway. If you want to completely prevent people from editing your presentation, you can use the Restrict Access option instead.
Hope you are succesful.
FAQ
What is the main topic of Check and Protect Presentations in PowerPoint 2016?
Understanding PowerPoint 2016 requires more than a headline.
Why is PowerPoint 2016 important?
The overview below breaks down the key facts, changes, and user impact.
What should readers remember about PowerPoint 2016?
Document Inspector Whenever creating or editing a presentation, certain personal information can be added to the file automatically (for example, document author information).
Related Articles
 PowerPoint 2019 (Part 1): Getting Started with PowerPoint: Explained7 minutes read
 10 Useful Tips for You When Presenting with Powerpoint15 minutes read
 PowerPoint 2019 (Part 24): Spell and Grammar Check: Explained5 minutes read
 50 Alternative Slideshow Applications for PowerPoint10 minutes read
 PowerPoint 2019 (Part 32): Sharing Presentations Online: Explained5 minutes read
 How to Make PowerPoint for Beginners: How to Use PowerPoint8 minutes read
Reader Comments 0
Sign in with email or Google to join the discussion.