The simplest way to take a screenshot on Windows 11 using keyboard shortcuts.
How to take a screenshot in Windows 11? Let's explore the simple steps with Free Download to help you save the image instantly.
Table of Contents
Windows 11 supports various screenshot methods, from traditional keyboard shortcuts to built-in tools like Snip & Sketch, Xbox Game Bar, and third-party software such as ShareX and PicPick. These tools not only help you quickly capture moments but also integrate smart editing and saving features, enhancing work efficiency.
Table of Contents:
Method 1. Using the PrtScn key .
Method 2. Utilizing the features of the Snip & Sketch tool .
Method 3. Manipulating with the Snipping Tools .
Method 4. Utilizing the Xbox Game Bar .
Method 5. Using ShareX software .
Method 6. Using PicPick .
Method 1: Using the PrtScn shortcut
The Print Screen (PrtSc) key is one of the most useful tools for capturing screenshots on a Windows 11 computer. You can use the following key combinations to perform this task.
Capture the current window and save it to the clipboard. After doing this, you can paste the image into any application such as Paint, Word, or email by pressing Ctrl + V. This is a quick and convenient way to capture a specific part of the screen without installing other software.
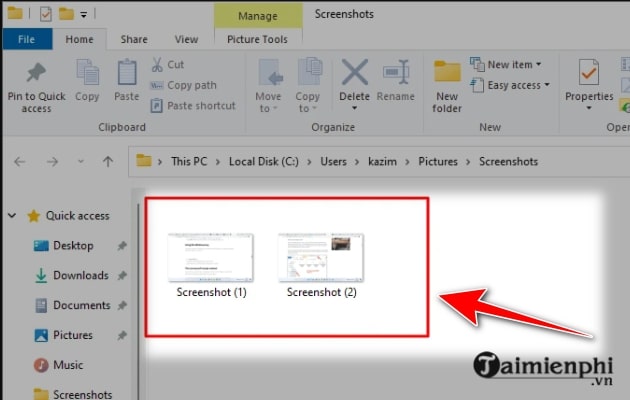
Capture the entire screen and automatically save it to the Screenshots folder.
To access the Screenshots folder , you can open the Start menu and search for " Screenshots ", then click on the Screenshots folder .
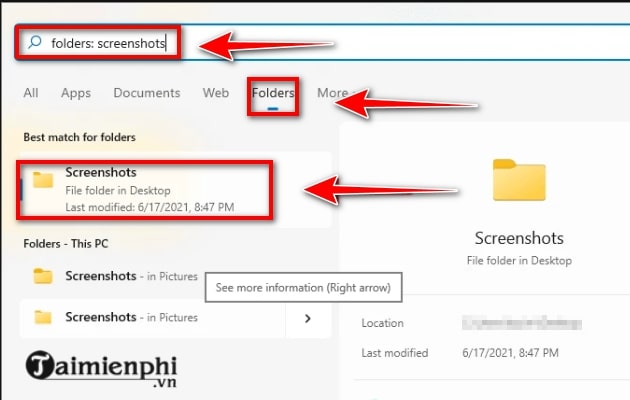
You will see Windows 11 screenshots saved and numbered sequentially according to the time they were taken.
Method 2: Using tools available on the operating system.
Snip & Sketch is a built-in application on the Windows platform that allows users to capture screenshots of their computer screen without needing additional software. It also includes image editing capabilities and copies the captured image to the clipboard.
It allows you to select the shooting area with various options.
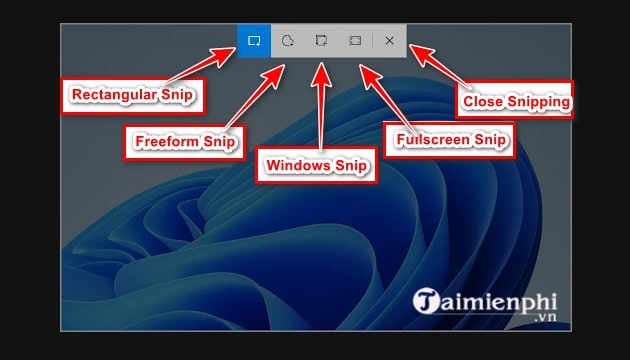
Step 1: Press the key combination to open the Snip & Sketch tool . A floating window with 5 actions will appear on your screen, each with a different function:
- Rectangular Snip : Draw a rectangle around the area to be captured.
- Freeform Snip : Select a freeform area to capture.
- Window Snip : Select a specific window to capture.
- Fullscreen Snip : Capture the entire screen.
- Close Snipping: Exit Snip & Sketch.
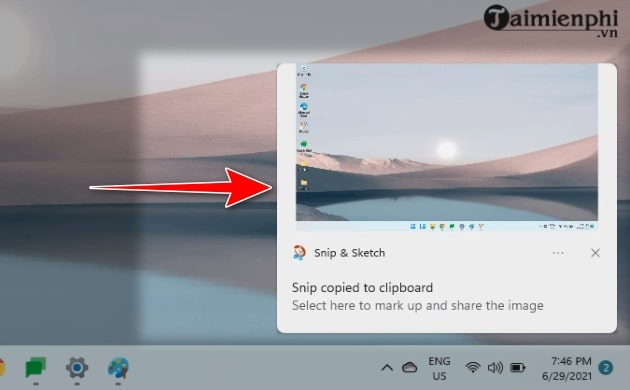
Step 2: After selecting the method and capture area, a notification window will appear in the bottom right corner of the screen. Left-click on it to open the screenshot you just took using Snip & Sketch.
 History
Step 3: Now you can freely edit the photo, such as adding content, annotations, drawing, sharing, and saving to the clipboard . If you want to take a new photo, left-click on "New" in the top left corner of the toolbar.
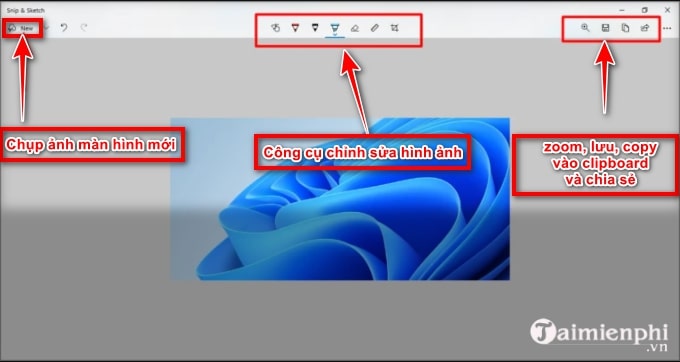 Instructions on how to take screenshots in Windows 11 using the Snip & Sketch tool.
Alternatively, you can open Snip & Sketch using the PrtScn key (or Fn+PrtScn) instead of pressing the Windows+Shift+S key combination . Here's how:
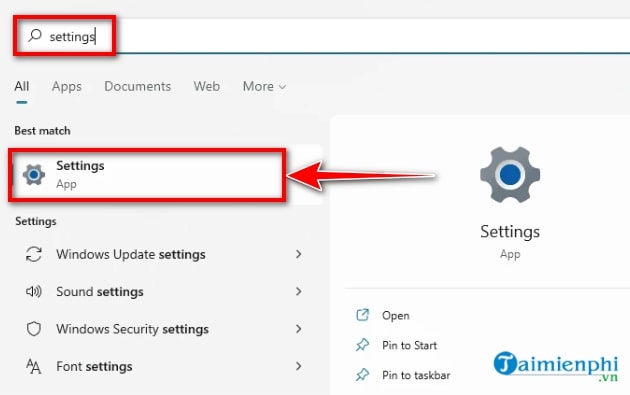
- Access the Start menu , search for " Settings" => select Settings . + Or press the Windows+S
key combination to access Settings.
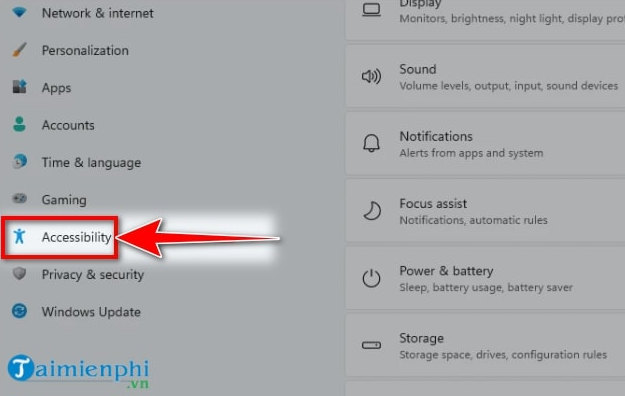
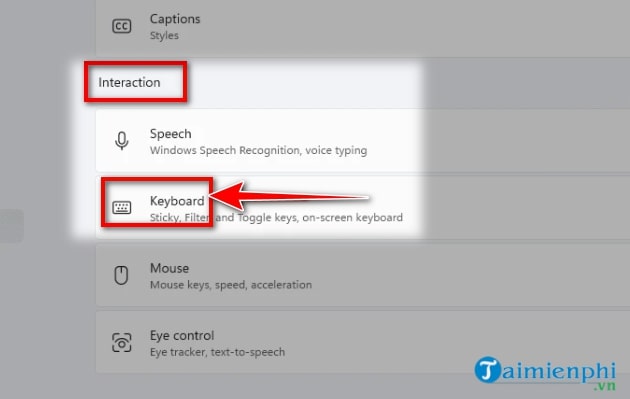
- Select Accessibility in the left pane.
- Next, in the Interaction section, click on the Keyboard option .
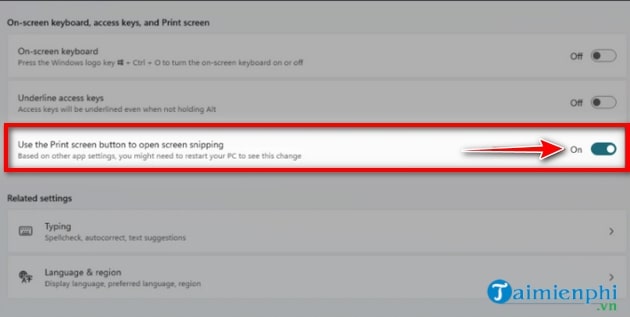
- Click the toggle switch icon in the " Use the Print Screen button to open screen snipping " section and turn it On .
=> Use the PrtScn key to quickly open Snip & Sketch . Now you can launch the Snip & Sketch tool using only the PrtSrn key (or Fn+PrtScn).
Method 3: Using Snipping Tools
You can also easily and conveniently take screenshots using another readily available software. That's Snipping Tools.
Overall, Snipping Tools has quite similar functionality to Snip & Sketch. However, unlike Snip & Sketch, after a screenshot is taken, Snipping Tools will automatically open the image through the Snipping Tools application, and when taking a screenshot, the screen will be slightly darkened except for the selected area. You can also find several image editing tools available within Snipping Tools.
To take a screenshot on Windows 11 using Snipping Tools, follow these steps:
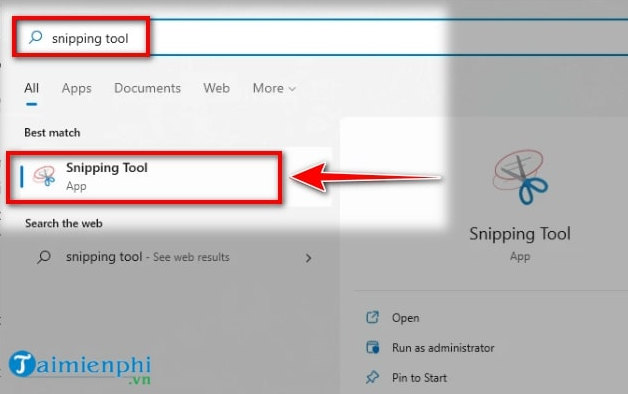
Step 1: Open the Start menu , search for " Snipping Tools," and then click the "Snipping Tool App" button.
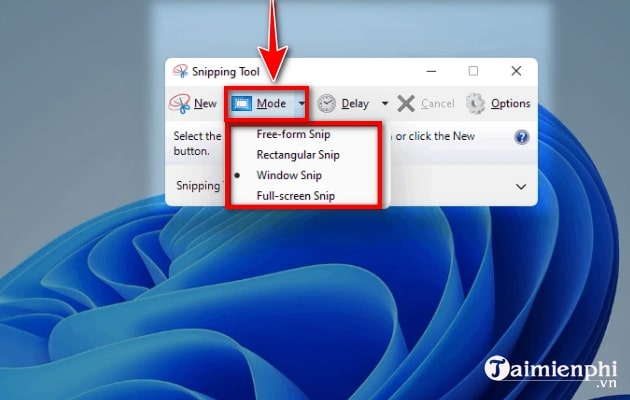
Step 2: Similar to Snip & Sketch, you can also choose from 4 different screenshot modes in the Mode menu of Snipping Tool, including: Rectangular Snip , Freeform Snip , Windows Snip , and Fullscreen Snip.
 Use the Snipping Tool to take screenshots in Windows 11.
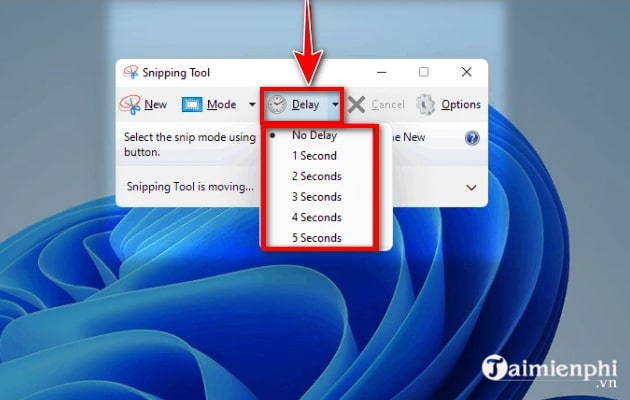
Step 3: You can also customize the delay when taking screenshots using the Delay feature of Snipping Tool.
Step 4: After selecting the screenshot mode and delay, drag and hold the right mouse button (for Freeform Snip + Rectangular Snip mode) or select the window you want to capture (for Windows Snip mode), then release the mouse button , and the image will automatically open in the Snipping Tool software window.
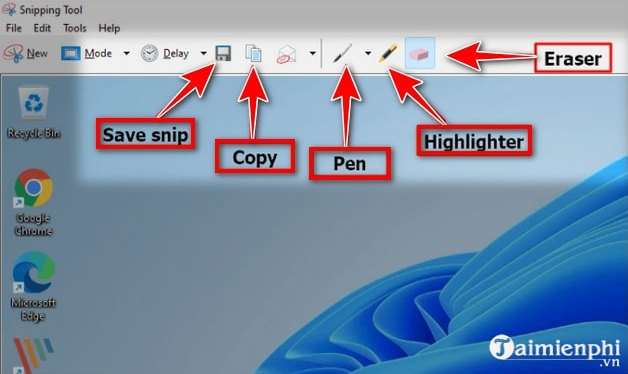
Step 5: Next, you can use several image editing tools such as: eraser , highlighter , draw more details by hand (Pen), copy to clipboard (Copy), and save image (Save snip).
Method 4: Using Xbox Game Bar
Besides allowing you to record screen videos, Windows 11 Xbox Game Bar also has a very useful screenshot feature. To take a screenshot of Windows 11 with Xbox Game Bar, you can refer to the following steps:
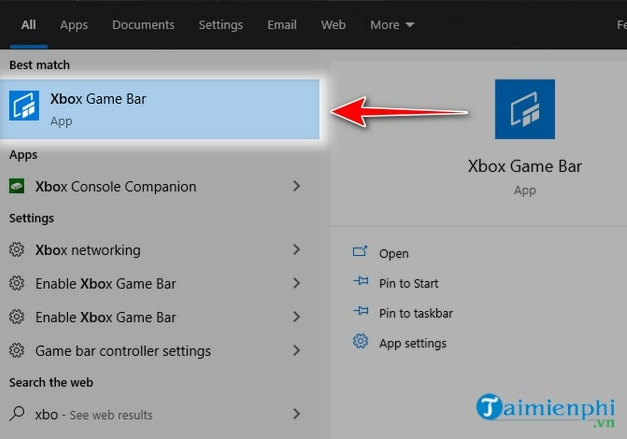
Step 1: Open the Xbox Game Bar software using the Windows + G key combination (or you can also open it through the Start menu).
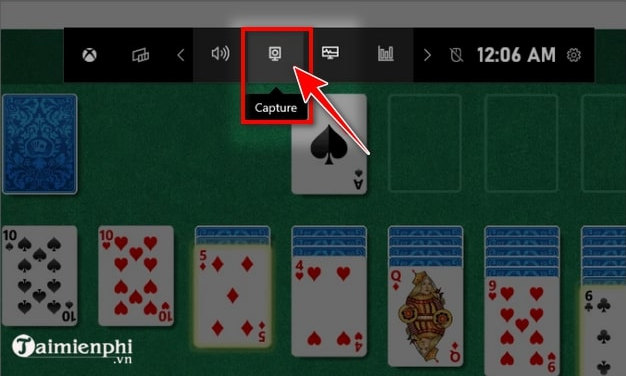
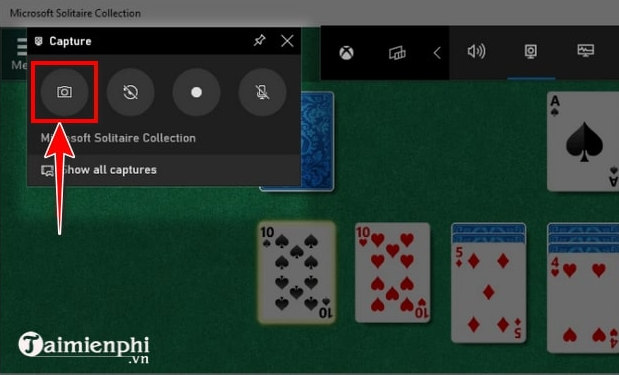
Step 2: Click the Capture button on the Xbox Game Bar toolbar.
Step 3: Next, click the camera icon in the Capture menu to take a screenshot, or use the keyboard shortcut Windows + ALT + PrtScn (or Windows + ALT + Fn + PrtScn depending on your device).
Step 4: The screenshot taken by Xbox Game Bar will be saved at the following location on your computer: C:UsersUserAccountVideosCaptures .
Note: Replace " User Account " in the address above with the username you are using to log in to your personal computer.
Method 5: Using ShareX
Step 1: Download the latest version of ShareX here.
Step 2: Directly click and install as usual. Open the ShareX software on your computer, click Capture => select Region .
Note: If you want to take a long screenshot in Windows 11 , select the Scrolling capture function .
 How to take a screenshot on a Windows 11 computer using ShareX
Step 3: A frame will appear. Move your mouse cursor to the desired screenshot location on the screen and click the left mouse button .
Step 4: The image will be saved to your computer immediately. Right- click the image, select Open , and then click Folder to open the folder containing the screenshot taken in the previous step.

Method 6: Using PicPick
Step 1: Download the latest version of PicPick here.
Step 2: Install it like any other software. Open PicPick on your computer and select Region .

Step 3: Left- click and drag to the area you want to capture, then release.
- For example: We want to capture the area below, not the entire screen.

Step 4: Once you've finished taking the picture, press File => select Save As to save the image.

Step 5: Choose the image format to save the photo to your computer.

Windows 11 also integrates useful features such as split-screen, video recording, and split-screen functionality on Windows 11 laptops , supporting efficient multitasking. You can explore more helpful tips on this platform to make the most of the operating system.
Was this article helpful?
Your feedback helps us improve.
Related Articles
 Summary of new keyboard shortcuts on Windows 11 to help you work faster6 minutes read
 The simplest and fastest way to take a screenshot on a MacBook in 2026.13 minutes read
 How to take a screenshot on Windows 117 minutes read
 Summary of 60+ latest keyboard shortcuts on Windows computers5 minutes read
 5 easiest and fastest ways to take screenshots of Windows 1016 minutes read
 The fastest ways to take screenshots on a computer or laptop.7 minutes read
Reader Comments 0
Sign in with email or Google to join the discussion.