Table of Contents
This guide provides a clear, practical overview of steps to restore the default font in Microsoft Office, with useful context, important details, and straightforward takeaways for everyday readers.
1. How to Restore Microsoft Office Fonts in Settings
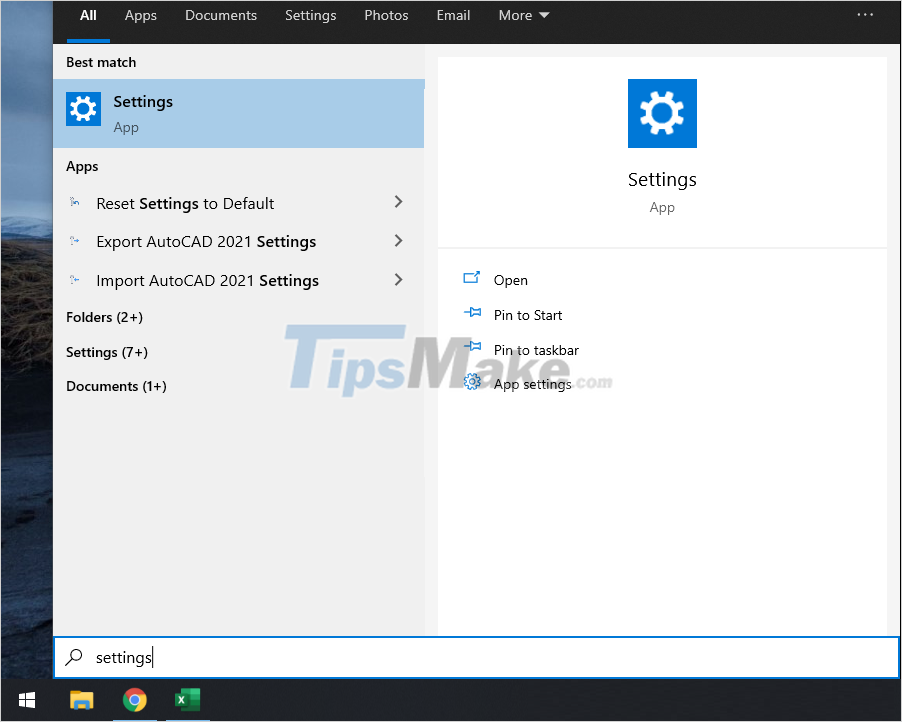
Step 1: At the main interface of the screen, proceed to select MenuStart and enter Settings to open.
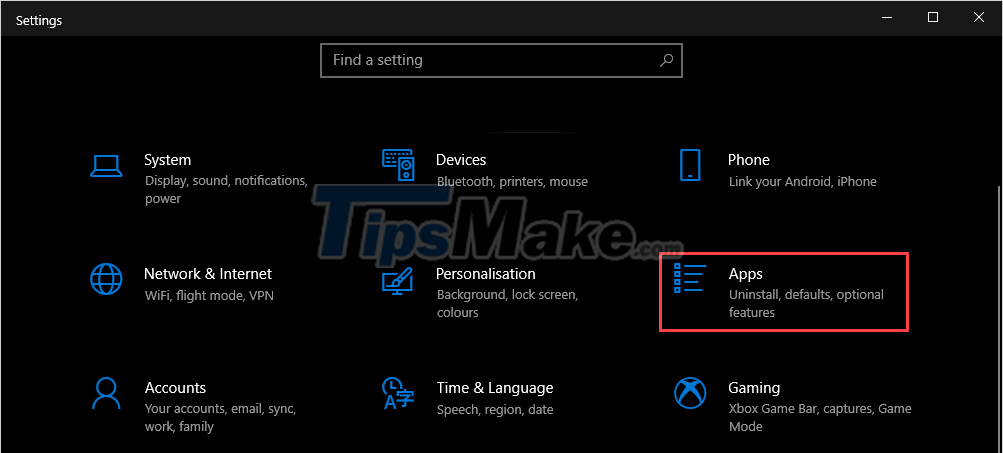
Step 2: When the Settings window is open, proceed to select the Apps item to see all the applications on Windows 10.
Step 3: Then, select the App & Features tab (1) and navigate to the Microsoft Office Professional section to select Modify (2) .

Step 4: In the error correction window, select the Quick Repair item and click Repair to start restoring the entire font of the software.

2. Manually Reinstall Fonts in Microsoft Store
The fonts used in Microsoft Office are provided on the Microsoft Store, so you can download and install them directly on your computer.
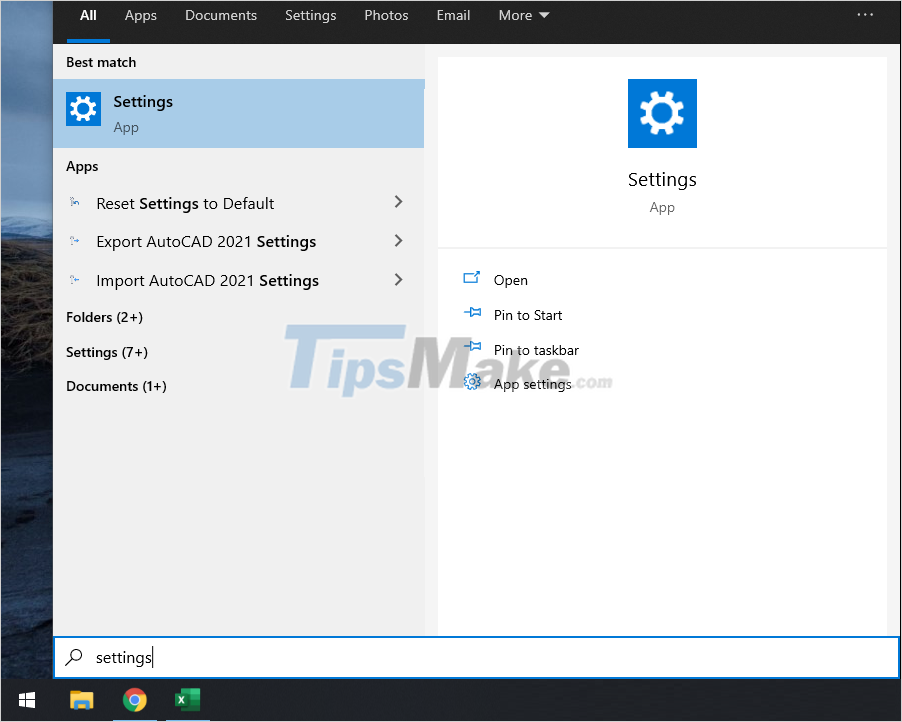
Step 1: At the main interface of the screen, you proceed to open MenuStart and enter Settings to open.
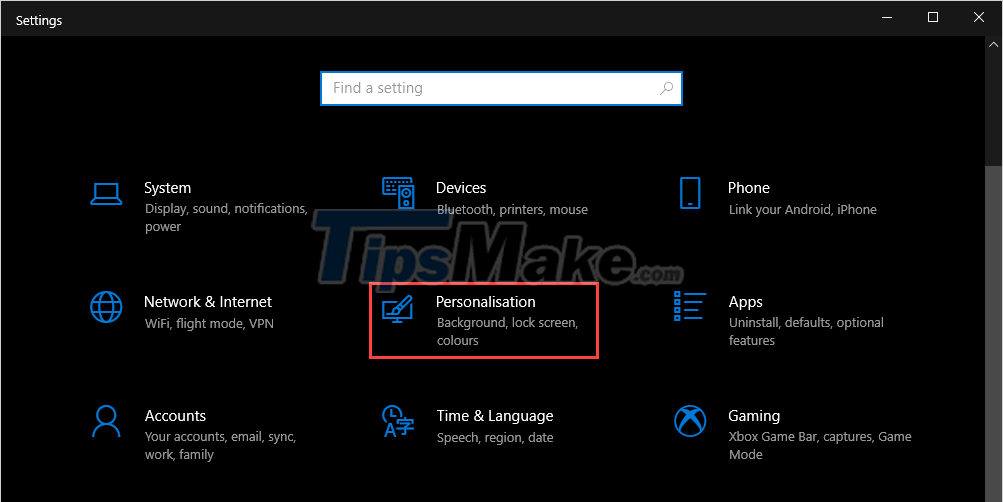
Step 2: Then, you select the Personalization tab to open the user settings.
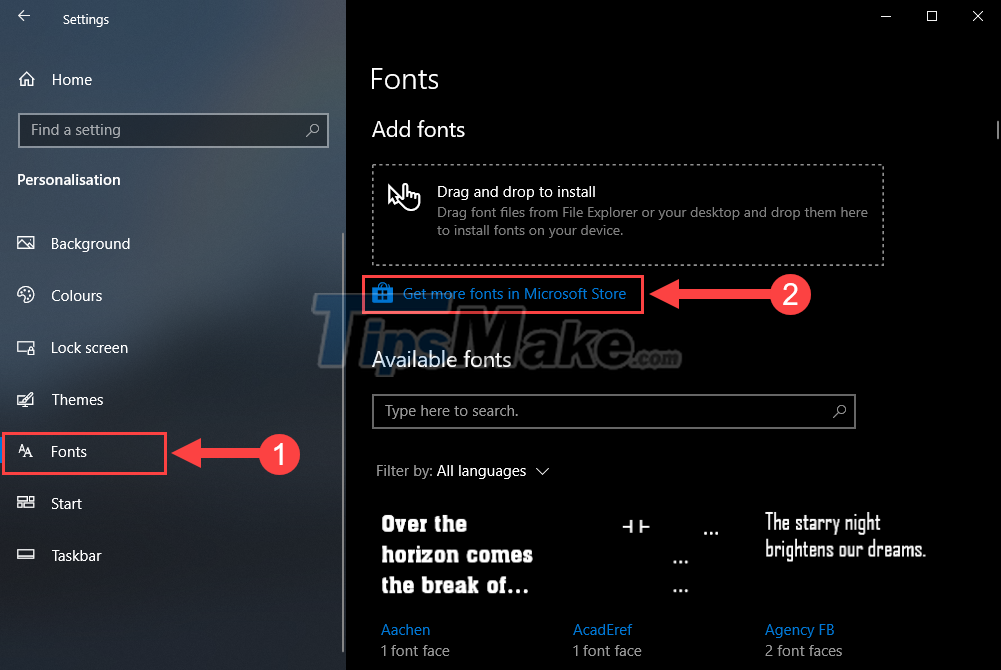
Step 3: Next, select Fonts (1) and proceed to select Get more fonts in Microsoft Store (2) to download them to your computer.
Step 4: When the Microsoft Store store is opened, you open each font in turn to download and install.

Step 5: To install the font from the store, you just need to click Get and you 're done.

Good luck
Key Takeaways
Use the information above as a practical reference for steps to restore the default font in Microsoft Office. Review each step carefully, confirm any requirements, and choose the option that best fits your situation.
FAQ
What does this guide explain about Steps to Restore the Default Font in Microsoft Office?
It explains the main concepts, practical considerations, and useful steps related to steps to restore the default font in Microsoft Office without requiring advanced knowledge.
Who can benefit from learning about Steps to Restore the Default Font in Microsoft Office?
This information is useful for readers who want a clear overview, practical guidance, and reliable steps related to steps to restore the default font in Microsoft Office.
What should I check before applying this information?
Review the requirements, confirm that your device, software, or situation matches the instructions, and back up important data before making major changes.
Related Articles
 How to Restore the Default Font on Windows 104 minutes read
 New Font: Complete Guide4 minutes read
 Instructions for Setting the Default Font in Microsoft Word4 minutes read
 How to Change the Default Font in Libreoffice3 minutes read
 Change the Default Font in Microsoft Word 2010: Tutorial2 minutes read
 How to Change Fonts in Windows 11: Step-by-Step Guide9 minutes read
Reader Comments 0
Sign in with email or Google to join the discussion.