Replace CPU for Laptop
Christopher Null
Network Administration - Do you feel uncomfortable with an old and slow processor in your laptop? Replacing a new CPU for a laptop is now an effective solution to help you speed up your computer. For example, upgrading from a 1.66-GHz Intel Core Duo CPU to a 2-GHz Core 2 Duo T7200 will greatly improve your performance. However, this upgrade is not as simple as upgrading other components of the laptop.
Make sure you buy a CPU that will work with your laptop. In fact, sometimes some laptops do not have the ability to replace the CPU.
If the processor allows an upgrade, you need to find an appropriate replacement component. As a guide we have shown you about replacing graphics cards, the best way to do this is to see which CPUs are sold with your laptop on Google. We bought a 2-GHz Intel T7200 CPU from a retail store.
Check the laptop's service manual (this guide can be downloaded from the manufacturer's support page) before opening your computer. In addition, you also need to ensure static electricity when removing the device.

Step 1: Upgrade the BIOS
Before removing your first screw, you need to consider upgrading the BIOS to the latest version. Manufacturers often upgrade BIOS to allow them to support newer CPUs. If you upgrade to a newer chip than your BIOS allows, your notebook won't boot. So check the support information on the manufacturer's website for any BIOS for your notebook.
The CPU upgrade process is almost the same as the graphics card upgrade process. In the case of Inspiron E1505, the CPU is located directly below the graphics card, so to remove it there are some parts like the steps in replacing the graphics card.

Step 2: Remove the covers
Laptops have different designs but the upgrade process usually starts by opening the cover: Turn on the plastic hinge cover, then lift it off the machine. Avoid using excessive force, as pushing too hard can damage plastic parts.
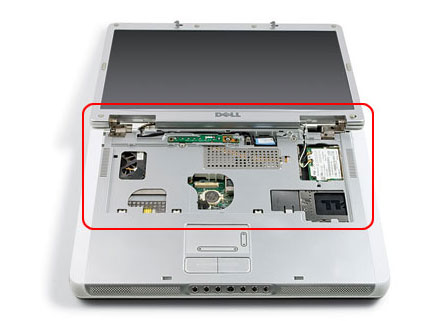
Step 3: Remove the keyboard
Remove the keyboard by twisting a few screws under the protective hinge cover, lift it out, then remove the connectors. On some notebooks, simple pins also allow you to remove the keyboard without screwing any screws.
(Note: Be sure to keep the screws removed carefully. The best way to be careful is to place them in cups - each cup for each step of disassembly - and label each cup).
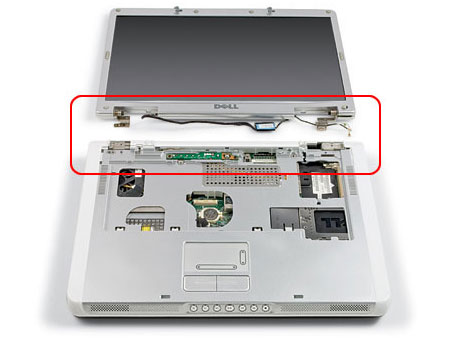
Step 4: Remove the display
Remove the display screen - all display parts of the screen - by removing the screws on the bottom and back of the device, unplugging the Wi-Fi antenna cables and video cables (see picture).
Next, remove the optical drive; This way of removing the drive can be done by pressing a latch below the laptop and pulling the drive out.
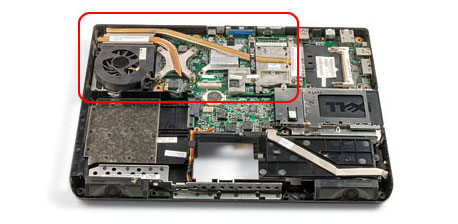
Step 5: Remove the frame
Remove the upper frame by removing the screws held below the computer. When you lift the frame off the pedestal, make sure there is no part of it still attached to the lower part of the case or to the motherboard. If you feel a bit forced, it is still easy for some snails to be removed.
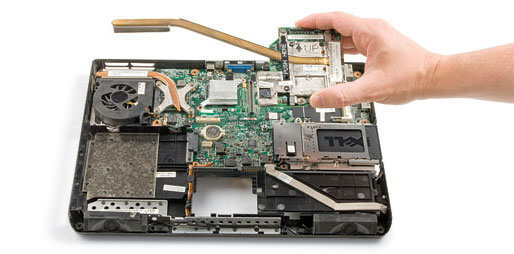
Step 6: Remove the graphics card
At this point you are about to touch the key components of the system, so it is necessary to ensure the electrostatic charge for all these internal components. As in the introduction to replace the graphics card, please remove the two screws to remove this card, the CPU is located directly below the graphics card.

Step 7: Remove the heat sink
Once you have removed the graphics card from the machine, let's remove the four screws to remove the heat sink to expose the CPU, the CPU is kept in its socket with a latch.

Step 8: Replace the CPU
Screw the socket of the socket to keep the CPU counterclockwise until it stops and lift the CPU off the laptop. Put on that new CPU but not pushed. Only screw the screw clockwise to lock it. Note: some use a latch bar instead of a screw.
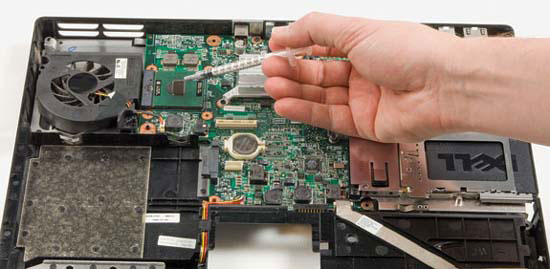
Step 9: Paste the heat conductor and assemble everything again
Next you need to prepare paste the heat conductor for the heat sink: Clean all old thermal conductive compounds with alcohol (rubbed on the cloth). When the alcohol is dry, apply the thermal conductor to its original place (about a thin layer of paper) on the CPU.
Put the heat sink in the correct position. Then there are the other components, which in turn perform the opposite compared to when opening the machine. Finally, launch Windows, then you'll notice changes to the system.