Upgrade graphics card for laptop
Christopher Null
Does anyone not want to get good graphics quality for their notebook computer? Obviously, no one wants it, but upgrading a graphics card for a laptop is a problem. The upgrade can be said to be completely possible for all of your laptops, but opening your entire notebook is a time-consuming or risky issue. Therefore you should not perform this process unless you are willing to take risks for your computer. However, if done correctly, this project can give you a higher frame rate. This is how to do that .
![]()
Step 1: Remove the hinge coupling
In some new notebooks, you can see the graphics card simply by opening the panel at the bottom of the computer. However, in most older computers, it takes a lot of steps at the computer.
The first thing you need to know if you upgrade your graphics card, your laptop can only support a few graphics cards. The best source for you is now the laptop manufacturer you are using.
First you need to consult the laptop service manual (instructions can be downloaded from the factory support pages) before attempting to open the device. In addition, you need to protect the hardware with discharges by running an electrostatic wire anywhere.
Laptops have different designs but the upgrade process usually starts by opening the cover: Turn on the plastic hinge cover, then lift it off the machine. Avoid using excessive force, because excessive force can damage plastic parts.

Step 2: Remove the keyboard
Remove the keyboard by twisting a few screws under the protective hinge cover, lift it out, then remove the connector plugs. On some notebooks, simple pins also allow you to remove the keyboard without screwing any screws.
(Note: Be sure to keep the screws removed carefully. The best way to be careful is to place them in cups - each cup for each step of disassembly - and label each cup).

Step 3: Remove the display
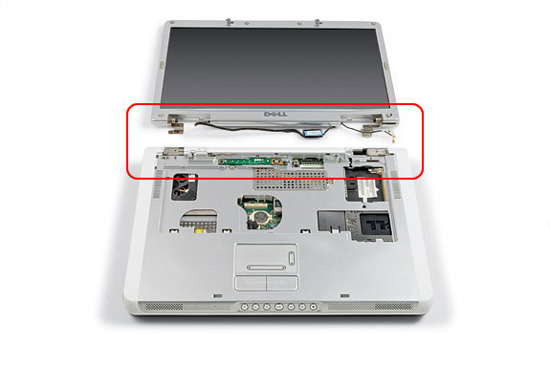
Remove the display screen - all display parts of the screen - by removing the screws on the bottom and back of the device, unplugging the Wi-Fi antenna cables and video cables (see picture).
Next, remove the optical drive; This way of removing the drive can be done by pressing a latch below the laptop and pulling the drive out.

Step 4: Remove the frame
Remove the upper frame by removing the screws held below the computer.

Step 5: Replace the graphics card and assemble it again
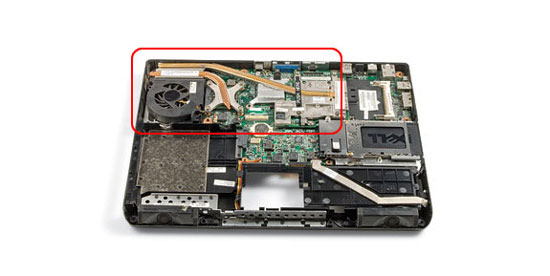
Following the steps described above allow us to remove the graphics card, loosen the two card screws. After installing a new graphics card, we reverse the previous removal procedure to assemble the laptop back to its original state.
Once the new card is installed, the system will recognize the new graphics card and ask you to download and install the correct driver for it from its website.