Protect your network with pfSense
The latest version 1.2, includes many features that you still see on commercial firewall or router devices, such as a Web-based GUI for easy management. While this free software also has many impressive features for free firewalls / routers, there are some limitations.
As a firewall, pfSense supports filtering by source and destination addresses, source ports or destination ports or IP addresses. For example, if we use source address filtering and set the checked IP address to be the subnet of the internal network, any traffic or any requests generated from that address will be analyzed. and filtered depends on the principles of the firewall. If we use destination address filtering, the firewall will check the IP address that the traffic will go, and if the destination address satisfies firewall rules, an appropriate action will be taken.
One of the best firewall features is the passive operating system fingerprinting (P0F), which will passively detect the operating system. of connection and allow the firewall to block connections based on the operating system of the currently connected node. It also supports routing policy and can operate in bridge or transparent modes, allowing you to simply put pfSense between network devices without requiring additional configuration. pfSense provides network address translation (NAT) and port forwarding, but this application still has some limitations with Point-to-Point Tunneling Protocol (PPTP), Generic Routing Encapsulation (GRE) and Session Initiation Protocol ( SIP) when using NAT.
pfSense is based on FreeBSD and the CommonBS Redundancy Protocol (CARP) protocol of FreeBSD, which provides redundancy by enabling administrators to group two or more firewalls into an automatic failover group. Because it supports multiple wide area network (WAN) connections, load balancing can be performed. However there is a drawback to it in that it is only possible to balance the delivery traffic between two WAN connections and you cannot assign traffic to a connection.
pfSense supports VPN in using Internet Protocol Security (IPSec), OpenVPN or PPTP. Due to some limitations with NAT, IPSec VPN is also limited when connecting via NAT, the limitation here is the lack of support for mobile or remote VPN clients. The software also lacks advanced IPSec features such as NAT Traversal in the Internet key exchange (IKE), which is still known as NAT-T and Xauth. You can choose OpenVPN to overcome some of these limitations, but there are some other limitations even though the development team has promised to address those limitations in the next version.
Install pfSense
To install, you must first download pfSense and choose between an embedded package or an ISO CD package. You should only select the embedded package if you will use it on a network device using flash technology for storage. Most people should choose ISO CD for regular computers. To run pfSense properly, you need a 'box' with a minimum 100MHz CPU configuration with 128MB of RAM and at least two network interface cards (NICs), one for LAN and one for WAN. This minimum requirement meets the throughput of less than 10Mbps. As your network throughput and usage increase, pfSense requirements also increase. Check out pfSense's page to get the most appropriate technical details for your requirements.

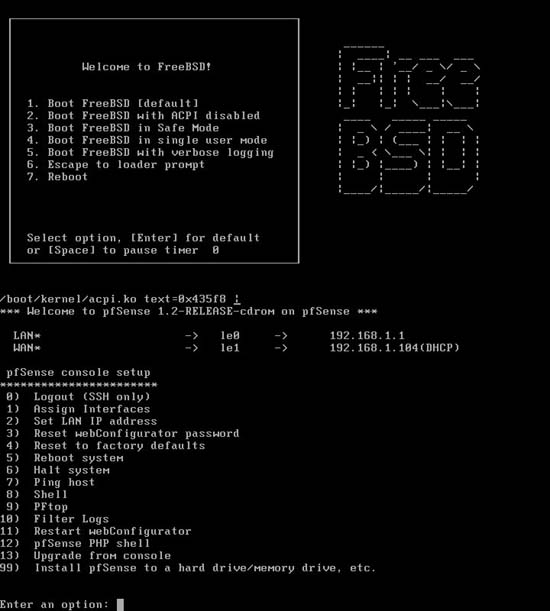
We downloaded 60MB of CD ISO package and burned it to a disc. When booting from CD, you will see some options. If this is the initial setting for pfSense, select the default option. The initial boot process will set up VLAN and select the interface for LAN and WAN. You can automatically detect interface settings but make sure that the interfaces are connected. If you are not connected, you will have to enter the interface names manually. In our setup, we choose le0 for LAN interface and le1 for WAN.
After the initial configuration, the boot process will continue until you get to the pfSense console, which is a simple menu that allows you to configure interface settings, enable Web configuration. and other services, reset the factory default configuration, install pfSense to the hard drive. pfSense will automatically assign the IP address to the LAN interface, but we used a private address so changed the IP address of the LAN so that the new address will be used during the installation on the disk. hard. You must format and create a disk partition before installing pfSense. If you select the recommended partition, pfSense will create it for you. However, you still have the option to create your own partition layout.
In our installation, we selected the default partition recommended. During the installation process, pfSense will ask you about the type of system you want to install it on. You can choose a normal station (an uniprocessor or multiprocessor), a station without any console or keyboard or embedded system. We chose the uniprocessor system. After installation, restart the computer and use the LAN IP configuration option, access the Web configuration interface.
Use pfSense
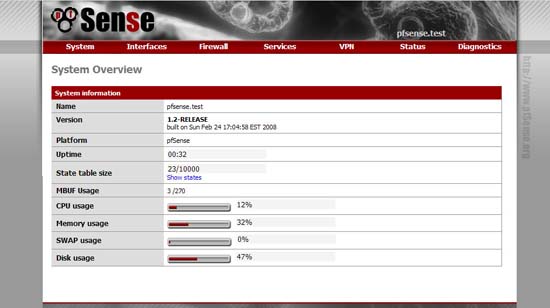
PfSense's configuration is no different from the configuration of any network firewall and router that uses the Web configuration. After logging in with the default username and password, you can configure the firewall's interfaces and rules for it. For secure Web management, change the default password and set the session type to HTTPS on the common installation properties. Here you can also set the firewall's DNS settings.

LAN configuration is very simple. If you have not done so before installing, you only need to set the IP address. In the WAN interface, you can choose between many different connections such as Static, Dynamic Host Configuration Protocol (DHCP), Point-to-Point Protocol on Ethernet cable (PPPoE) and BigPond. Select the appropriate connection as configured by your ISP.
Once you have configured the network interfaces properly, you can set up firewall policies. Like any firewall device, firewall policy setting requires you to choose an interface (WAN or LAN), source address, port and destination address, protocols and services and types. action like giving, locking or rejecting. Blocking will completely drop data packets while reject will return an "unreachable" response to the host initiating the connection. For security, you should choose lock action rather than reject. In Firewall you can also configure NAT settings if you need to use port forwarding for services or configure static NAT (1: 1) for specific hosts. The default setting of NAT for outbound connections is automatic / dynamic, but you can change the manual type if needed. We tested some of the firewall rules that were created, such as rules for blocking FTP access to external networks, and pfSense successfully blocked the service.
We also tested pfSense's VPN features. It supports IPSec, OpenVPN, and even PPTP. If you need a fast VPN connection and have less available bandwidth than are required by SSL VPN connections and still ensure good security, choose IPSec VPN. If you have previously managed IPSec VPN configuration, then you will find that configuring IPSec in VPN is very simple and can be done in a few minutes. Make sure that the parameters for the algorithms in use are common for both. Also note that there are some IPSec VPN restrictions on pfSense Developers Wiki. With a simple IPSec configuration, pfSense's limitations can still be guaranteed to some extent and it works well with site-to-site settings that we tested. However for important applications that involve resolving other mobile devices and authentication, you will see a lack and limitation in pfSense's IPSec configuration.
You can use OpenVPN to overcome some of these limitations of IPSec. OpenVPN can allow for increased security because it uses SSL. The only difference is that it requires more overhead due to SSL, which means it will consume more bandwidth than IPSec.
If you have other VPNs that still use PPTP dial-up connections, pfSense will fully support PPTP.
Other features of pfSense must include its ability to connect WAN and load balancing. You can set up a "captive portal", a portal that requires users to access the network to authenticate himself through an internal database or Remote Authentication Dial-In User Service (RADIUS) first. when allowed to enter. For users who want to access your network with PPPoE, the PPPoE server already exists and authentication can be used internally or via RADIUS.

Although some features need improvement, the pfSense capabilities currently available meet an office network. It is also easy to manage and provides many features to be like in commercial products. However, some features that have been used in large businesses are still limited, so we do not recommend using them in such a large environment. With the active development community of this application, the project should address these issues as new features are added.
With its multi WAN capabilities and load balancing, you can add pfSense to your list of growing network / firewall solutions, low cost or free.
Cory Buford