Open your own online store with WordPress
Not only is a professional blogging service, WordPress also allows you to 'build' an online store right on your blog.
To do this, you need to use the WP e-Commerce plugin, download it at http://wordpress.org/extend/plugins/wp-e-commerce, good compatibility with WordPress version from 2.5 to 2.7.1.
Download and extract the zip file, you will be wp-e-commerce directory. Copy this folder to WordPress wp-content / plugins folder, go to admin page, select Plugins > Installed > select Activate at WP Shopping Cart line. Re-open the blog home page, you will see an additional Products Page page showing the list of products. You can manage and reset the store through the Products menu in the admin page.
General settings
First, go to Products > Settings , select the General tab to reset the store. In the Base Country / Region section , select Vietnam , fill in the general tax rates for the Tax Settings items. When adding new products, you don't need to charge taxes anymore. Next, select the currency and display type in the Currency Settings section .
Product Management
Before adding a product, you need to create a group of products of the same type so that viewers can easily find the product they want to buy. Go to Products > Groups , select Add new items to create a new group. On the Group Image line, click Browse , select a product that represents the group, and then click Add to add it.

Select Products > Manage products , click Add Product to add new products, with the following parameters:
- Enter the selling price into the Price item and the number of items available in Stock Keeping Unit .
- Categories and Tags : Select product groups for this product.
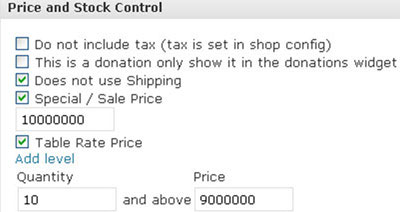
- Price and Stock Control : Price and shipping options such as: Do not include tax (product is not taxable), Does not use Shipping (product not delivered), Special / Sale Price (product check this box, a blank box will appear asking you to enter the new price after deducting the discounted amount), Table Rate Price (discount when buying bulk goods, for example with price 10 million / product, if buying from 10 products or more, the price is 9 million / product).

- Shipping Details : Shipping fee for the product (including two rates applicable at home and abroad).
- Variation Control : Group of product properties, select Add New Variations to add product properties. Once created, you can use these features for other products.
- Products Images : Click Browse to upload the avatar image for the product.
Sell products
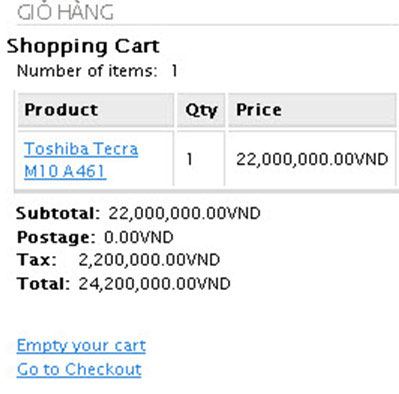
- When you want to buy a product, someone else will click on the Add to cart text below that product. Then, the product will be put into the cart and paid through the Checkout page. To appear to notify the buyer that the product has been placed in the cart, go to Settings > Presentation card, select Yes at the Display Fancy Purchase Notifications line .
- In addition, you can let users rate the product, by selecting Yes at Show Product Ratings . You choose the location of the shopping cart on the blog via Cart Location , so choose the Widget to put the cart in the sidebar of the blog, how to display the widget will be mentioned later.
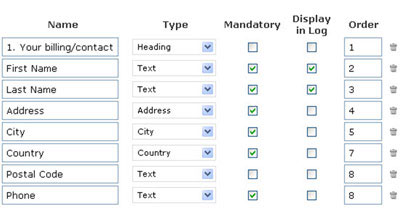
- If you accept payment, the buyer will click Checkout . At this time, there will be a form to collect the buyer information. You can customize this form again by selecting Settings > Checkout tab, with items that require the buyer to declare, you mark the Mandatory column.

Besides, if you want to create coupons code (discount code) for buyers, go to Products > Marketing , click Add Coupon , enter the code into the Coupon code frame, discount at Discounts , start and expire date at column Start and Expiry . If you want the code to be used only once, check the Use Once column.
Back to the admin page, go to Products > Sales , you will see the buyer's order, the status of the order listed in the Status column. You click Details to view details.

Widget
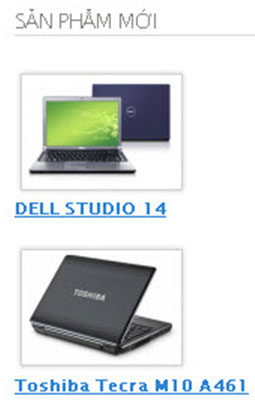
On the admin page, go to Appearance > Widgets to bring the product widgets to the blog homepage. There are seven widgets on the product, you press the Add button at each widget to bring up the homepage, so use widgets like Products Special (list of special products), Latest Products (new products), Shopping Cart (cart),…


advertisement
In order for the store to be well-known, you should use some of the following:
- Go to Products > Marketing , check Show Share This (Social Bookmarks) line to show ' Shart This Product ' under each product, help viewers put products on online bookmark pages, or send an introduction email. products to friends.
- Through Facebook: You can use the GetShopped application in Facebook to update new products. Visit http://apps.facebook.com/getshopped for detailed instructions. In the Enter new RSS line, you enter the RSS of the store, you can get the RSS link in Products > Marketing .

You should read it
- ★ WordPress plugins with more than 300,000 pages that use vulnerabilities are vulnerable to SQL Injection attacks
- ★ 5 mistakes everyone mistakenly thinks about WordPress
- ★ Create a backup schedule for Database with Cron Job
- ★ 20 WordPress plugins for photo websites (2018)
- ★ 30 best free WordPress presentation plugins (2018)