Table of Contents
This updated guide examines Make Your Own Smart Mirror with Raspberry Pi 3 and organizes the essential facts, background, and practical takeaways in clear American English.
In this project, we will use open source software MagicMirror by MichMich installed on Raspberry Pi 3, then via HDMI to export to the screen and finally apply a 2-dimensional Acrylic glass on the front screen.

With Magic Mirror, you can integrate into it Google Assistant Vietnamese or Home Assistant. turning it into a similar tool to Google Home mini to control the device, ask questions and do some other tasks.
Prepare
- 1 Raspberry Pi 3 B + (with power, shell, heatsink, memory card, fan.) and a mouse.
- 1 HDMI cable to connect it to the TV or LCD monitor.
- 1 Acrylic 2-dimensional glass.
- 1 wooden frame (whatever size you want)
- 1 LCD screen or TV (the size is equal to or smaller than the size of Acrylic glass, can be purchased for savings).
- Mic, speaker (if integrated Google Assistant).
- 1 PC or laptop to configure the Pi.
Installation steps
Step 1: Visit the home page of the Raspberry Pi by following the link below to download the Raspbian Buster.
https://www.raspberrypi.org/downloads/
Step 2: Visit the link below, download the Etcher software.
https://www.balena.io/etcher/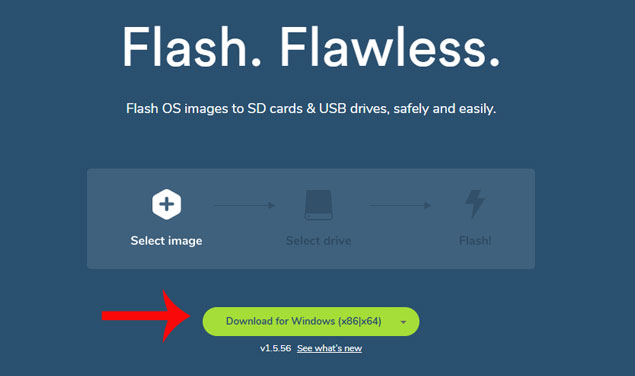
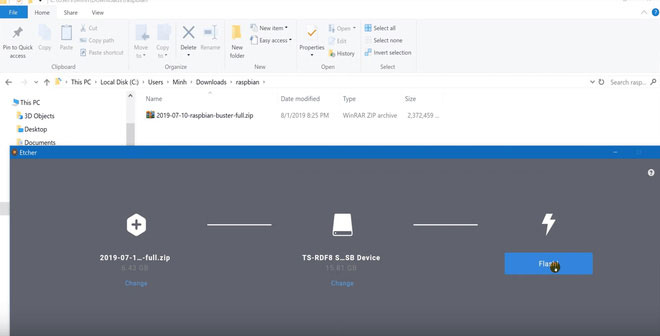
Step 3: Open Etcher software, click Select image to select the newly downloaded Raspbian Buster zip file in step 1 -> click Select drive to select a memory card -> click Flash to flash the Raspbian Buster zip file to the memory card. When the success message appears, remove the memory card.
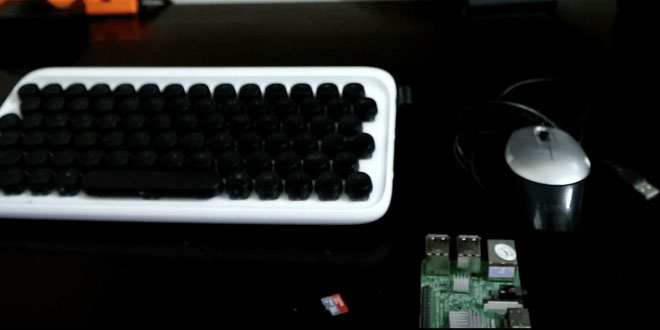
Step 4: Plug the memory card into the Pi -> plug in the mouse -> plug in the LAN (to have internet for the Pi) and HDMI -> plug the power into the Pi.
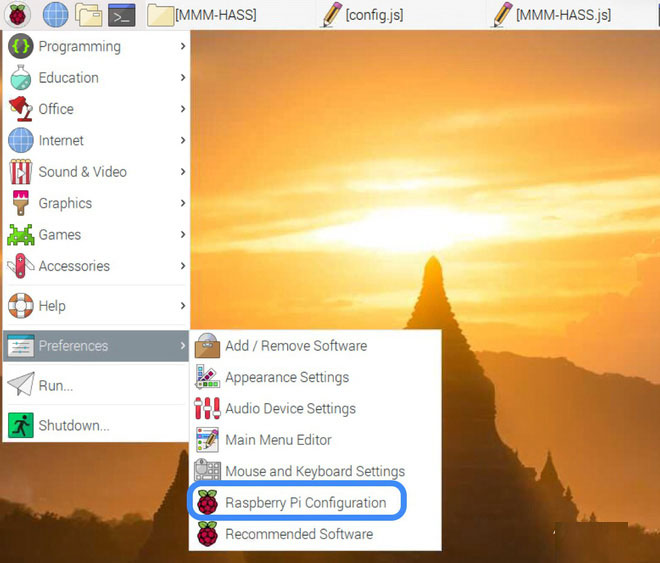
Step 5: After the Pi is Booted up, go to the menu (strawberry image) -> select Preferences - Raspberry Pi Configuration.
Step 7: Open the Interfaces tab -> select Enable for SSH and VNC -> click OK.
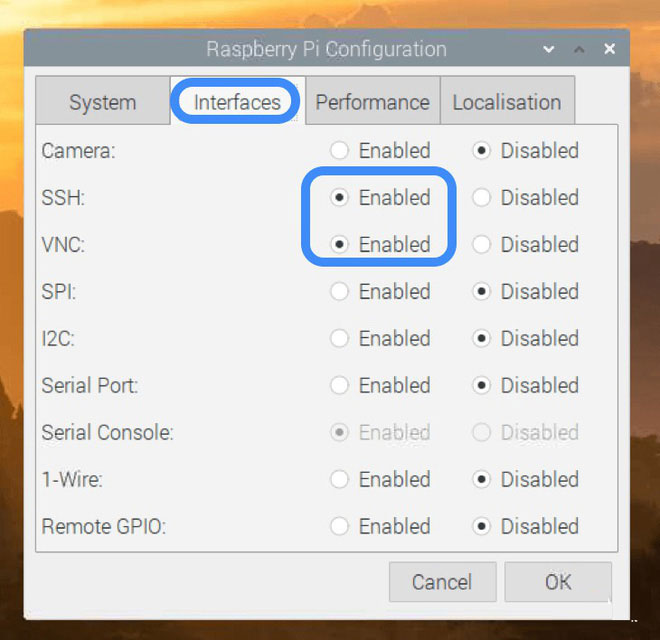
Step 8: Visit the link below to download and install VNC Viewer software for Windows.
https://www.realvnc.com/en/connect/download/viewer/Step 9: Open VNC Viewer -> in IP, enter IP of Pi. To know the IP of the Pi, use the Advanced IP Scanner to find or access the modem or router to view.
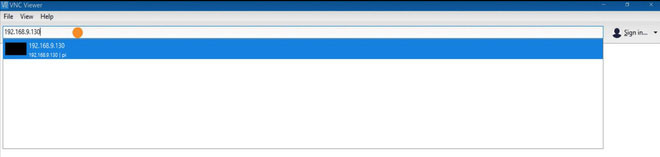
Step 9: After the remote access to the Pi interface right on the computer, through the VNC Viewer software you will see what happens on the TV screen (Pi output HDMI to TV).

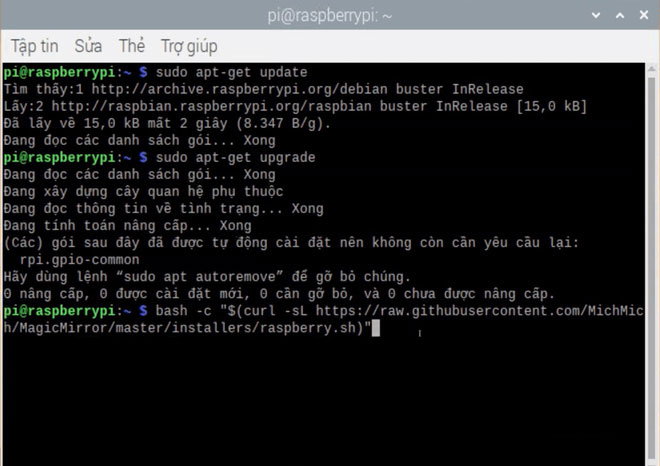
Step 10: Click the black icon 4 from the left to open the Terminal window -> in turn type the following 3 commands:
sudo apt-get updatesudo apt-get upgradebash -c "$(curl -sL https://raw.githubusercontent.com/MichMich/MagicMirror/master/installers/raspberry.sh)"These statements run quite a long time, you will have to wait a while.
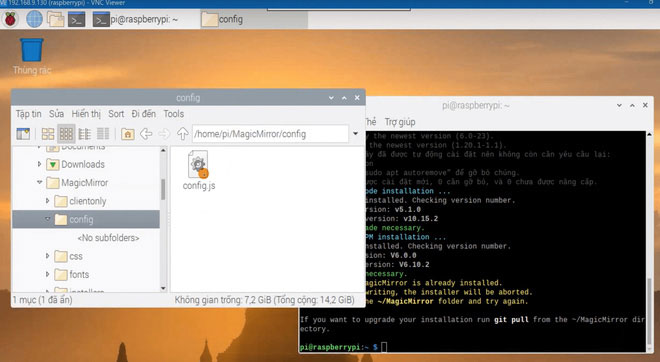
Step 11: Once the program has finished installing, open the file browser (the third golden icon from the left) -> navigate to / home / pi / MagicMirrror / config.
Step 12: Go into the config directory, if you see the config.js file, you don't have to do anything, and if you see the config.js.sample file, rename it to config.js.
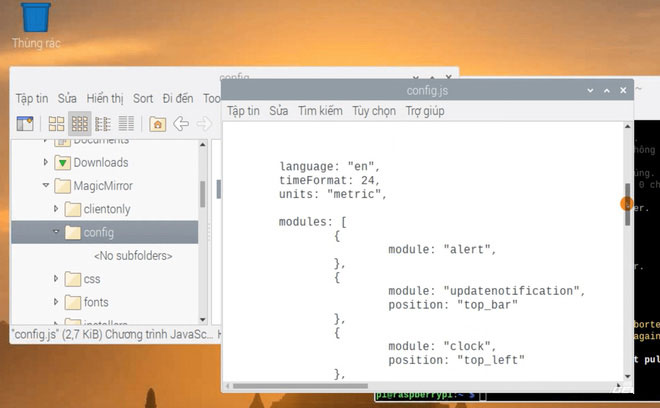
Run Magic Mirror for the first time
Step 1: Use the command " cd MagicMirror " to move into the MagicMirror folder. If already in MagicMirror directory, skip this step.
Step 2: Type the "npm start" command to launch.
You can use Ctrl-Q to exit.
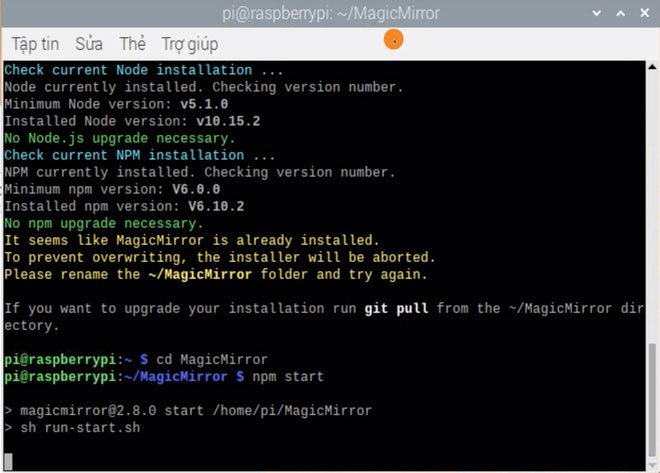
With the above command, you have launched Magic Mirror. You can learn more about smart mirrors with the keyword "Basic Magic Mirror" on YouTube.
- DIY laptop heat sink base is super simple
FAQ
What is Make Your Own Smart Mirror with Raspberry Pi 3 about?
It provides a structured overview of smart mirror, explains the main context, and highlights practical takeaways for readers.
Why does this topic matter?
Understanding the main concepts helps readers evaluate the issue, avoid common mistakes, and make better-informed decisions.
How should readers use this information?
Use the guidance as a practical starting point, confirm details that may have changed, and follow current product, safety, or security recommendations.
Related Articles
 Smart Mirrors Integrate Computer Touch Screens Like in Science Fiction Movies2 minutes read
 5 Ways to Turn an Old Computer Monitor into a Useful Device7 minutes read
 5 Ways to Make Good Use of Raspberry Pi 45 minutes read
 4 Reasons to Upgrade to Raspberry Pi 5005 minutes read
 How to Use the Rear View Mirror: Step-by-Step Guide8 minutes read
 How to Add an ADC to Raspberry Pi: What You Need to Know: Clear Instructions11 minutes read
Reader Comments 0
Sign in with email or Google to join the discussion.