Table of Contents
If a Windows laptop has no sound, first confirm that the correct output device is selected and that Windows, the application, and the speakers are not muted. Then disconnect HDMI, Bluetooth, docks, and headphones, restart the laptop, and run the Get Help audio troubleshooter. Change drivers only after these simpler checks fail.
Follow the steps in order. After each one, play a known-good local audio file and stop when sound returns. This makes it easier to identify the cause and avoids unnecessary driver changes.
Identify the scope of the problem
Before changing settings, answer three questions:
- Is every application silent, or only one browser, game, meeting app, or media player?
- Do the built-in speakers, wired headphones, and Bluetooth headphones all fail?
- Did the problem start after connecting a monitor or dock, installing an app, or updating Windows or a driver?
If only one app is silent, check that app’s audio output and Windows Volume mixer. If headphones work but the built-in speakers do not, the speaker hardware, jack-detection circuit, or output selection is more likely. If no output device appears anywhere in Windows, focus on the driver and hardware sections.
1. Check volume, the output device, and the app
- Select the speaker icon on the taskbar and raise the volume.
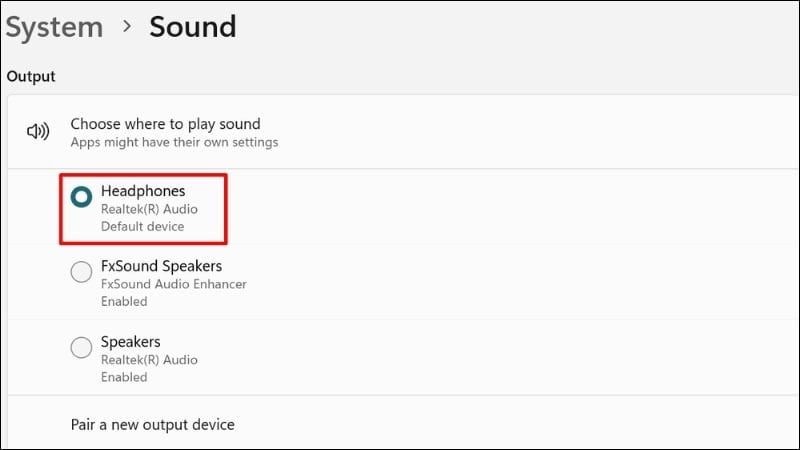
- Select the output selector next to the volume control and choose the laptop’s built-in speakers or the intended headphones.
- Open Settings > System > Sound > Volume mixer.
- Confirm that the affected app is not muted and is using the correct output device.
- Open the app itself and check its speaker, output, and mute settings.
A laptop often sends audio to an external monitor, dock, Bluetooth device, USB headset, or virtual audio cable after that device has been used. Disconnect those devices temporarily and select the built-in speakers again.
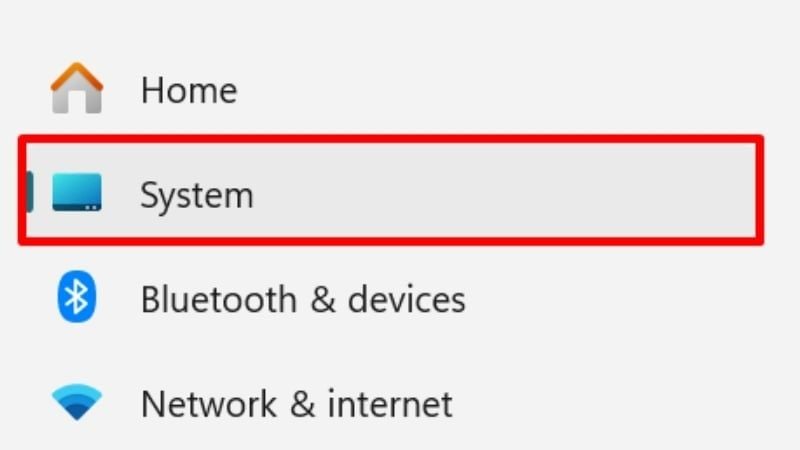
In Settings > System > Sound, select the intended device under Output and use the available test control.
2. Check the physical connection
- Reconnect wired headphones or speakers firmly and try a different known-good headset.
- Charge a Bluetooth accessory, remove it from Windows, and pair it again if necessary.
- If sound disappeared after using HDMI or DisplayPort, disconnect the display and reselect the laptop speakers.
- Check any speaker power switch, inline mute button, keyboard mute key, and hardware volume wheel.
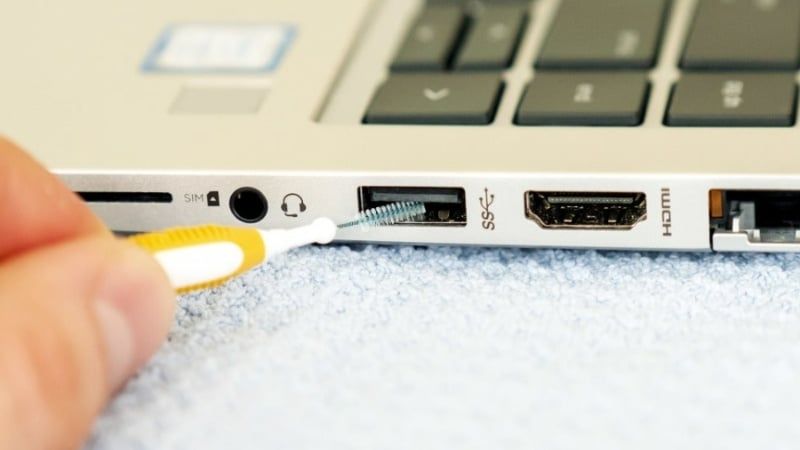
- Inspect the jack for visible debris only when the laptop is powered off. Follow the manufacturer’s cleaning guidance; do not insert metal tools or liquid.
Restart the laptop with unnecessary audio accessories disconnected. A full restart can clear an output-routing or service problem that sleep and wake do not.
3. Run the Windows audio troubleshooter
Current Windows 11 uses the automated troubleshooter in the Get Help app:
- Open Start, type Get Help, and open the app.
- Search for audio troubleshooter or no sound.
- Allow the diagnostic to test the affected output and follow only the steps that match the device.
Older Windows builds exposed Troubleshoot sound problems when the taskbar speaker was right-clicked. The screenshot below shows that legacy route; it may now open Get Help or may not appear.
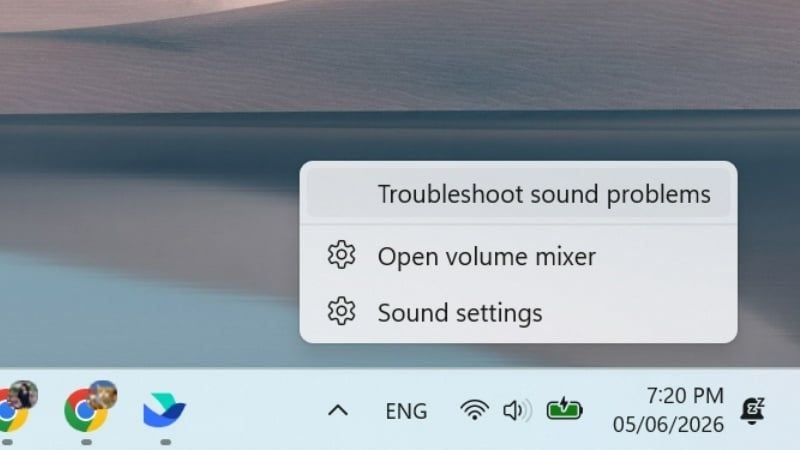
Microsoft’s current Windows audio troubleshooting guide follows the same safe order: output, connections and volume, the troubleshooter, services, enhancements, formats, and drivers.
4. Set and test the default playback device
- Open Settings > System > Sound.
- Select More sound settings to open the classic Sound dialog when that option is available.
- On the Playback tab, right-click the intended speakers or headphones and choose Set as Default Device.
- Select Properties > Advanced and use Test.
If the test fails, try a different supported default format in the Advanced tab, apply the change, and test again. Do not change several settings at once.
5. Restart Windows audio services
If every output is silent but the devices are visible, the Windows audio services may be stuck.
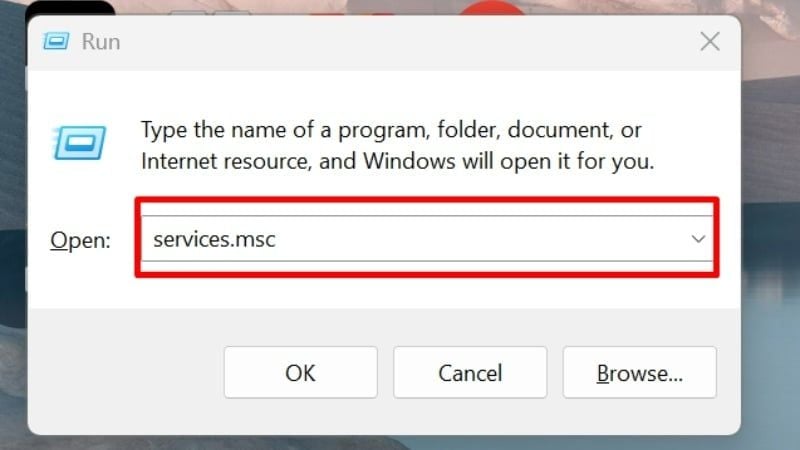
- Press Windows + R, enter
services.msc, and press Enter.
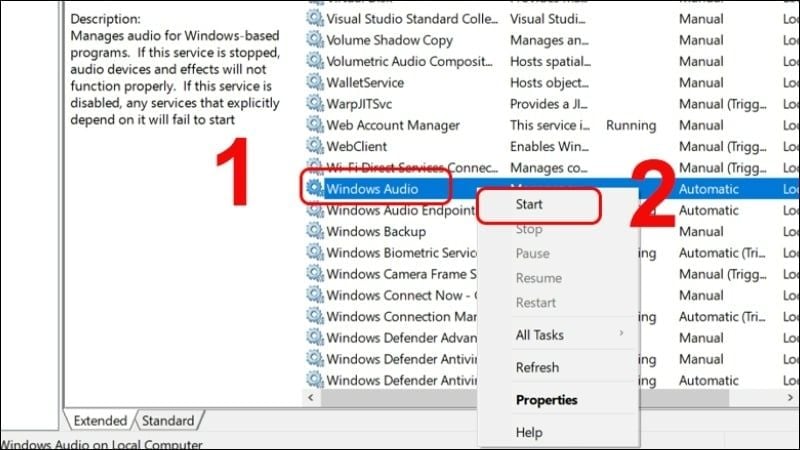
- Find Windows Audio, right-click it, and select Restart. If Restart is unavailable, use Start only when the service is stopped.
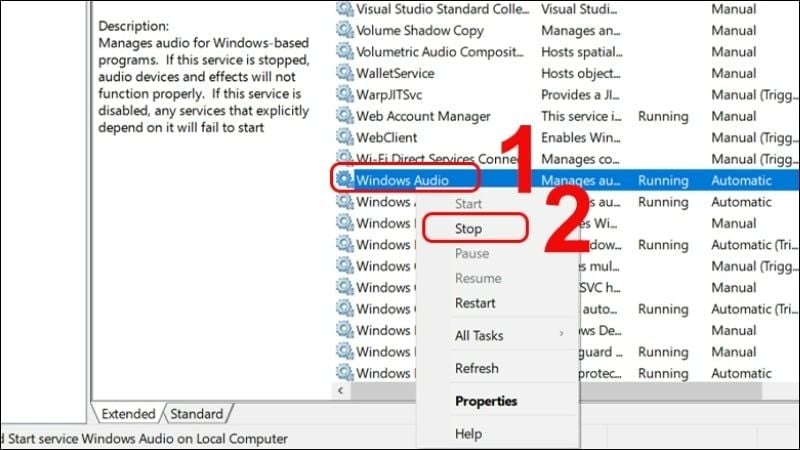
- Repeat the check for Windows Audio Endpoint Builder.
- Confirm that both services are configured for their normal automatic startup, then test sound.
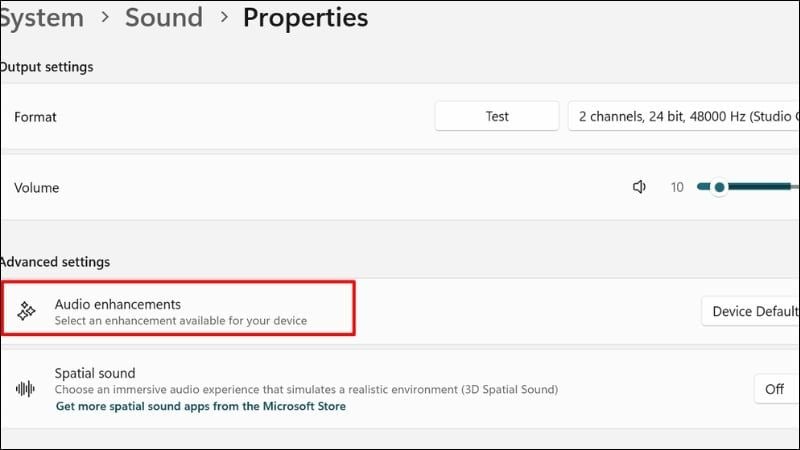
6. Disable audio enhancements temporarily
Enhancement software supplied by Windows, the laptop maker, or an audio driver can conflict after an update.
- Open Settings > System > Sound.
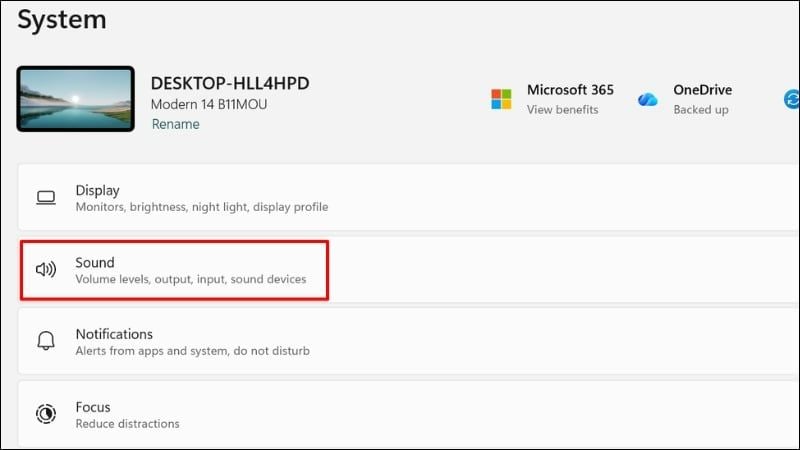
- Select the active output device.
- Set Audio enhancements to Off, or open Additional device properties and disable enhancements there.
- Test sound. If this does not help, restore the original setting.
7. Install Windows and manufacturer updates
Open Settings > Windows Update, install ordinary updates, restart, and test. Then check Advanced options > Optional updates for a relevant driver only when offered.
For laptops, the manufacturer’s support page is often the best source for the tested audio, chipset, and firmware packages for the exact model. Avoid generic driver-download sites and “driver booster” utilities.
Windows 10 reached the end of standard support on October 14, 2025. A Windows 10 laptop can still play audio, but moving to a supported operating system is the safer long-term fix where the hardware permits.
8. Update, roll back, or reinstall the audio driver
Make a restore point or note the current driver version before changing it. If the problem began immediately after a driver update, rolling back can be more appropriate than searching for another new driver.
Update the device
- Right-click Start and select Device Manager.
- Expand Sound, video and game controllers.
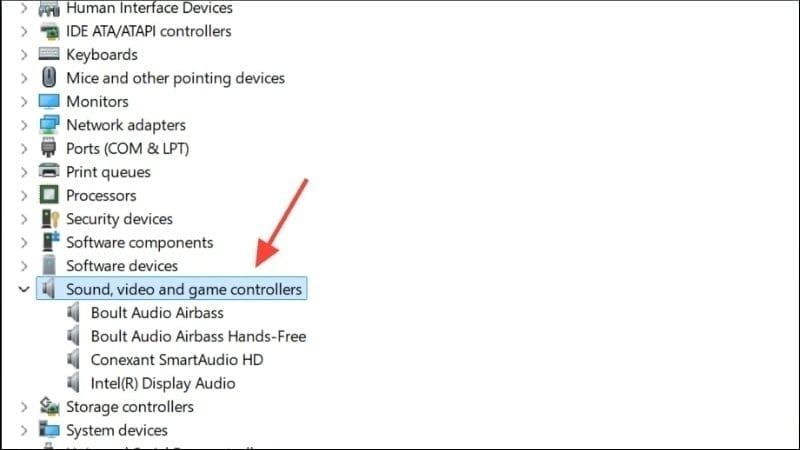
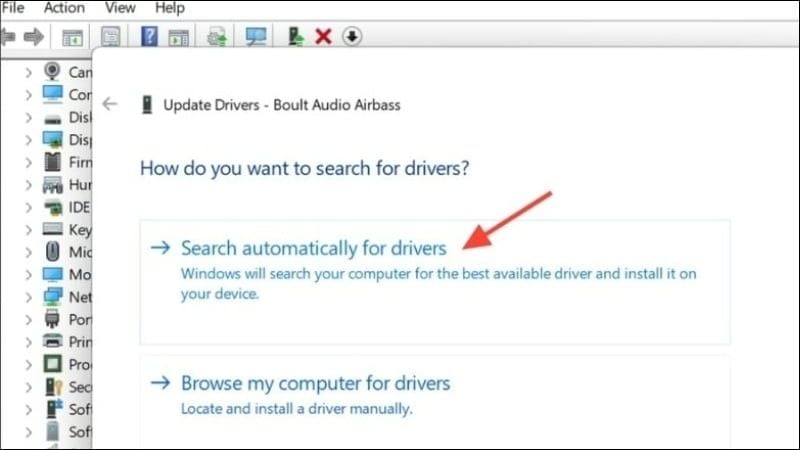
- Right-click the laptop’s audio device and choose Update driver.
- Select Search automatically for drivers, or install the exact package obtained from the laptop manufacturer.
Roll back after a bad update
- Open the device’s Properties > Driver tab.
- Select Roll Back Driver if it is available and the failure began after an update.
- Restart and test.
Reinstall only when necessary
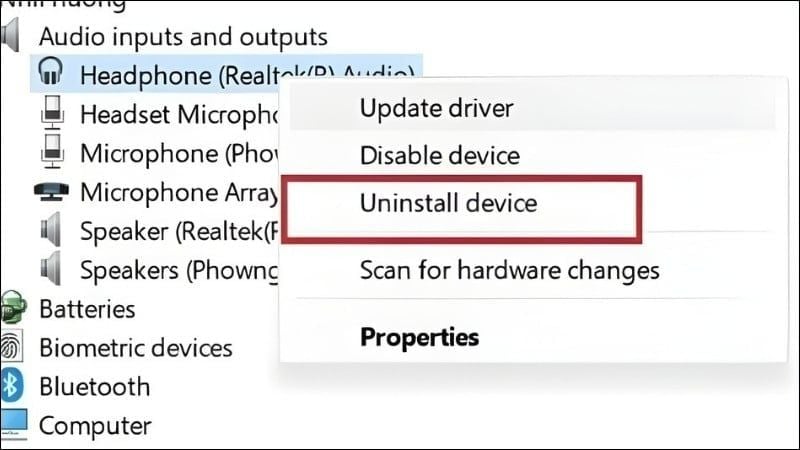
- In Device Manager, right-click the confirmed audio device and select Uninstall device.
- Do not select an option to remove driver files unless you already have the correct replacement and understand the consequence.
- Restart so Windows can detect the device again, then install the manufacturer’s driver if required.
Microsoft’s Device Manager driver guide covers the current update and reinstall procedures. TipsMake also explains how to use Windows Device Manager safely.
9. Check whether the problem is hardware
Stop software troubleshooting and contact the manufacturer or a qualified repair service when:
- The audio device remains absent from Device Manager after installing the correct manufacturer packages.
- Both built-in speakers and known-good wired or USB audio devices fail.
- Sound cuts out when the screen or laptop body moves.
- The speaker crackles or distorts at low volume with multiple audio sources.
- The laptop was dropped, exposed to liquid, or damaged near the audio jack.
- There is a burning smell, excessive heat, swelling, or other electrical warning.
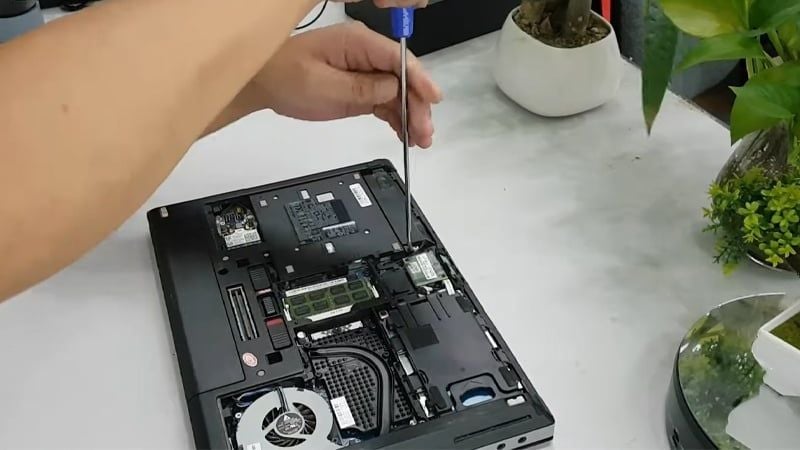
If the laptop is under warranty, use an authorized service route before opening the case. Back up important data before handing over the computer.
Prevent the problem from returning
- Recheck the output after connecting HDMI, a dock, Bluetooth, or a USB headset.
- Install audio and firmware packages from Windows Update or the laptop manufacturer.
- Avoid untrusted audio enhancers and driver tools.
- Keep vents and speaker openings clear without spraying liquid into them.
- Record the driver version that works after a successful repair.
- Use a restore point before a manual driver replacement.
If audio works but the built-in speakers are simply too quiet, that is a different problem. Use the safer checks in how to increase computer volume instead of repeatedly reinstalling the driver.
Related Articles
 How to Fix the Issue of Computer Losing Sound, Laptop Has No18 minutes read
 3 Easy Ways to Lock Your Acer Laptop Keyboard at Home9 minutes read
 Bose Home Speaker 500 . Review8 minutes read
 Cause the Laptop Lost Sound, Tips Repair Laptop Lost Sound6 minutes read
 20 Ways to Fix Computer Sound Loss Error on Windows 1012 minutes read
 Steps to Fix ASUS Laptop with Sound7 minutes read
Reader Comments 0
Sign in with email or Google to join the discussion.