Table of Contents
This practical guide explains how to enable private wifi on iPhone. Follow the steps in order, review the requirements first, and use the troubleshooting notes when a setting or option does not work as expected.
How to enable privacy for WiFi on iPhone
Step 1:
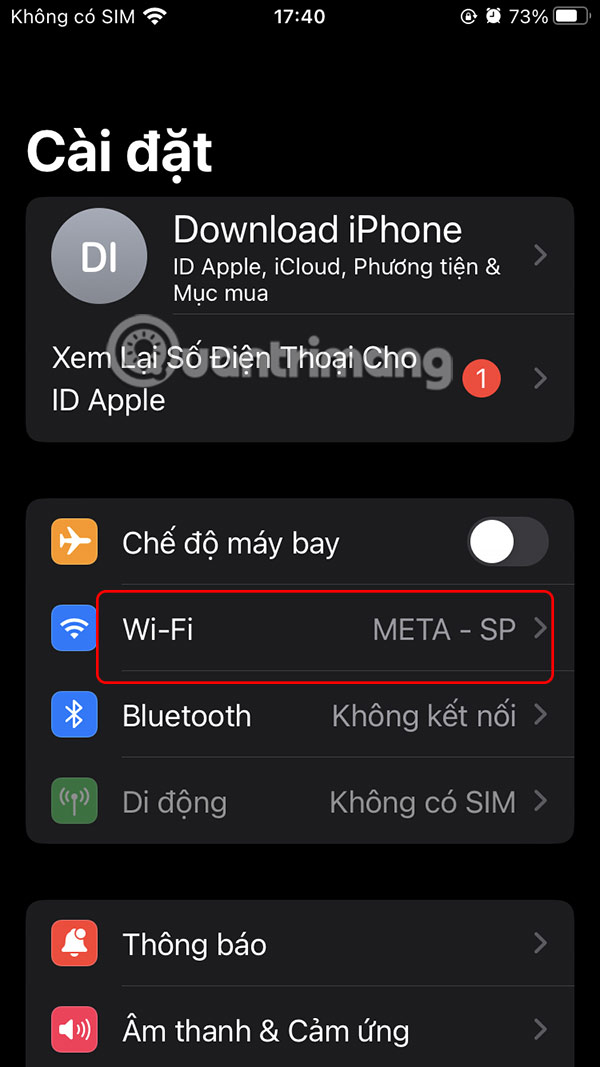
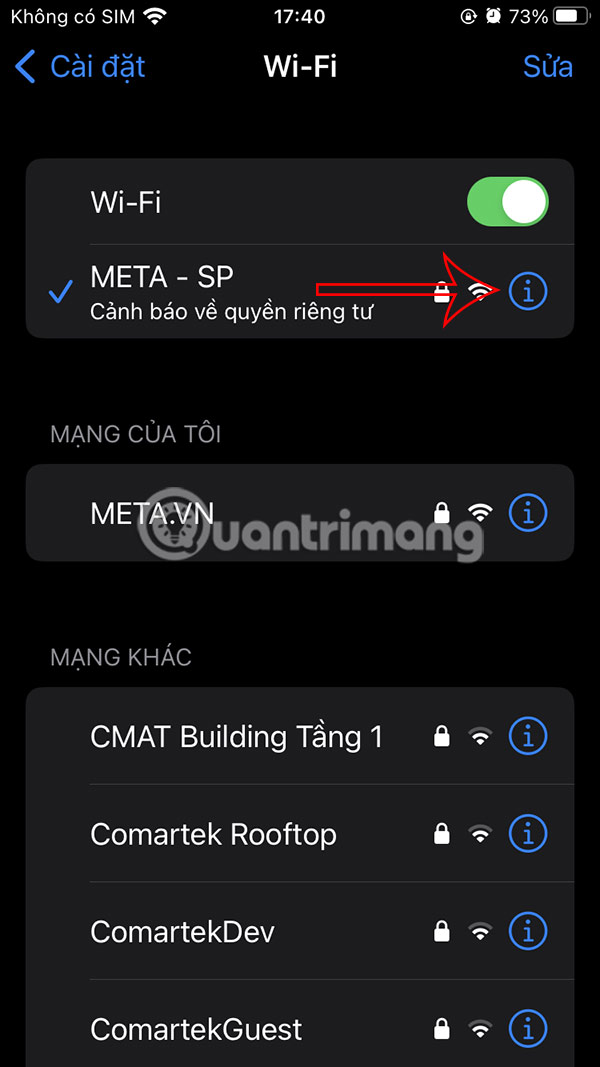
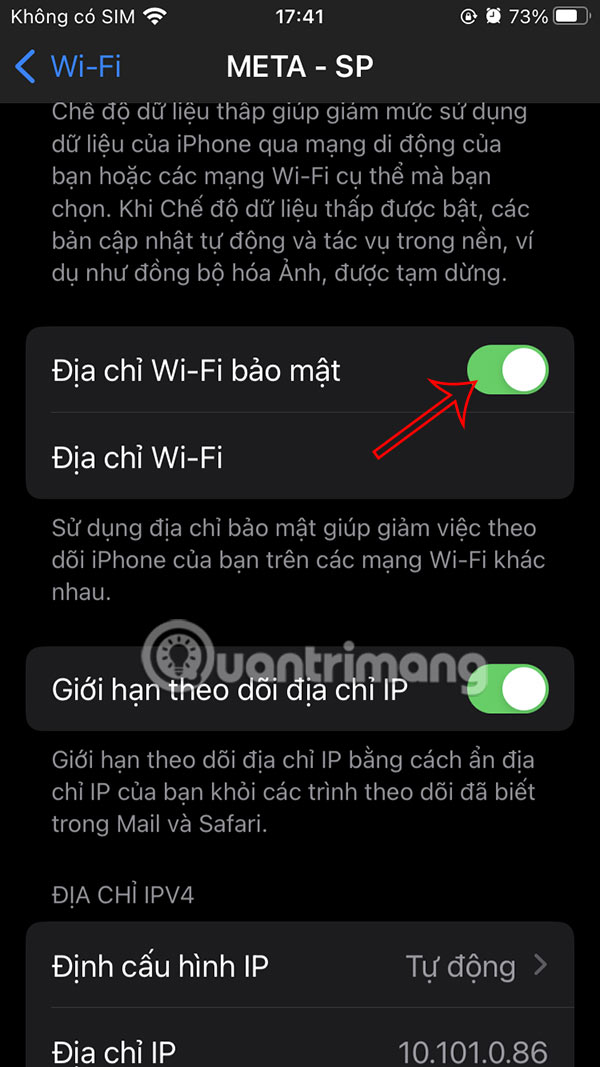
You go to Settings on your iPhone, then tap on the WiFi network you are connected to. Next, tap on the i icon at the name of the WiFi you are connecting to.
Step 2:
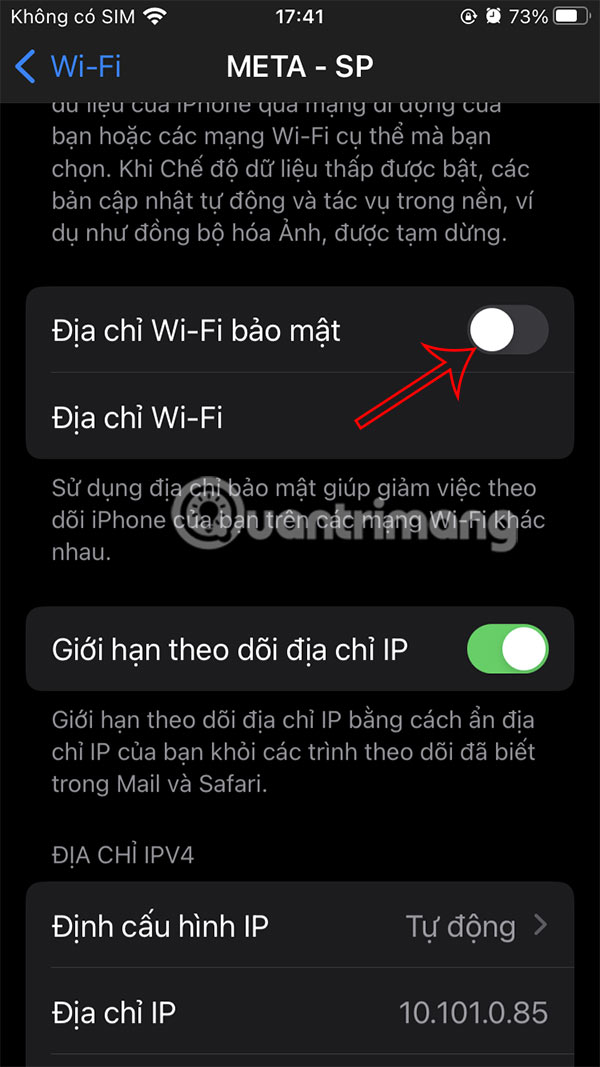
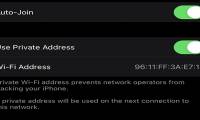
Go to the WiFi address setup interface, we activate the Secure Wi-Fi Address mode . At this time, the iPhone notifies the connection interface, press Continue to perform.
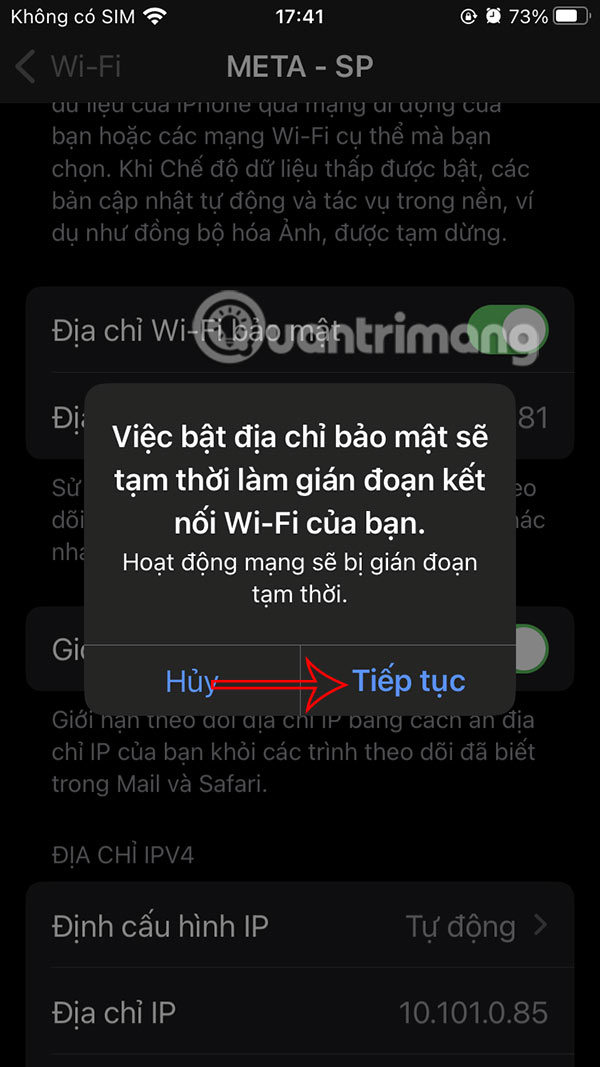
So you have enabled privacy for WiFi on iPhone.
With iOS 26, the Wi-Fi Security Address section has some more options. Here you have the option to Rotate or Fixed to use.
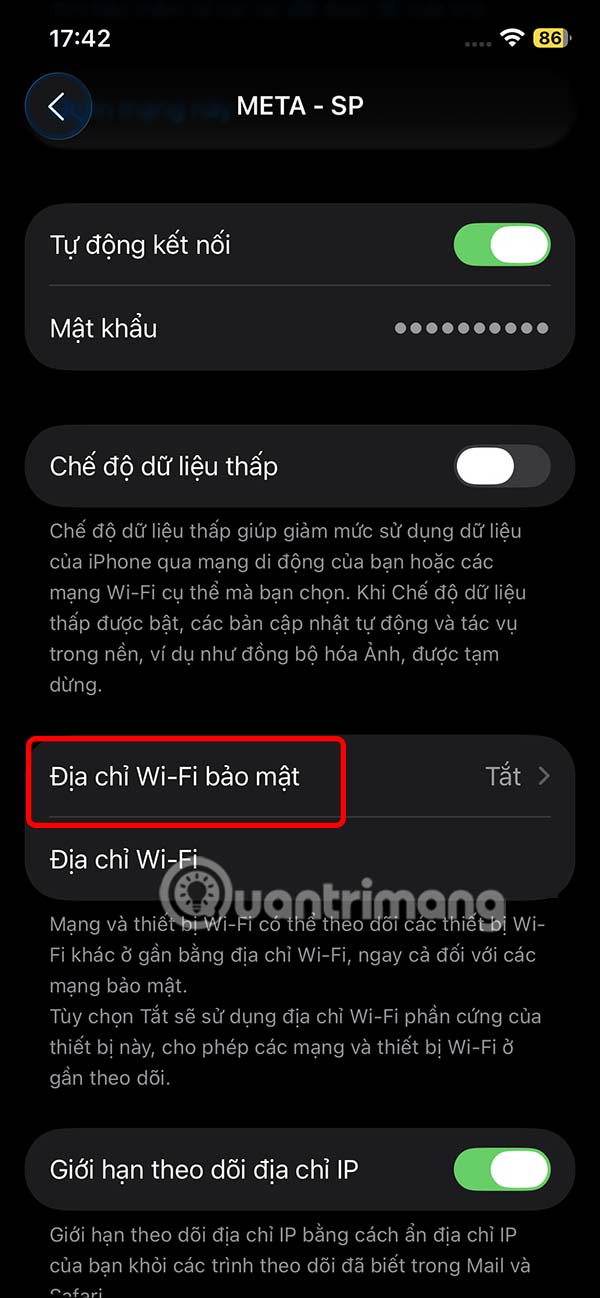
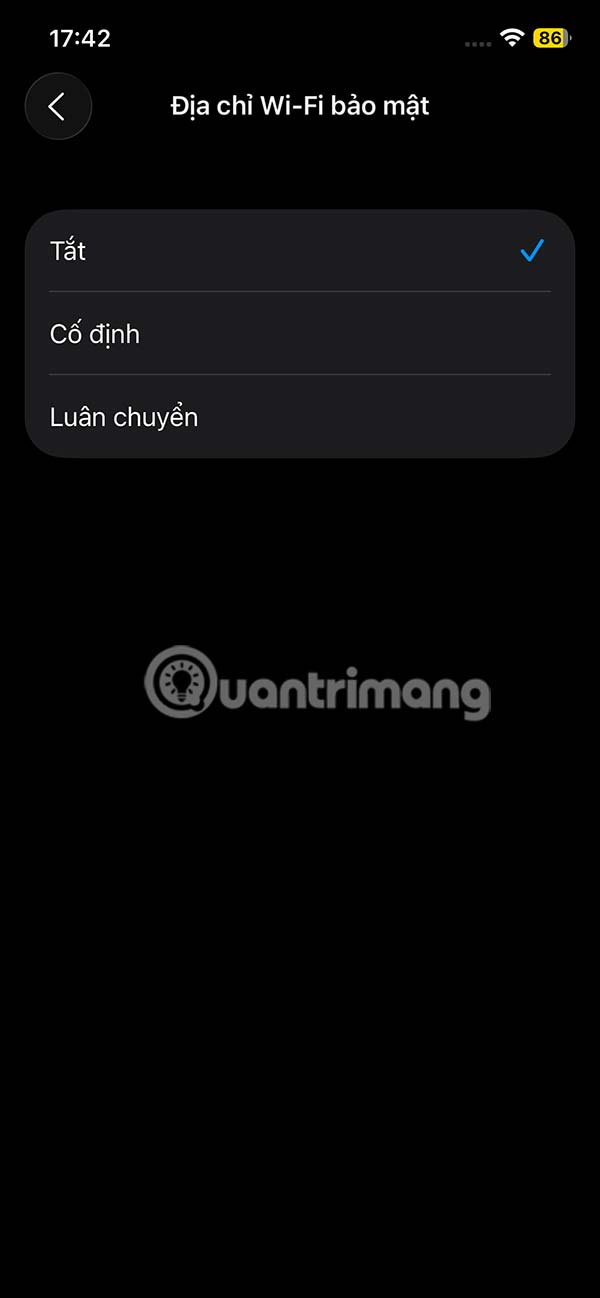
- Fixed: Uses a unique static MAC address for this network, improving privacy by preventing tracking across multiple networks while still allowing consistent network access.
- Rotate: Automatically rotate MAC address periodically, greatly enhancing privacy. Once selected, private Wi-Fi address will be enabled.
select the private WiFi type on your iPhone that you want to enable for use.
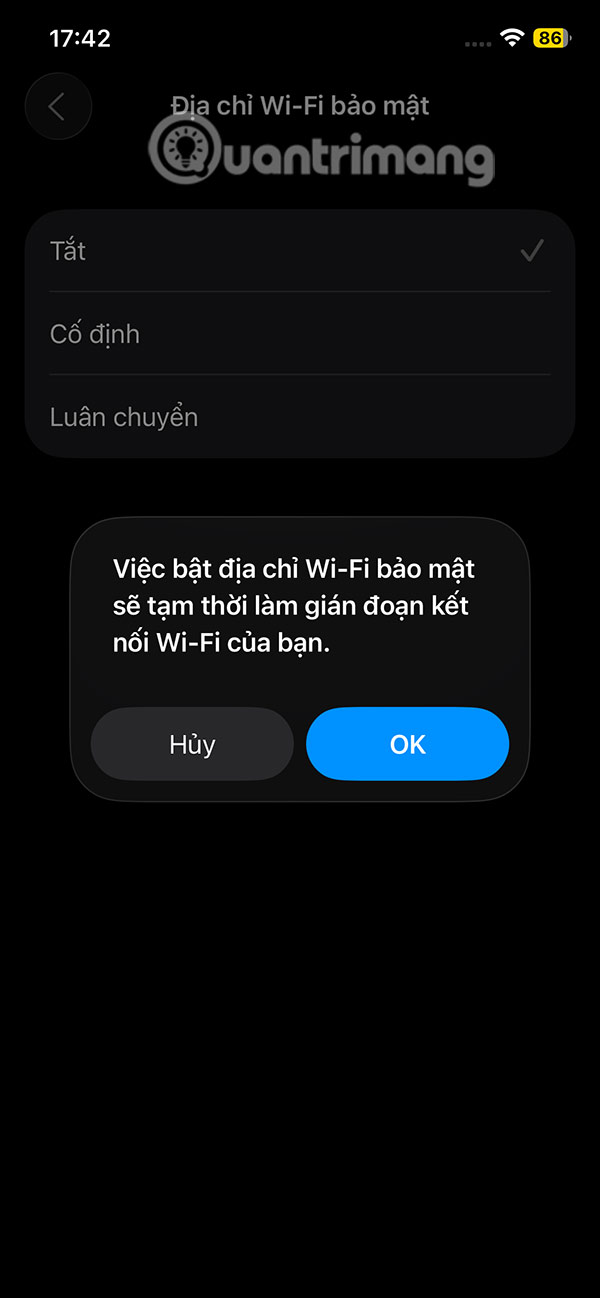


Using a private WiFi address on your iPhone helps you stay anonymous when connecting to public and private networks. By masking your device's identity, this feature helps reduce the risk of long-term tracking without interrupting your connection.
FAQ
How to enable privacy for WiFi on iPhone?
You go to Settings on your iPhone, then tap on the WiFi network you are connected to. Next, tap on the i icon at the name of the WiFi you are connecting to.
What does this guide cover?
This guide explains enable private wifi on iPhone, including the main steps, important details, and practical considerations.
Who is this guide for?
It is designed for readers who want a clear, practical overview and a reliable process they can follow without unnecessary complexity.
Related Articles
 How to Turn Off Private Wi-Fi MAC Addresses on iPhone4 minutes read
 Enable Wi-Fi Calling on iOS 103 minutes read
 How to Enable Private Threads Account3 minutes read
 Instructions for Activating and Using Wi-Fi Calling Feature on iOS 84 minutes read
 5 Steps to Turn Your iPhone into Wi-Fi Hotspot3 minutes read
 Instructions for Syncing iPhone / iPad via Wi-Fi5 minutes read
Reader Comments 0
Sign in with email or Google to join the discussion.