Instructions for using OneNote note software for beginners
You want to learn and use OneNote note software to save personal information, important information to note. But you don't know how to start? So please see the OneNote notes software for beginners in the article below.
Table of Contents
You want to learn and use OneNote note software to save personal information, important information to note. But you don't know how to start? So please see the OneNote notes software for beginners in the article below.

Here TipsMake.com shows you how to use OneNote note software for beginners, please follow along.
Open OneNote
OneNote is the software in the Microsoft Office suite, if you use Microsoft Office and you have it installed during the Office installation process, you just need to select the Start Menu and navigate to OneNote to open it.

The interface of OneNote is similar to that of Word or Excel, which is very intuitive, friendly and easy to use.

If not, then you need to install OneNote on your computer.
Create a new notebook on OneNote
On the OneNote interface, select the My Notebook icon -> Add Notebook (or you can choose File -> New ).

In the New Notebook section, you choose where to save Notebook (OneDrive, This PC), for example, you want to save to your computer, select This PC , then enter a new note name in the Notebook Name box , and finally select Create Notebook .
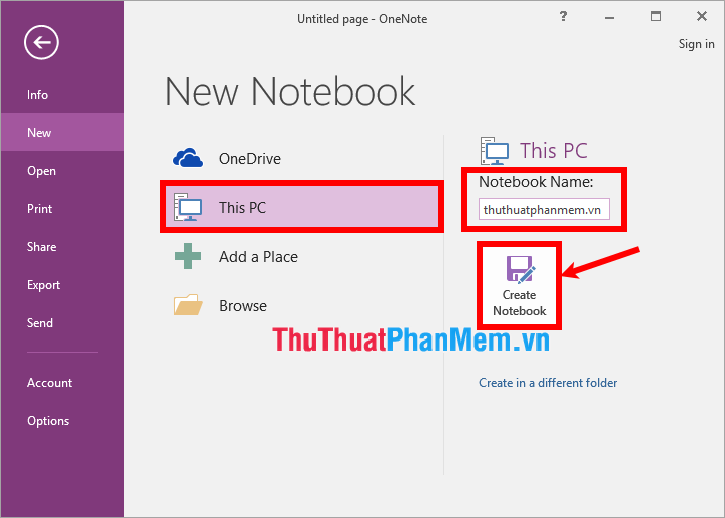
So you've created a new notebook on OneNote.

Add section in notebook
In a notebook will be able to create multiple Sections , by clicking on the + icon next to New Section 1 as shown below.
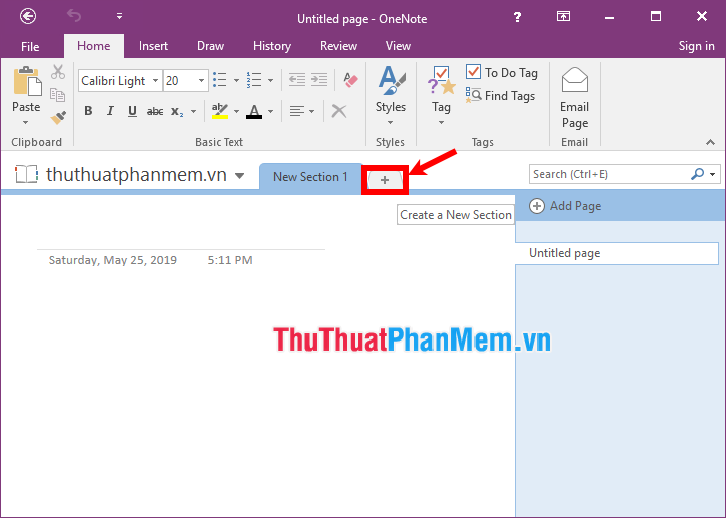
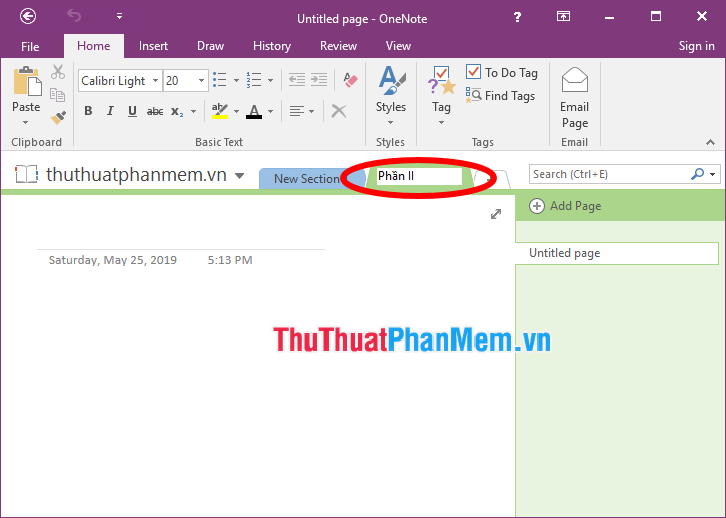
And enter a name for the newly added Section .
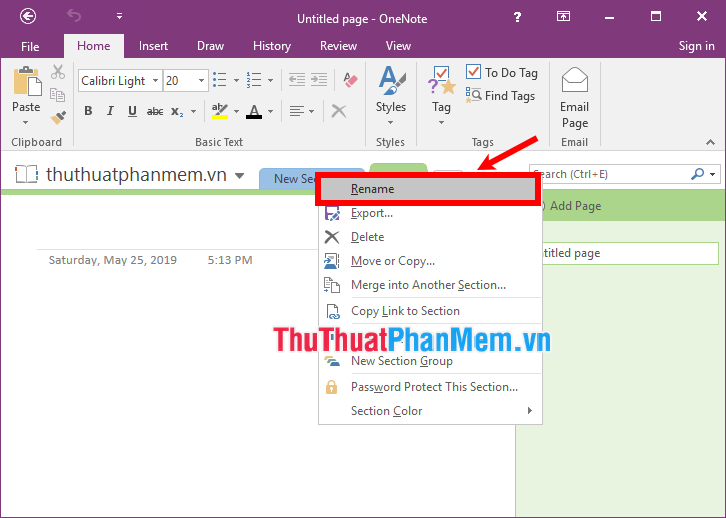
To edit the name of a section, right-click the section and select Rename , then enter the name you want.
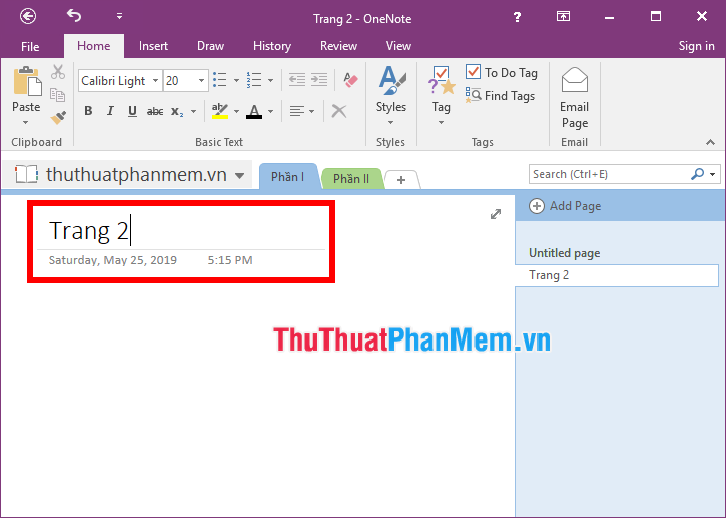
Add page in section
In each Section, you can create multiple pages, to add a new page for the Section, select Section , then select Add Page to the right of the Section.
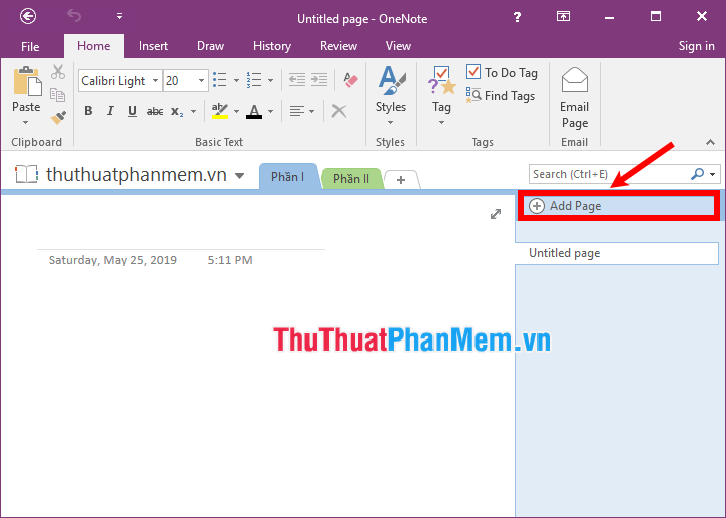
So you have added a new page for Section, to name the page you enter the name in the box above the page creation date and time.
Move back and forth between the notebooks
By default, OneNote will have a My Notebook, which you can immediately write to this notebook or other notebooks. To switch between notebooks, select the notebook's name above and select the notebook you want to open.

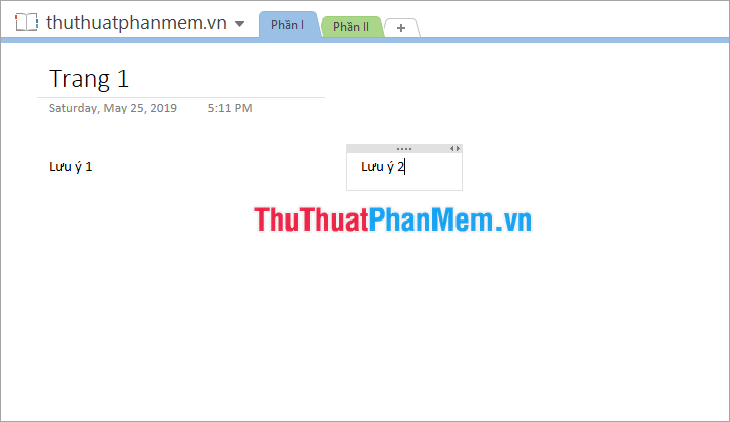
Enter or write notes
Select Section and select the page where you want to write a note, then click or click anywhere on the page to enter the note.
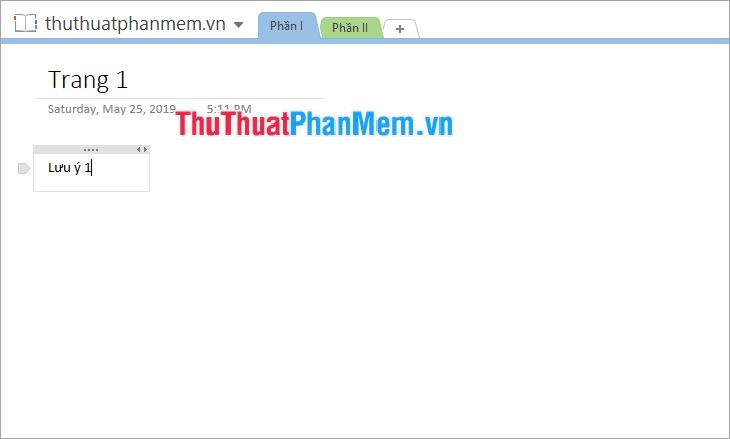
To enter other notes, click another location to write another note, each note will be enclosed in a frame, you can move, expand this frame.
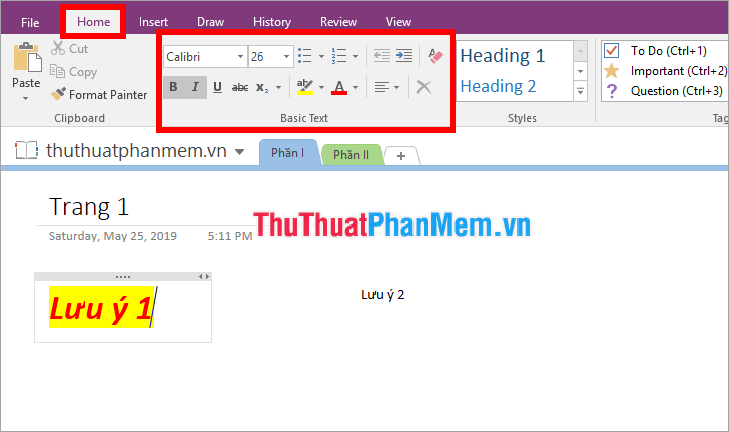
To format the text you've just entered, select the note you want to format and select the Home tab , in the Basic Text section, you can format the font style, font size, font color, fill the background color for the text.
You can also draw notes directly by selecting Draw and choosing the stroke style.
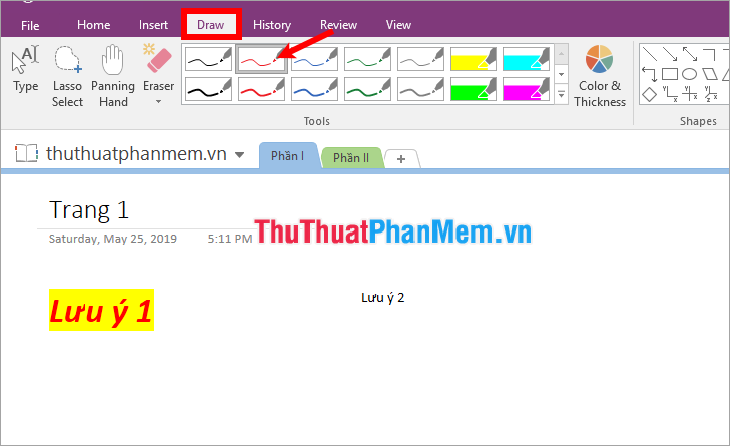
You can then draw directly to the page.
Add templates to the page
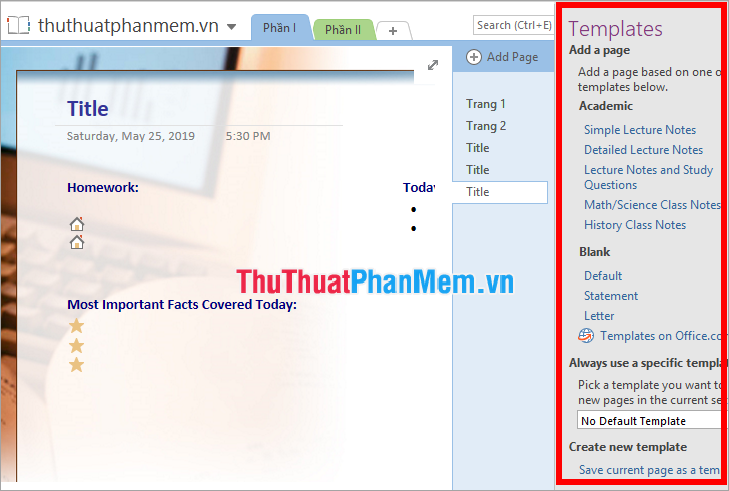
Select Insert -> Page Templates .
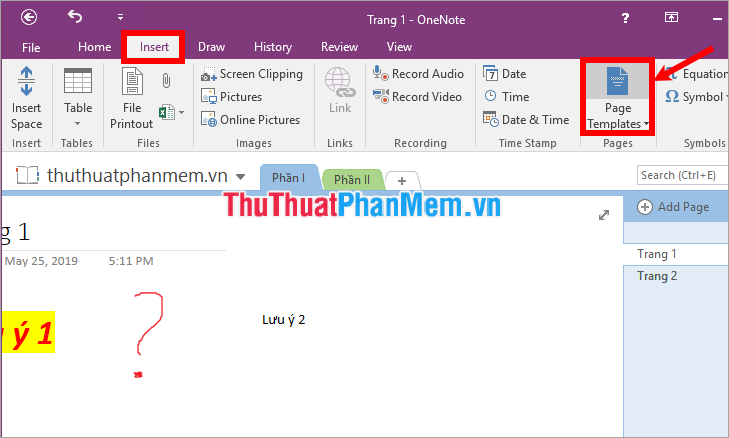
The Templates menu on the right of OneNote appears, select the templates you want.
Add a tag
Add tags to visually mark and prioritize important notes for easy tracking by:
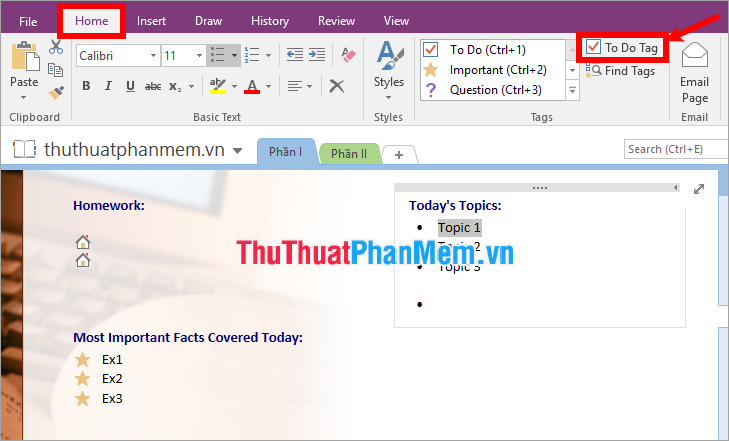
Step 1: Select the line of text in the note to which you want to add the tag.

Step 2: Select the Home tab -> select To Do Tag to add a check box before the note line you have selected.
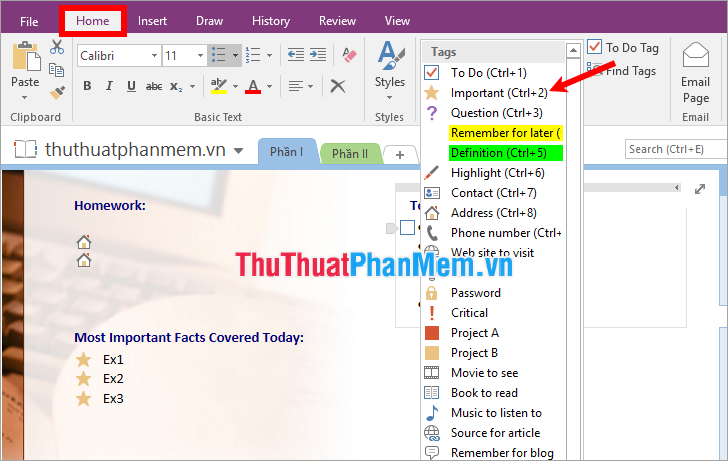
Or you can choose the extended arrow icon next to To Do Tag and select one of the other bookmark accordingly (important, questions, memos, contacts, addresses, phone numbers . .).
Add links for notes in OneNote
Step 1: Select the note you want to insert the link, then select the Insert tab -> Link .
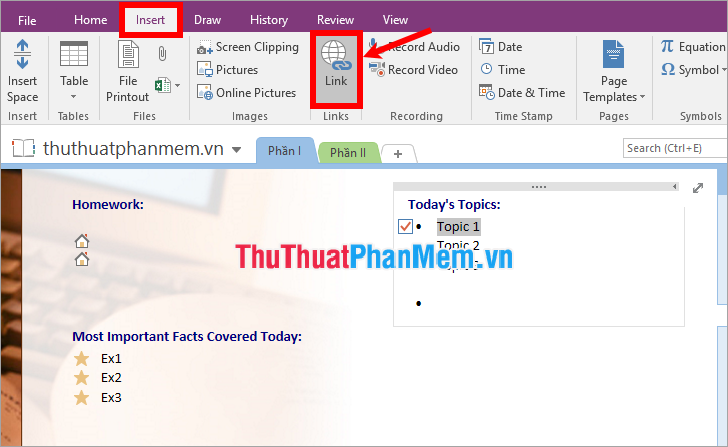
Step 2: The Link dialog box appears, you can change the text displayed in the Text to display section . And in the Address section, paste the address you need to link, can search for the link address on the web (
 ) or the link to the file on the computer (
 ). Then click OK to add the link.
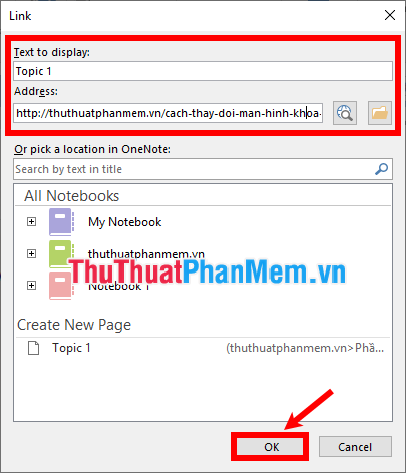
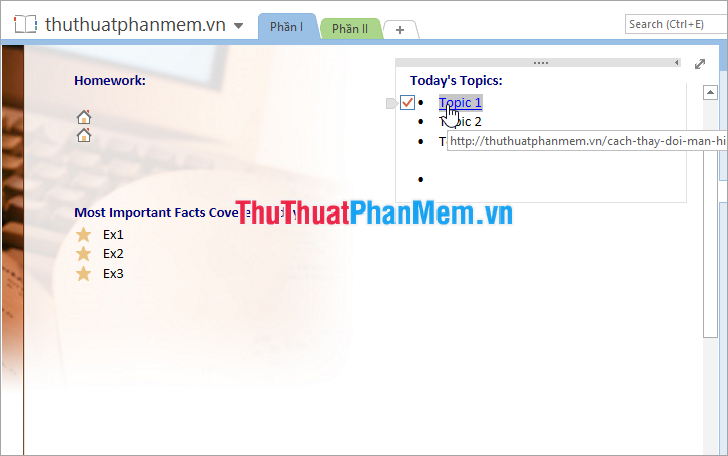
So the text you have chosen is linked, when clicking on it the link will appear.
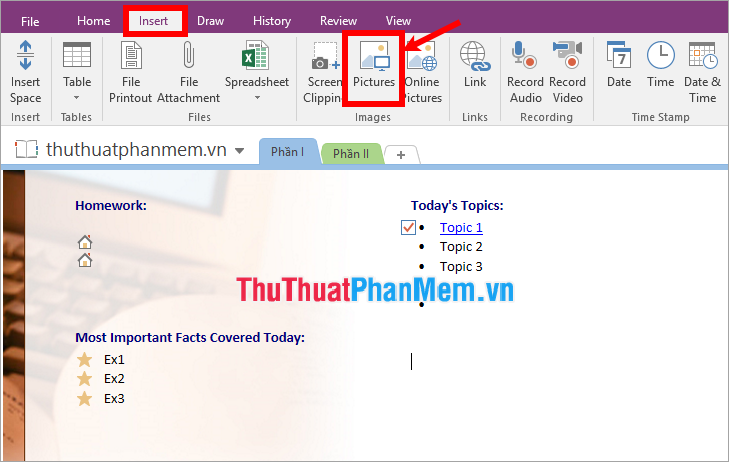
Insert photos
To insert pictures into OneNote you do the following:
Step 1: Click on any location on the page you want to add the image to, next select Insert -> Pictures (if inserting pictures online, select Online Pictures ).
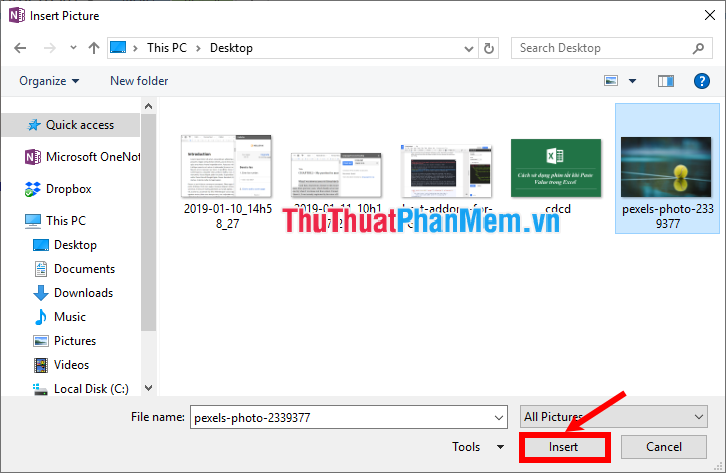
Step 2: The Insert Picture window appears, navigate to the folder containing the images and select the image to be inserted then click Insert .
So the image has been added to your page, to move the image you click on the image, move the mouse over the image when the mouse cursor appears 4-dimensional arrow, you hold and drag to the desired location.

To reduce or enlarge the image you select the image, the image will appear the knobs around the image, you just need to move the mouse on those buttons when the mouse pointer appears as a two-way arrow then hold down the mouse button and drag it to zoom in, drag it in to zoom out.

Add documents and files to notes
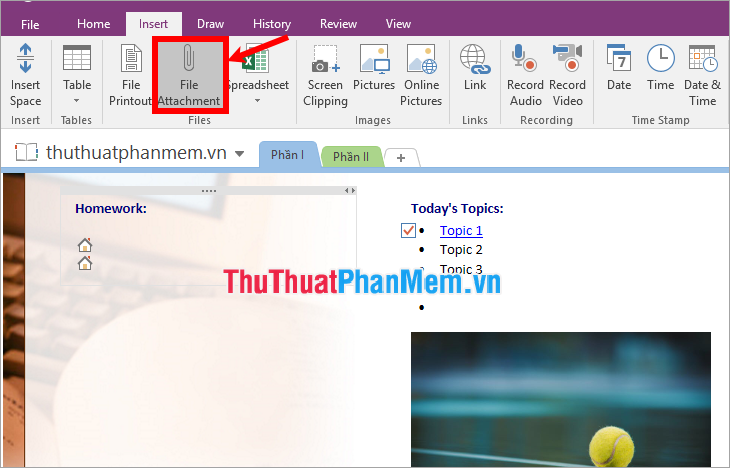
Step 1: Click and click anywhere on the page you want to add the document. On the menu bar, select Insert -> File Attachment .
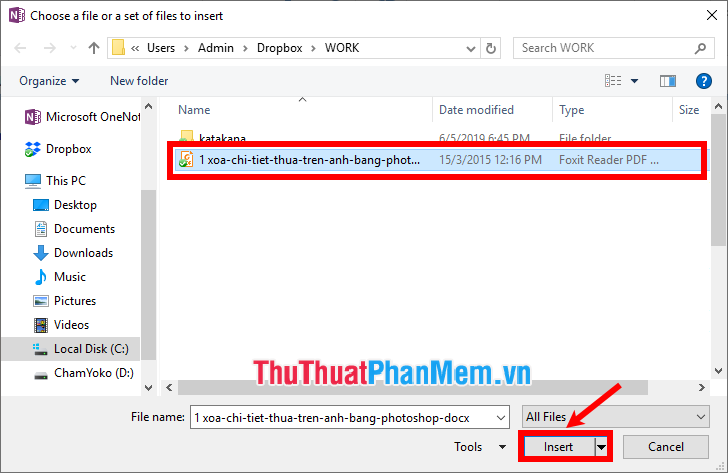
Step 2: The Choose a file or a set of files to insert window appears, select the document to be added and select Insert .
Step 3: The Insert File appears, you can insert the document as an attachment ( Attach File ) or directly insert the document into the note (Insert….).
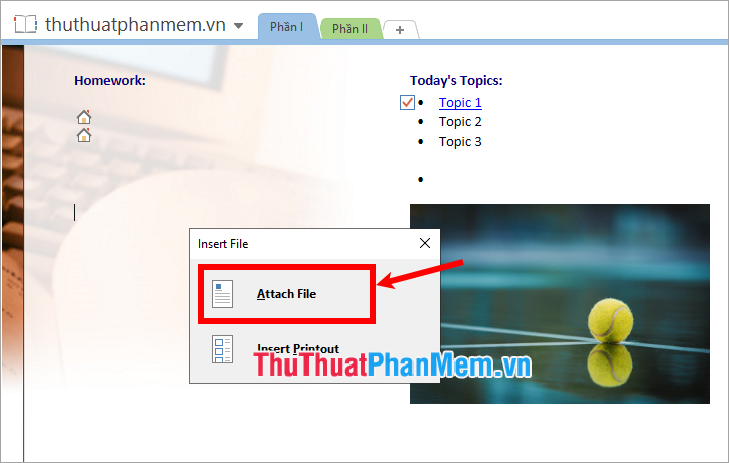
If you choose Attach File , the file will be added as an attachment as shown below.

Create a table in a notebook
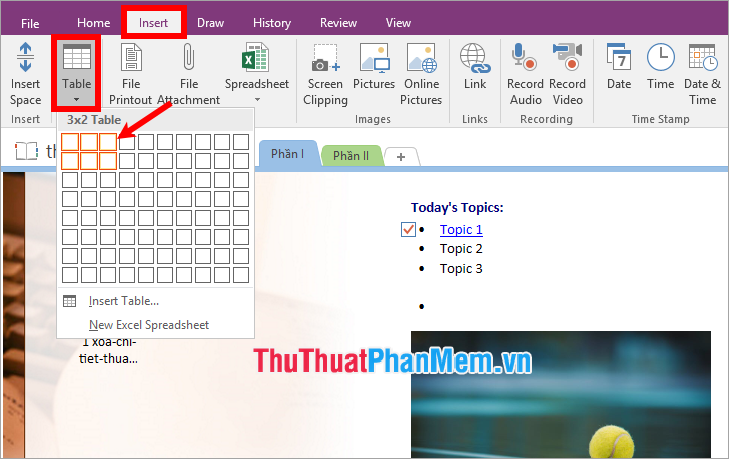
To create a table in the notes you make very simple, just select the position to insert the table, then choose Insert -> Table -> select the number of rows and columns of the table.
So the table has been inserted in the notes, you can work with tables similar to tables in Word, Excel, customize the table in the Layout tab of Table Tools .

Add date and time to OneNote
OneNote supports you to add date and time to the notes page, you just need to select the location to add and select Insert -> Date (to add the current day, month, year), Insert -> Time (to add the current time ) or Insert -> Date & Time (to add days, months, years and hours).
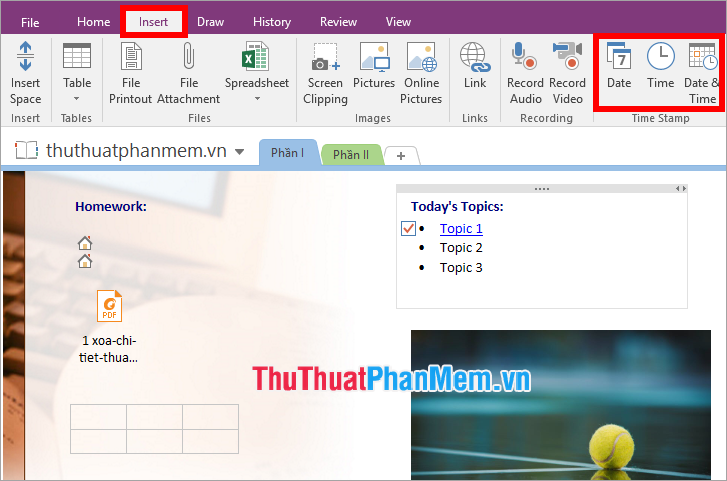
Immediately the date and time you inserted will be added to the page.

Save the notebook
OneNote in Windows 10 does not have a Save button, because OneNote automatically saves and dynamically everything you manipulate, change, or edit on OneNote.
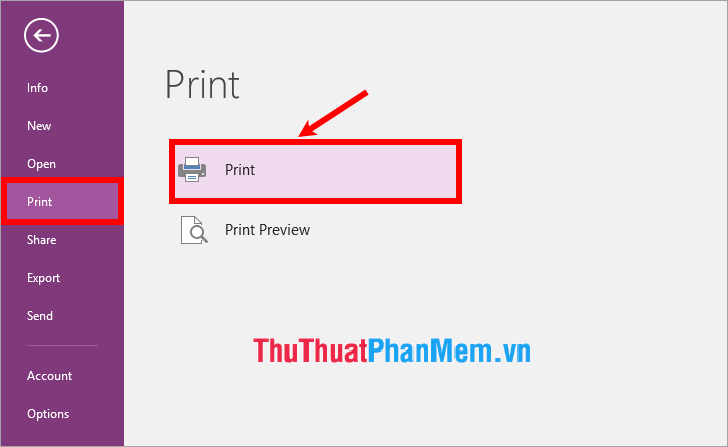
Print a notebook
If you need to print any page in OneNote then you do as follows:
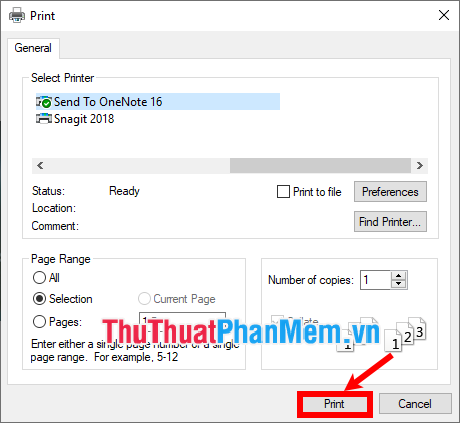
Step 1: Open the page you want to print, select File -> Print -> Print (or press Ctrl + P ) to open the Print dialog box .
Step 2: On the Print dialog box, select the printer and print page settings then click Print to print.
Above the article has instructed you to use OneNote note software for beginners, after regular use you will have the experience of creating notes quickly, easy to understand and manipulate many useful functions. Other utilities that OneNote supports. Good luck!
Was this article helpful?
Your feedback helps us improve.
Related Articles
 How to fix errors that are not backed up are noted on OneNote 20162 minutes read
 The best Microsoft OneNote download sites6 minutes read
 Top 5 Sites to Download Free OneNote Templates5 minutes read
 How to crop pictures in OneNote app?3 minutes read
 Simple way to transfer Evernote data to OneNote2 minutes read
 How to delete OneNote data on Windows 103 minutes read
Reader Comments 0
Sign in with email or Google to join the discussion.