Table of Contents
Learning how to using OBS studio, live streaming and screen recording doesn't have to be complicated. This updated guide presents a clear workflow, practical checks, and troubleshooting advice you can use while completing the process.
Key Takeaways
- Review OBS studio user guide.
- Follow the recommended steps in order to avoid common mistakes with using OBS studio, live streaming and screen recording.
- Review compatibility, settings, or requirements before making changes.
OBS Studio User Guide
First, you need: - Download OBS studio software.
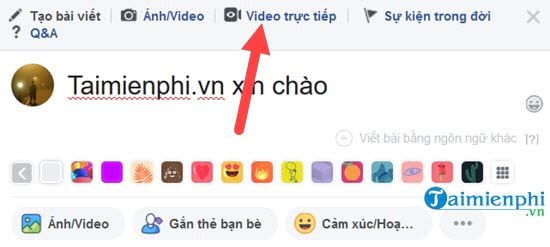
Step 1: Log in to Facebook, select the live video streaming feature.
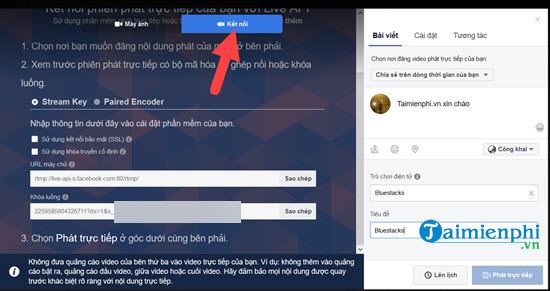
Step 2: Another window appears, here you select the connection section to be able to use OBS studio.
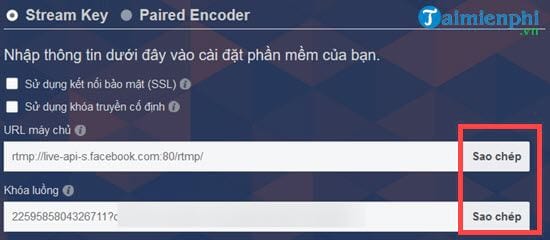
Step 3: Here there are 2 parts Stream Key Server URL and stream key, here you copy both of these parts.
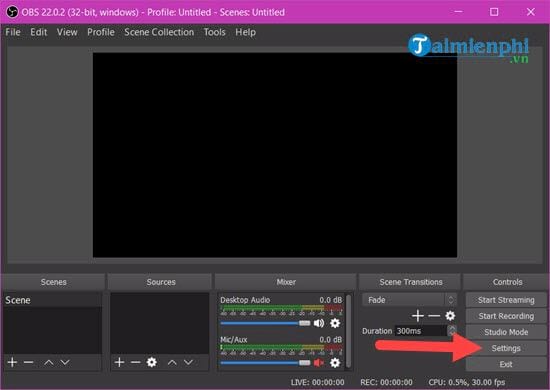
Step 4: Open OBS studio software, you will see the interface and here you select Settings below.
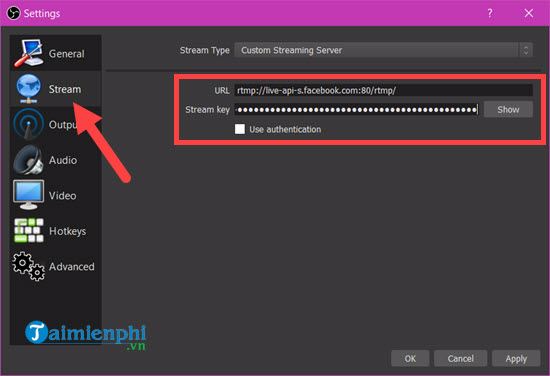
Step 5: In the Settings section, we continue to select Stream > here you select Custom Streaming Server. In the 2 lines below, you paste the corresponding Stream key server URL and stream key in step 3 and then click OK.
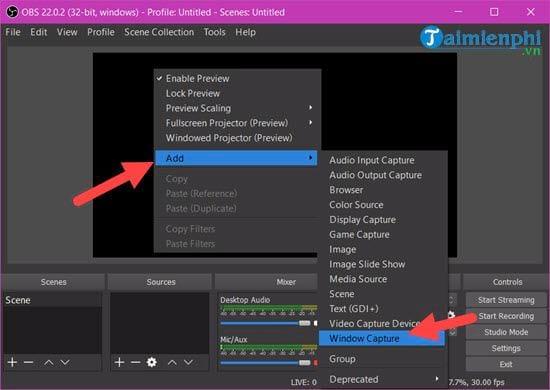
Step 6: Return to the OBS studio interface, here you select Add > Windows Capture (play content according to each program window).
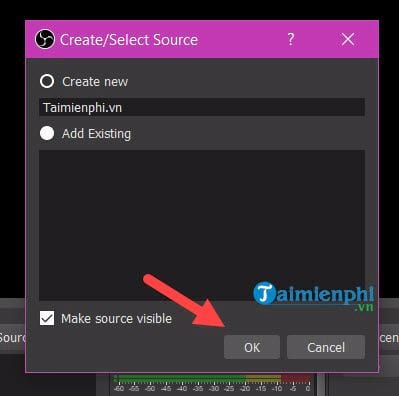
Name this live video profile.
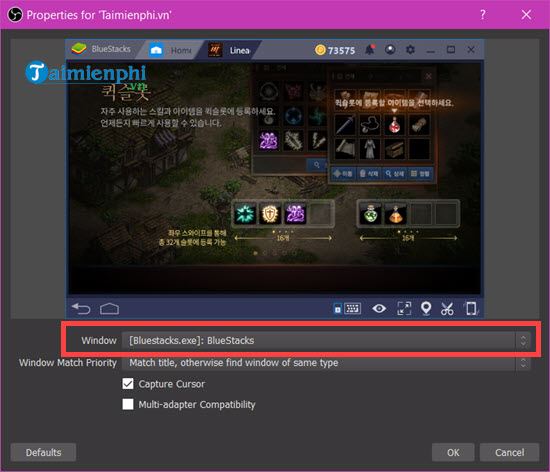
Step 7: In the Windows section, point to the program you are running. Here we are using Bluestacks to play the game, so we will choose this software to stream directly.
Step 8: After adjusting the display interface of Bluestacks, click Start Streaming to start live streaming.
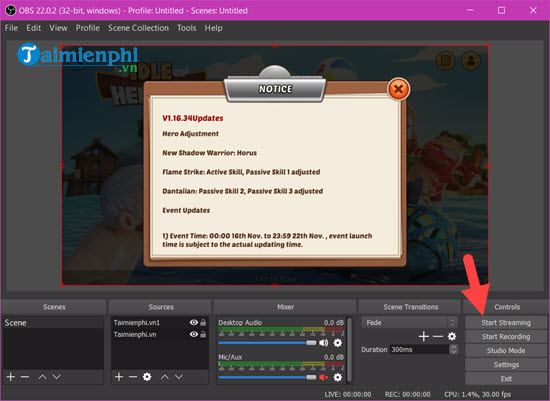
Step 9: Return to the Facebook interface, now the live broadcast button with content has been displayed, select live broadcast.
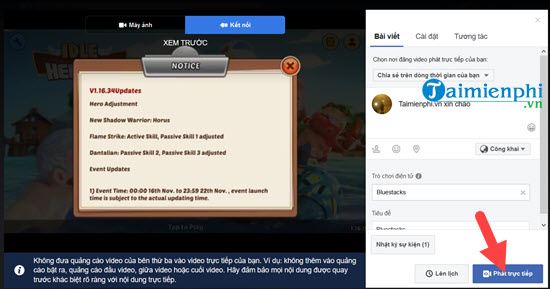
Step 10: Now you will see that you are live streaming, if anyone comments or comments, it will appear live.
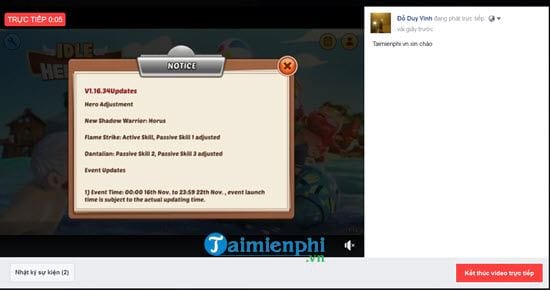
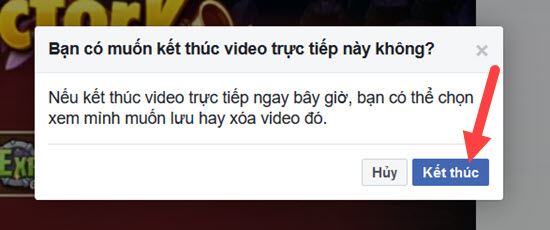
Step 11: In case you don't want to use OBS studio to stream live anymore, select end live video.
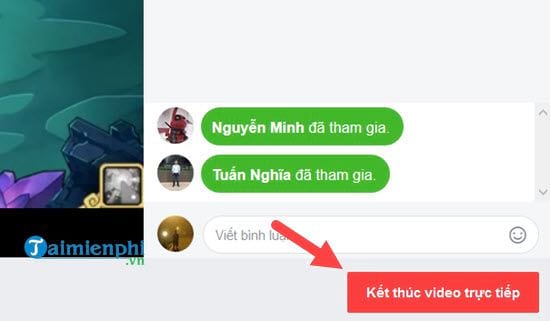
Step 12: Confirm the end of the video to turn off the live stream on Facebook.
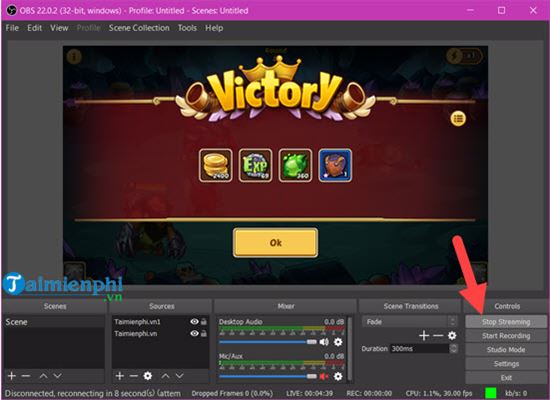
Step 13: Then you must open OBS studio software to proceed with Stop Streaming to stop using it.
Using OBS Studio to live stream Facebook helps you share content directly with friends or the community easily. Not only supporting Facebook, the software also allows live streaming on YouTube, Twitch, TikTok and Nimo TV, suitable for streamers or content creators who want to build their personal brand.
Final Thoughts
The most reliable way to handle using OBS studio, live streaming and screen recording is to follow the process in order, verify each important setting, and test the result before moving on. Use the guidance above as a practical reference, then adjust the details for your device, software version, or specific goal.
FAQ
What should I check before I using OBS studio, live streaming and screen recording?
Use the latest available software, confirm that your device meets the requirements, and make sure you have the necessary permissions, account access, or backup before changing anything.
Why might I be unable to using OBS studio, live streaming and screen recording?
Common causes include outdated software, missing permissions, incompatible settings, incomplete setup steps, or a temporary network problem. Recheck the process from the beginning and restart the app or device if needed.
Is it safe to using OBS studio, live streaming and screen recording?
It is generally safe when you use official tools, review every permission, and back up important data before making system-level or account-level changes.
Related Articles
 OBS Studio - Free, Open Source Software9 minutes read
 How to Fix Your System Is Missing OBS Studio Installation Components4 minutes read
 Record Computer Screen with OBS Studio, How to Record Laptop6 minutes read
 What Is TikTok Live Studio? Instructions for Using TikTok Live Studio3 minutes read
 How to Install Obs Studio in Ubuntu3 minutes read
 A Comprehensive Guide on How to Fix Black Screen or Black Display Issues When Recording13 minutes read
Reader Comments 0
Sign in with email or Google to join the discussion.