How to Write a Resume in LaTeX
While Microsoft Word can be great, when it comes to writing technical documents like engineering reports, Word is irritating to say the least. LaTeX is a technical document creation program that allows engineers to write technical document...
Table of Contents
Sample Resume and LaTeX Code
 Sample LaTeX Resume
 LaTeX Resume Template
Method 1 of 7:
Writing a Resume in LaTeX
-
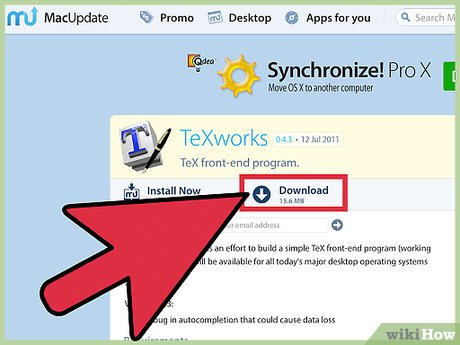 The first step is to download a free copy of a LaTeX editor. Although any LaTeX editor should work. This article is written specifically for TeXworks.
 -
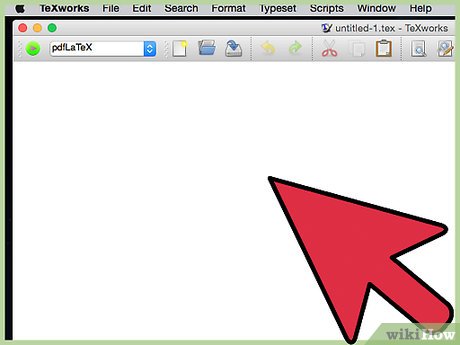 When you open up Tex Works you should see a screen like this:
 -
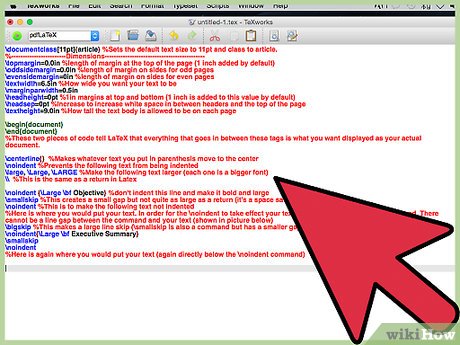
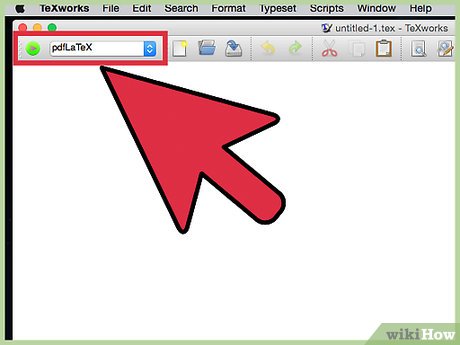 Change the top left menu to pdfLaTeX: I also would suggest going into Format/Syntax Highlighting and selecting LaTeX, as this will make your code easier to read.
Method 2 of 7:
Set Up the Document
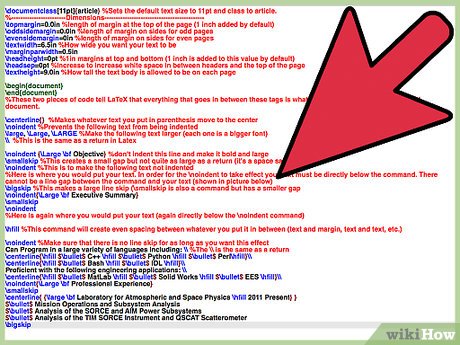
- In LaTeX, you have to set up each of the margins manually, which can seem tedious at first. However if you have too much information or too little, these settings can be easily adjusted to make your document look its best. This can be done with the following code:
documentclass[11pt]{article} %Sets the default text size to 11pt and class to article. %------------------------Dimensions-------------------------------------------- topmargin=0.0in %length of margin at the top of the page (1 inch added by default) oddsidemargin=0.0in %length of margin on sides for odd pages evensidemargin=0in %length of margin on sides for even pages textwidth=6.5in %How wide you want your text to be marginparwidth=0.5in headheight=0pt %1in margins at top and bottom (1 inch is added to this value by default) headsep=0pt %Increase to increase white space in between headers and the top of the page textheight=9.0in %How tall the text body is allowed to be on each page 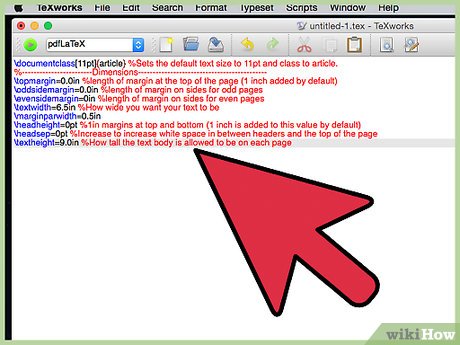
Method 3 of 7:
Begin the Document
- The next step is to actually begin your document. In LaTeX this is done by simply inserting the following code:
begin{document} end{document} %These two pieces of code tell LaTeX that everything that goes in between these tags is what you want displayed as your actual document. 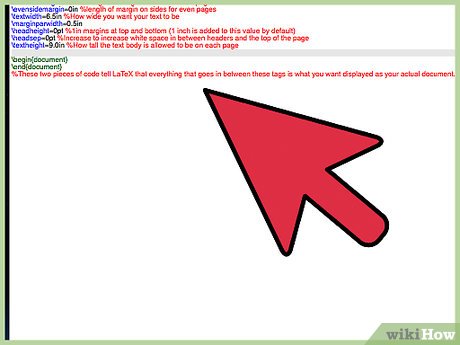
Method 4 of 7:
Make the Header
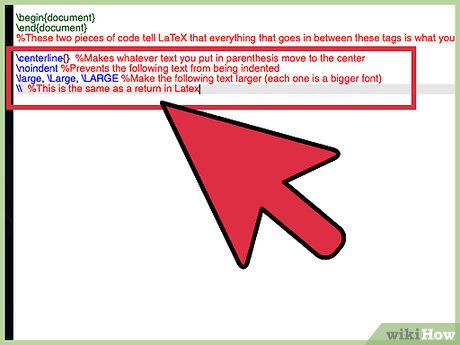
- In LaTeX you write your document in the same manner that would would in Word, except you have to use commands like:
centerline{} %Makes whatever text you put in parenthesis move to the center noindent %Prevents the following text from being indented large, Large, LARGE %Make the following text larger (each one is a bigger font) %This is the same as a return in Latex 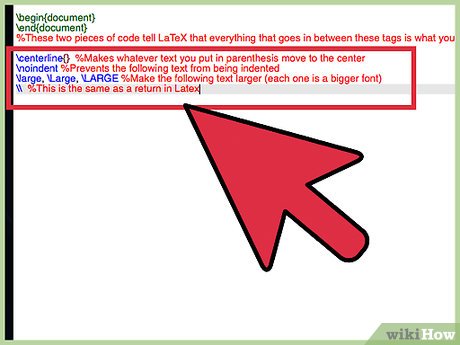
-
 The return key also plays a key role in designing LaTeX documents. If you return twice as if to make a new paragraph, LaTeX will treat that as a new paragraph and ignore any formatting code used for the previous paragraph. We will see how this comes in handy later.
 -
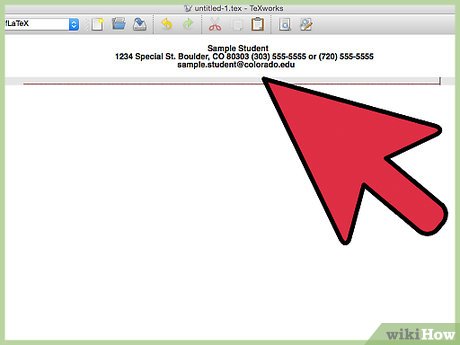 At this point your document should look like this:
Method 5 of 7:
Making the Body
- The next part of your resume should be some simple objective and summary type sections. This can easily be accomplished by making headers and following them with text. Here is an example:
noindent {Large bf Objective} %don't indent this line and make it bold and large smallskip %This creates a small gap but not quite as large as a return (it's a space saver) noindent %This is to make the following text not indented %Here is where you would put your text. In order for the noindent to take effect your text must be directly below the command. There cannot be a line gap between the command and your text (shown in picture below) bigskip %This makes a large line skip (smallskip is also a command but has a smaller gap noindent{Large bf Executive Summary} smallskip noindent %Here is again where you would put your text (again directly below the noindent command) 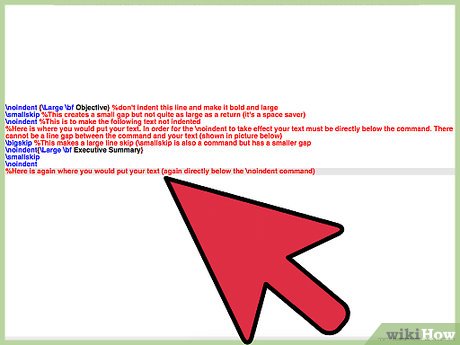
-
 Below are examples of how your text should look in LaTex and how your document should look so far:
Method 6 of 7:
Extra Helpful Commands
- While this may look a little bit silly on the sample resume we created, it serves the purpose of demonstrating how you can make columns in LaTeX. In order to do a list of known programming languages I used the following command:
hfill %This command will create even spacing between whatever you put it in between (text and margin, text and text, etc.) 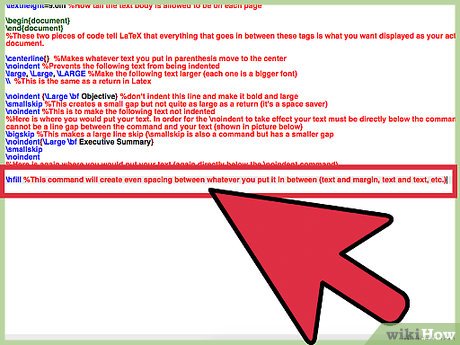
- Here is a sample of hfill using the following code:
noindent %Make sure that there is no line skip for as long as you want this effect Can Program in a large variety of languages including: %The is the same as a return centerline{hfill $bullet$ C++ hfill $bullet$ Python hfill $bullet$ Perlhfill} centerline{hfill $bullet$ Bash hfill $bullet$ IDL hfill} Proficient with the following engineering applications: centerline{hfill $bullet$ MatLab hfill $bullet$ Solid Works hfill $bullet$ EES hfill} noindent{Large bf Professional Experience} smallskip centerline{ {large bf Laboratory for Atmospheric and Space Physics hfill 2011 Present} } $bullet$ Mission Operations and Subsystem Analysis $bullet$ Analysis of the SORCE and AIM Power Subsystems $bullet$ Analysis of the TIM SORCE Instrument and QSCAT Scatterometer bigskip 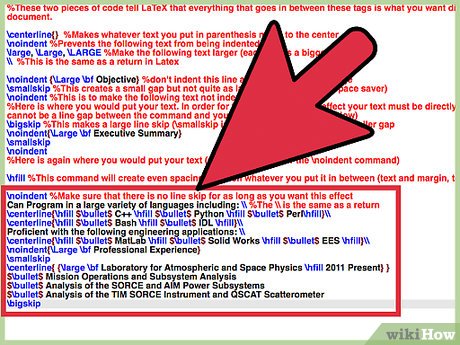
-
 Repeat these last 4 lines for each section you want to add.
 - Here is a look at the code and the product after you add in these lines:
Method 7 of 7:
Finishing Up
- Now all you need to do to finish the resume is add in more sections (using the same steps show above), tweak your dimensions, and it never hurts to have a professional look at it to make sure you did a good job. I hope this is helpful to whoever decides to use it, and I hope it will inspire more people to start learning LaTeX as it can be a great skill to have.
Was this article helpful?
Your feedback helps us improve.
Related Articles
 What is Latex? Top 5 most popular Latex editors 20216 minutes read
 10 tips for programmers to have a successful resume9 minutes read
 To have an impressive English CV you should not give the following words5 minutes read
 How to create Resume in Microsoft Word10 minutes read
 How to write an effective application under the 'standard' formula of Google7 minutes read
 Write a more professional CV with LinkedIn's new Resume Assistant feature5 minutes read
Reader Comments 0
Sign in with email or Google to join the discussion.