How to use the Windows Tiling feature in macOS Sequoia
The latest macOS 15 Sequoia has a lot of new features and native tools, one of which is Automatic Windows Tiling..
Apple launched the next generation Mac operating system, macOS Sequoia at WWDC 2024. The new Windows Tiling management feature helps arrange opened windows into the layout that best suits you.
PC users have had this feature since Windows 7 and Aero Snap. Previously, Mac users had to rely on several third-party tools like Magnet and Rectangle to get similar layouts. Thanks to the new native engine in macOS 15, you don't need any third-party apps. Let's see how to use the Windows Tiling feature in macOS 15 Sequoia through the following article!
Automatic Windows Tiling in macOS Sequoia
You can call the new Windows Tiling feature in a variety of ways, and it also comes with a number of keyboard shortcuts. Apple's MacOS Sequoia automatically suggests options for rearranging windows. You can arrange tiles next to each other or even place them in the corners to keep more apps in view. Here are all the steps to use the Windows Tiling feature in macOS Sequoia:
- Make sure you have yours (currently in Developer Beta).
- Now, drag a window to the side, top or bottom edge, or any corner of the screen.
- macOS Sequoia will display a gray frame to suggest juxtaposition.
- When you release the window, it will automatically drop into place.

- There are also some keyboard shortcuts available to automatically tile windows.
- You can press Function + Control + Left, Right, Up or Down arrow .
- To rearrange a window's title, press Function + Control + Shift + Left, Right, Up , or Down arrow .
- You can use Function + Control + R to return the window tiles to their previous size.
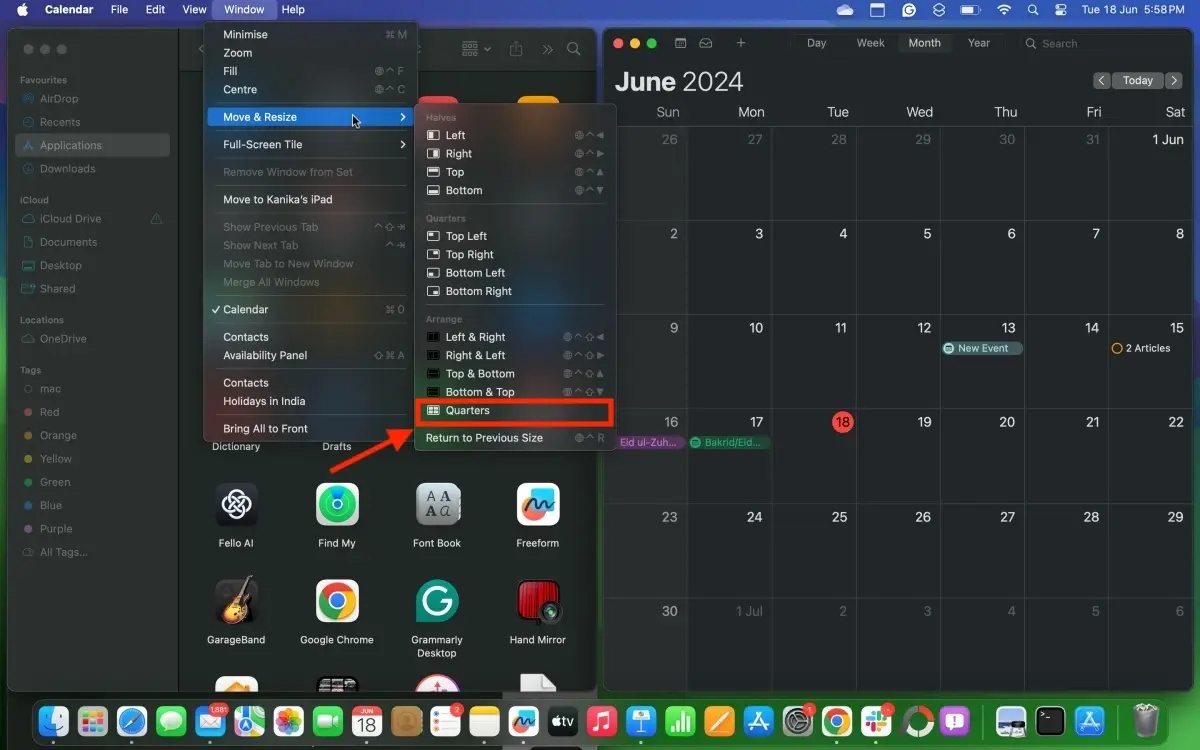
- You can also go to the top Menu bar and select Window > Move & Resize to resize the window.
- To accommodate more windows, you can click Window > Move & Resize > Quarters .
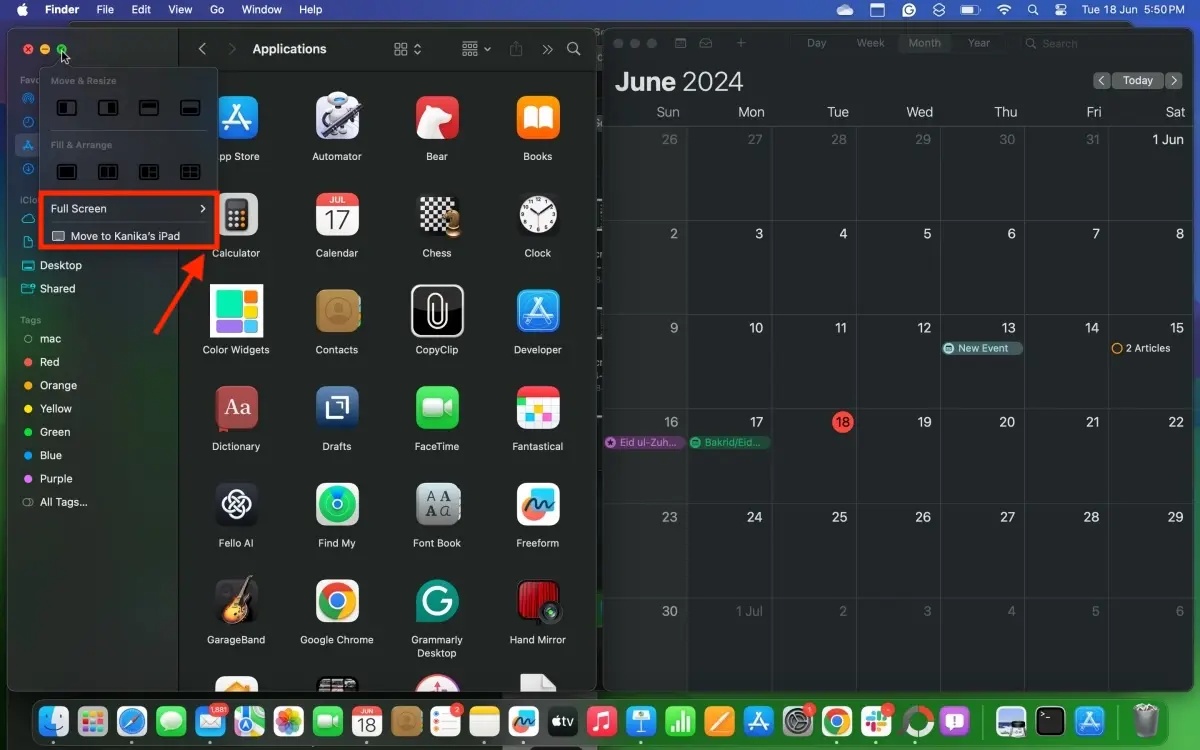
- Additionally, you can select a window and hover over the green maximize button in the top left corner to resize the window, or even move it to your iPad (where you're signed in). with the same Apple ID).
This way, you can arrange two app windows side by side or keep multiple apps in view at the same time on your Mac. After using the Auto tiling feature, if you move a window manually, it will return to its original size.
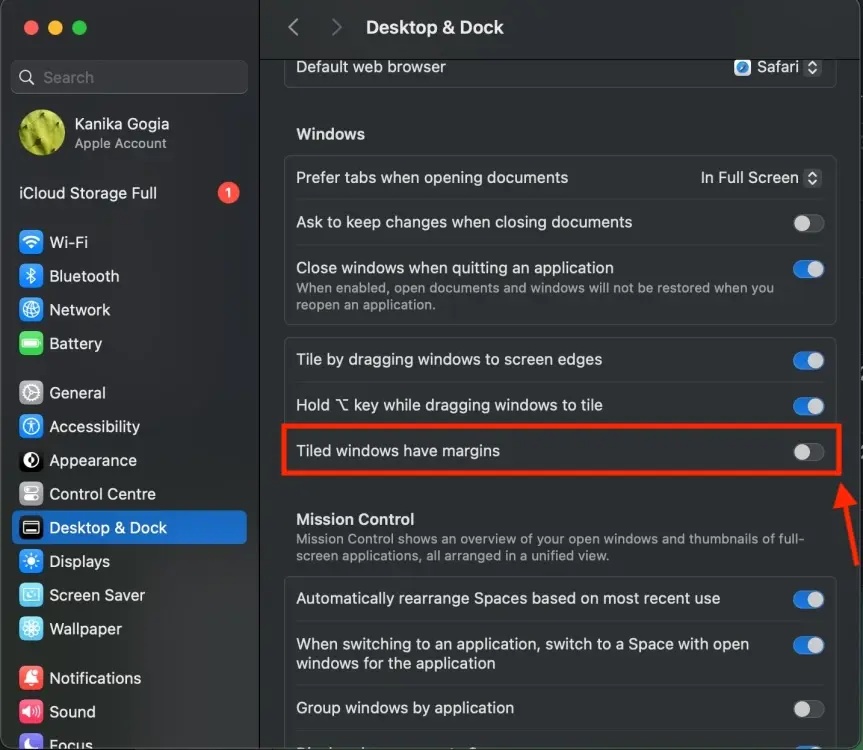
Note that some applications by design cannot be reduced beyond a certain size. As a result, you may experience windows disappearing from the screen or overlapping each other. If the automatic tiling system leaves some space between windows, you can go to System Settings > Desktop and Dock , then scroll down and turn off the 'Tiled windows have margins' option in the Windows section. This will reduce the gap between windows.
In beta 2, the Automatic Windows Tiling feature is now working but there is some slight lag and windows are not displayed correctly in a quarter layout. However, they function normally when placed next to each other.
Of course, Apple will make some improvements and hopefully all the features will work properly when the stable version of macOS Sequia launches later this year.