How to use the Windows 10 DPI Fix utility to fix blurry text errors
The obvious sign of blurred text is that the Windows 10 fonts are blurred, while the rest of the screen, like images and other parts of the user interface, appears normal. It is usually not difficult to fix this problem. There are several troubleshooting steps you can perform in Windows Settings, and if the problem persists, you can try a free utility called Windows 10 DPI Fix .
Cause blurry text on Windows 10
Blurred text errors in Windows 10 occur most often when using large, high-resolution screens, such as 4K UHD displays. This is because Windows is designed to expand the text size on high-resolution screens, making the text easier to read. However, some people complain that the size expansion technique used by Windows 10 can sometimes cause blurry text.
How to fix blurry text in Windows 10?
1. Change DPI scaling in Windows Settings
If you have a high-resolution screen, Windows may have automatically set the DPI to 125% or 150%. Changing that value may solve the problem. For example, if it is 125%, you can try increasing it to 150% and see if the text is sharper.
2. Turn off DPI scaling
If changing the DPI doesn't help, you can turn this feature off completely by setting it to 100% in Display Settings. When you set DPI to 100%, the text is no longer blurry. Unfortunately, the text is now too small to read comfortably.
3. If only certain programs experience blurry text, you can change the display rate for that particular program only.
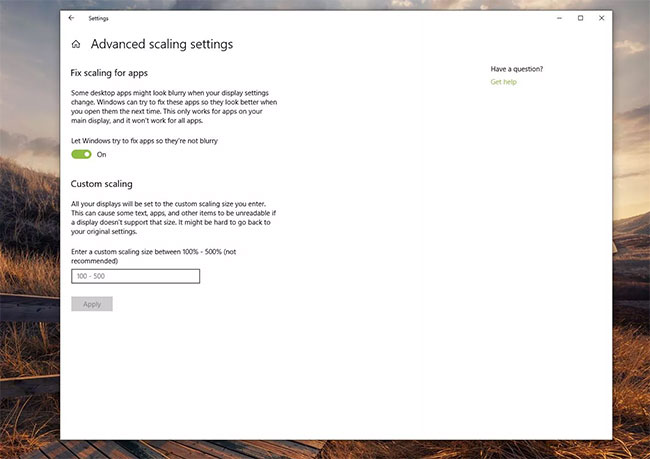
Open Advanced scaling settings for the problematic program and disable the Let Windows try to fix apps option so they're not blurry . Alternatively, you can enter a custom scale value to make the text big enough to read if needed.

4. If you have multiple monitors connected to the computer, one or both monitors may experience blurry text, if the two monitors are set at different resolutions.
The easiest way to solve this problem is not to simultaneously use different sized screens and make sure they are all set at the same resolution.
5. Install and run Windows 10 DPI Fix.
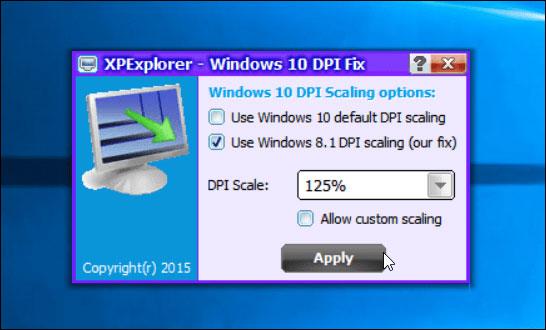
This free third-party utility for Windows 10 uses the method used by older versions of Windows (such as Windows 8). Some users find this method to work better for some Windows configurations. If other troubleshooting steps don't work, install Windows 10 DPI Fix at:
http://windows10-dpi-fix.xpexplorer.com/ Select Use Windows 8.1 DPI scaling and click Apply .

6. If necessary, you can return to the default Windows 10 DPI scaling installation.
Start Windows 10 DPI Fix, select Use Windows 10 default DPI scaling and click Apply .
You should read it
- ★ 10 ways to open Bluetooth File Transfer utility on Windows 11
- ★ How to use Windows Defender increases security when surfing the web
- ★ Which system cleanup utility should be used for Windows?
- ★ Cut, merge video clips with the utility available in Windows
- ★ DevToys - a great set of utilities for Windows developers