Table of Contents
Learning how to stress test GPU with furmark doesn't have to be complicated. This updated guide presents a clear workflow, practical checks, and troubleshooting advice you can use while completing the process.
Key Takeaways
- Follow the steps to stress test GPU with furmark.
- Follow the recommended steps in order to avoid common mistakes with stress test GPU with furmark.
- Review compatibility, settings, or requirements before making changes.
How to Stress Test GPU with Furmark
Step 1: Download and install FurMark from the following link: Download FurMark.
Step 2: Close all applications running on the computer => open FurMark => perform some necessary settings.
Step 3: If your computer has multiple graphics cards, select Fullscreen mode.
- In Windowed Mode, you can only select one primary graphics card.
- In the Resolution section, select the resolution that suits your screen.
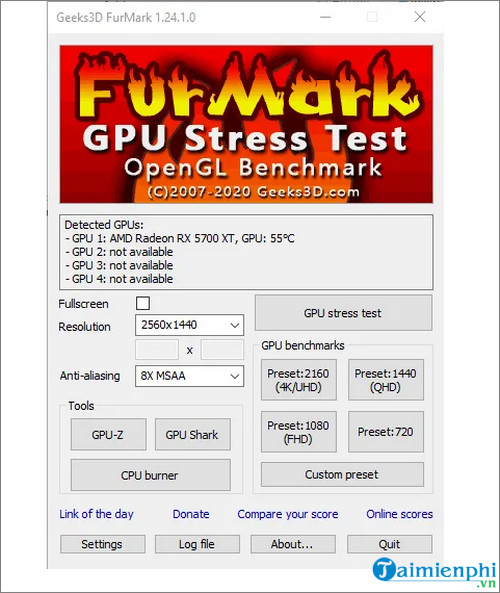
Step 4: You can also adjust the Stress Test level. In the Anti-aliasing menu, select the 8X MSAA option for the highest level.
- Next click Settings and enable the Dynamic background and Post-FX options.
Step 5: In that window, find and check the box next to the GPU temperature alarm option.
- Set temperature value in frame to get alert when GPU reaches specific temperature and stop test.
- If the temperature exceeds 100°C, the system may fail.
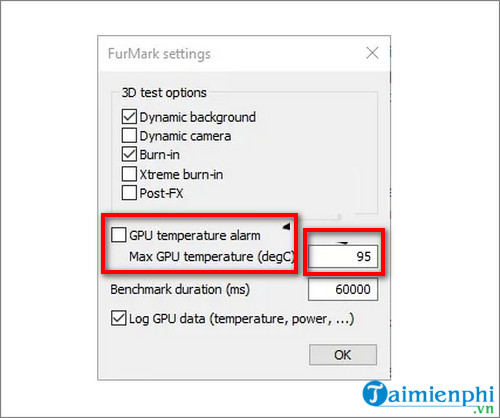
Step 6: Once completed, click GPU stress test. The screen will display the image below:
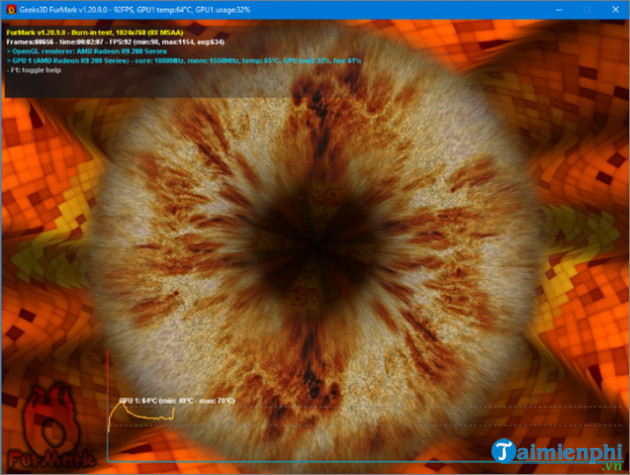
Step 7: You need to pay attention to the top left corner to check the GPU load, as well as observe the graph in the bottom corner to monitor the temperature.
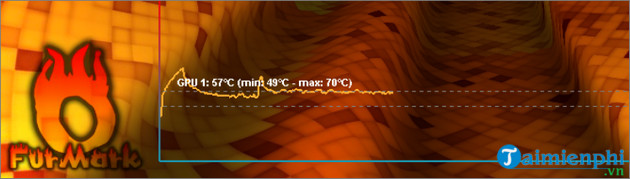
It is likely that your GPU is having problems: if you experience the following symptoms.
- FurMark freezes: This is the most obvious sign of a hardware problem. It is possible that your GPU or PSU (power supply unit) is faulty if this problem occurs repeatedly during the Stress Test.
- Artifacts or screen glitches: These issues can also appear during stress testing.
You should consider adding an additional GPU cooler to reduce the temperature if your GPU is not overclocked and the temperature exceeds 90°C to 95°C during the Stress Test.
The above article this guide has just guided you on how to stress test GPU with Furmark. In addition, you can refer to some articles already on this guide to learn more about How to view computer configuration with CPU Z.
Final Thoughts
The most reliable way to handle stress test GPU with furmark is to follow the process in order, verify each important setting, and test the result before moving on. Use the guidance above as a practical reference, then adjust the details for your device, software version, or specific goal.
FAQ
What should I check before I stress test GPU with furmark?
Use the latest available software, confirm that your device meets the requirements, and make sure you have the necessary permissions, account access, or backup before changing anything.
Why might I be unable to stress test GPU with furmark?
Common causes include outdated software, missing permissions, incompatible settings, incomplete setup steps, or a temporary network problem. Recheck the process from the beginning and restart the app or device if needed.
Is it safe to stress test GPU with furmark?
It is generally safe when you use official tools, review every permission, and back up important data before making system-level or account-level changes.
Related Articles
 How to Test VGA with Furmark Tool5 minutes read
 What Is Stress Test: What Is a Stress Test?3 minutes read
 How to Safely Stress Test Overclocked RAM, GPU and CPU12 minutes read
 How to Use Furmark to Test VGA, CPU, GPU of Computer5 minutes read
 Furmark - Software to Test VGA and Hardware Performance6 minutes read
 How to Stress Test Hard Drives on Your Computer or Server?9 minutes read
Reader Comments 0
Sign in with email or Google to join the discussion.