Table of Contents
Zoom Breakout Rooms let a host divide one meeting into smaller sessions for discussion, group work, interviews, or activities. The host or an eligible co-host can create rooms, assign participants, move between rooms, broadcast instructions, and return everyone to the main session.
Before you begin, update the Zoom desktop app and make sure you are signed in as the meeting host. If Zoom is not installed, follow TipsMake’s Zoom installation guide. The labels below reflect the current Zoom web portal and desktop app; older screenshots may show slightly different wording.
Enable Breakout Rooms in your Zoom settings
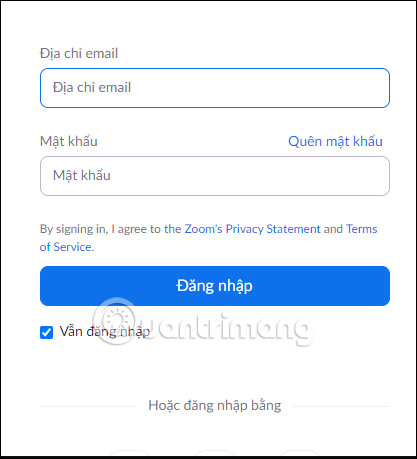
Step 1: Sign in to the Zoom web portal with the account you use to host meetings.
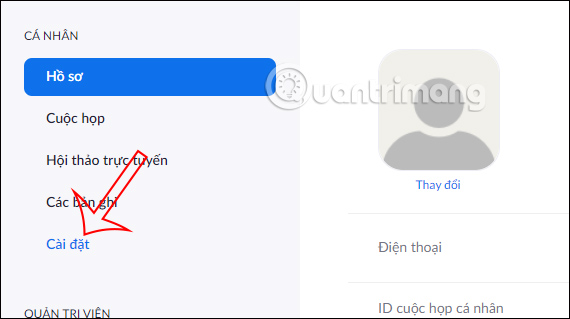
Step 2: In the navigation menu, select Settings, then open the Meeting tab.
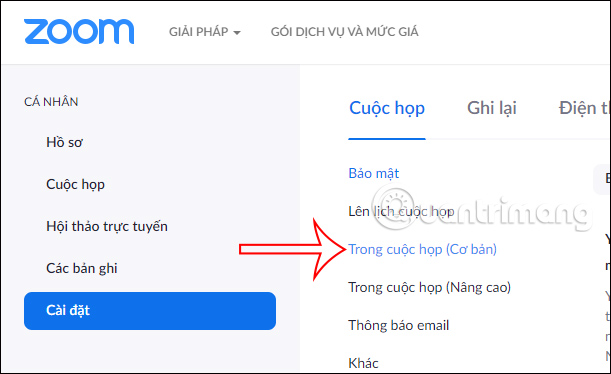
Step 3: Scroll to In Meeting (Advanced). Find Breakout room - Meetings and turn it on.
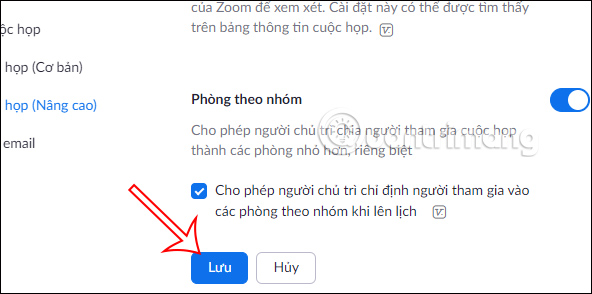
Zoom may ask you to confirm the change. Depending on your account, you can also enable options for pre-assigning participants, broadcasting text or voice, and setting default room behavior. If the switch is gray, an account or group administrator has locked the setting.
Create breakout rooms during a meeting
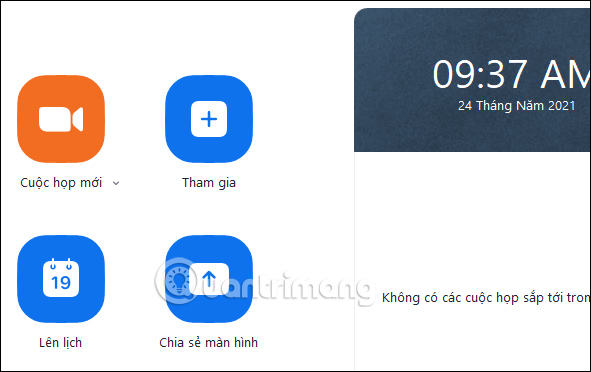
Step 1: Start a scheduled meeting or click New Meeting in the Zoom desktop app.
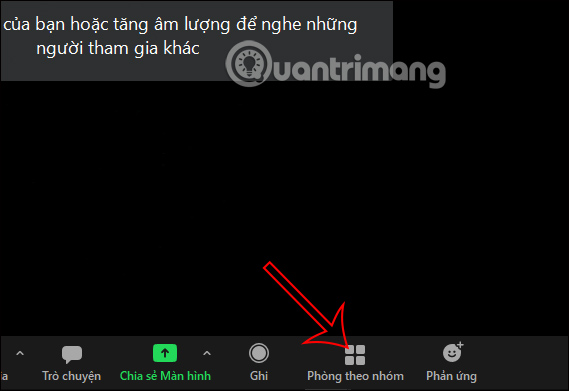
Step 2: In the meeting controls, click Breakout Rooms. If the button is hidden, look under More. If it is still missing, confirm that the web-portal setting is enabled, that you are the host or co-host, and that the app is current.
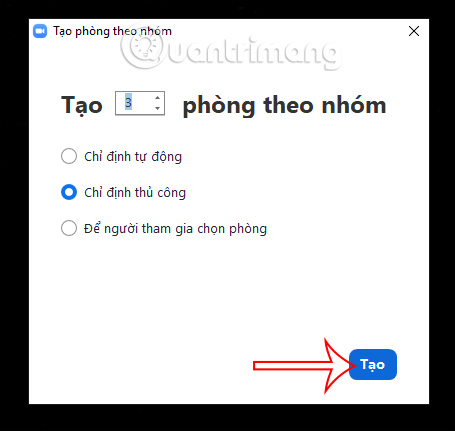
Step 3: Enter the number of rooms and choose an assignment method:
- Assign automatically: Zoom distributes participants across the rooms.
- Assign manually: You choose who goes into each room.
- Let participants choose room: Participants select from the available rooms when the option is supported and enabled.
- Load pre-assigned rooms: Use assignments prepared when the meeting was scheduled, if available.
Click Create. This prepares the rooms but does not open them yet.
Rename rooms and assign participants
Rename each room according to the task—such as Group A, Interview 1, or Topic: Security—so participants know where to go. With manual assignment, click Assign beside a room and select its participants. You can move or exchange people before opening the rooms.
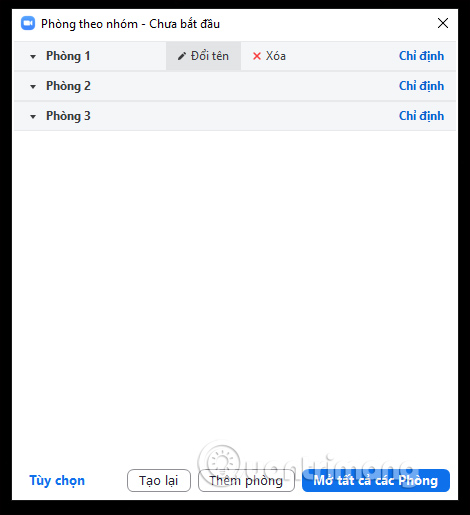
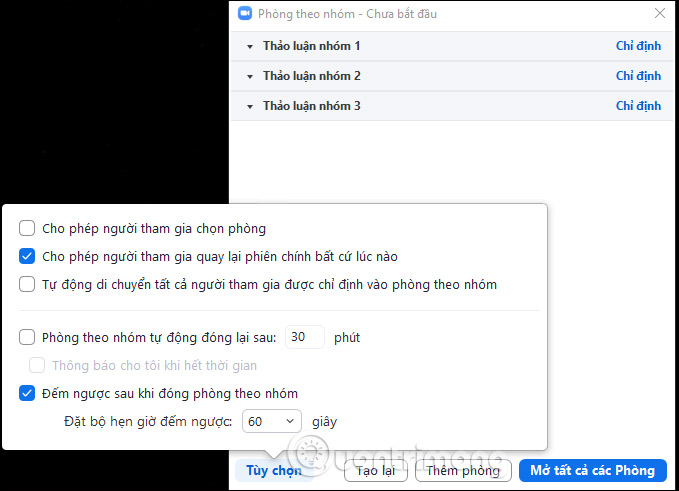
Open Options or the gear icon to configure the session. Useful controls can include:
- Allow participants to choose a room.
- Allow participants to return to the main session.
- Move assigned participants into rooms automatically.
- Close rooms automatically after a set time.
- Show a countdown before participants return to the main room.
Choose settings that fit the activity, explain them before the split, and then click Open All Rooms.
Manage rooms while they are open
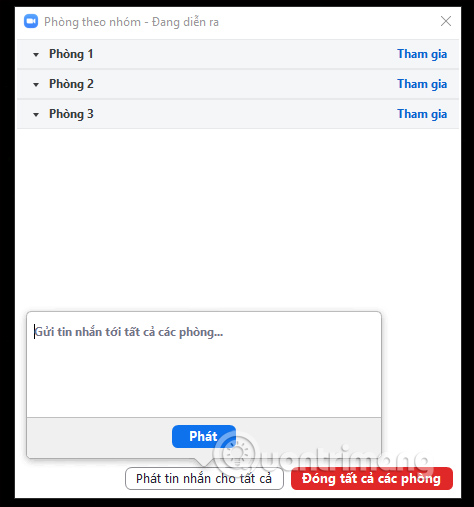
The host and co-host can view room status and join rooms as needed. Use broadcast controls to send the same instruction or time warning to every room. Participants can request help, but the host should also check rooms proactively and keep the main session available for anyone who cannot join.
To share material from the main session with every room, use Share Screen and select Share to breakout rooms when the option is available. Avoid sharing confidential content because all active rooms will receive it.
Close the rooms and bring everyone back
Click Close All Rooms when the activity is finished. If a countdown is enabled, participants see how much time remains before Zoom returns them to the main meeting. Leave enough time for groups to save notes or choose a spokesperson.
Tips for smoother group work
- State the question, expected output, and time limit before opening the rooms.
- Put instructions in chat or on a shared slide so late arrivals can catch up.
- Assign a facilitator or note-taker in each room for longer activities.
- Keep groups small enough for everyone to speak.
- Do a short test before a large class or event.
If breakout rooms are not essential, compare the available collaboration features in Google Meet and Zoom before choosing a platform. For the latest controls and limitations, consult Zoom’s official breakout-room guide.
Video tutorial
Related Articles
 Zoom Meetings: How to Learn Online, Create Classrooms on Zoom3 minutes read
 Instructions on How to Use the Zoom Meeting Application from a to Z6 minutes read
 How to Sign Up Zoom.us Learn Online for Free3 minutes read
 How to Install Zoom on a Mac4 minutes read
 How to Use Zoom Meeting on Phone: Step-by-Step Guide3 minutes read
 Why Doesn't Zoom Sound? Zoom Error Has No Sound5 minutes read
Reader Comments 0
Sign in with email or Google to join the discussion.