How to set up no-page formatting in Google Docs
If you frequently work with documents on Google Docs, you've probably encountered situations where images or tables automatically jump to a new page, making the document layout look unattractive. To fix this, switch to the 'no pages' setting on Google Docs, a feature that allows you to change the way all the text is displayed on a single page.
Table of Contents
When you set the no-page format in Google Docs , the content in your document will stretch continuously without page breaks, and images and tables will automatically adjust to the screen size and resize as you zoom in or out.

A quick guide to enabling pagination-free mode in Google Docs.
I. How to set up Google Docs without pages on a PC
2. Detailed instructions
Step 1: Access the Google Docs file you want to format without pages.
Step 2: In the toolbar , select File => Page Setup .

Step 3: Next, select the " No Pages" option .
Step 4: Click OK to apply the "No Pages" formatting to Google Docs.

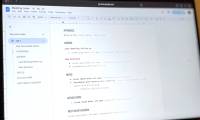
- The difference between before and after setting the no-page formatting in Google Docs.

Before setting up the no-page format in Google Docs

After setting the no-page format in Google Docs
II. Instructions for setting up Google Docs without pages on your phone
2. Detailed instructions
Step 1: Update the Google Docs application to the latest version.
- Download link for Android version: Google Docs for Android
- Download link for iOS version: Google Docs for iPhone
Step 2: Open Google Docs, then open the file you want to enable no-page formatting for.
Step 3: Click the pen icon, then Edit => Click the three-dot icon .

Step 4: Select Page Settings => Turn on No Pagination .

Therefore, setting up a pageless format on Google Docs is extremely simple; you will view the entire document seamlessly without page breaks. In addition, there are many tips for using Google Docs effectively that you can refer to and apply to improve your work efficiency. Good luck!
Was this article helpful?
Your feedback helps us improve.
Related Articles
 How to delete a page in Google Docs4 minutes read
 How to copy formatting in Google Docs, Sheets and Slides4 minutes read
 How to add page numbers on Google Docs4 minutes read
 How to redirect pages on Google Docs3 minutes read
 7 Google Docs Shortcuts Everyone Shouldn't Forget5 minutes read
 The way Google Docs helps you become professional7 minutes read
Reader Comments 0
Sign in with email or Google to join the discussion.