How to reset CMOS
Although this rarely happens, there may be a day when you need to reset the CMOS. Bad overclocking settings, incorrect BIOS settings changes, and even viruses can cause you to need to reset your BIOS or UEFI to factory defaults. However, your settings can always be backed up to restore them after a reset.
Reset CMOS using the button on the case
If you see a button on your computer case labeled Clear or Reset , that will reset your CMOS. Using this button is the easiest method but is not applicable to all computers.

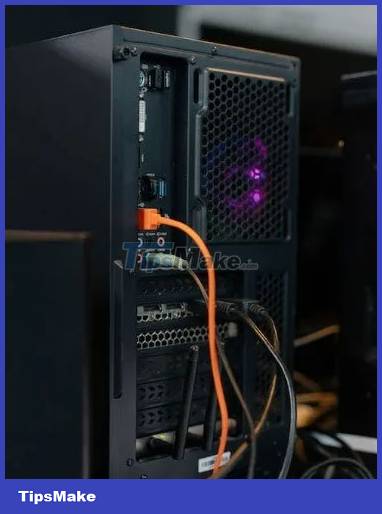
Start by turning off your computer. Disconnect the computer from the wall outlet. Locate the case button labeled Clear or Reset . It's usually next to or near the power button. It could also be on the back of the case, near the auxiliary ports.
Hold the button for 5 to 10 seconds then release. You may need to use the tip of the pen to hold the button if it is too small. Reconnect your computer to a power source and restart.
During boot, press the correct key to enter your BIOS options. Depending on your motherboard, it could be ., Delete, F2, F8 or F12 . Different computer manufacturers use different keys, or you can set Windows 10 to boot into your BIOS. There are many ways to enter your BIOS.
Adjust your BIOS options if necessary. Some motherboards have an 'optimized defaults' load option, which is a great starting point.
Reset CMOS using motherboard button
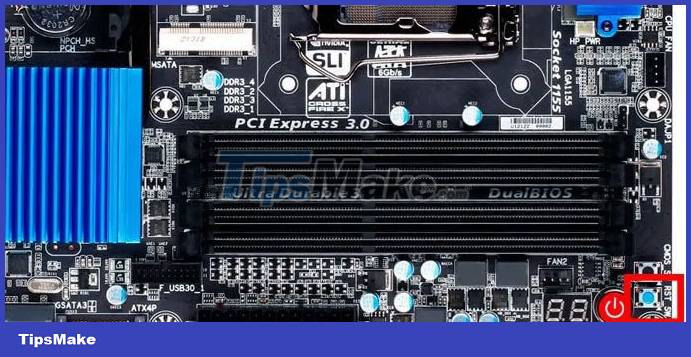
Some higher-end motherboards have an on-board button to reset the CMOS. Access it by opening the computer case and locating the button inside the case. It will usually be labeled as CLR, CLEAR or RESET .
Shut down and disconnect your computer from the wall outlet. Press the case's power button several times to completely discharge the capacitor on the motherboard. Locate the correct button on your motherboard. If you're not sure where to find it, check your motherboard manual. You can find these on the motherboard manufacturer or computer manufacturer's website.

Press and hold the button for 5 to 10 seconds using your finger or the eraser tip of a pencil. If you use your fingers, be sure to ground yourself by touching a bare metal surface (a doorknob is a very good choice) before touching anything inside the computer.
Reconnect the computer to the power source and restart. Press the correct key to enter your BIOS options, then adjust the BIOS options as needed.
Reset CMOS by reinserting the CMOS battery
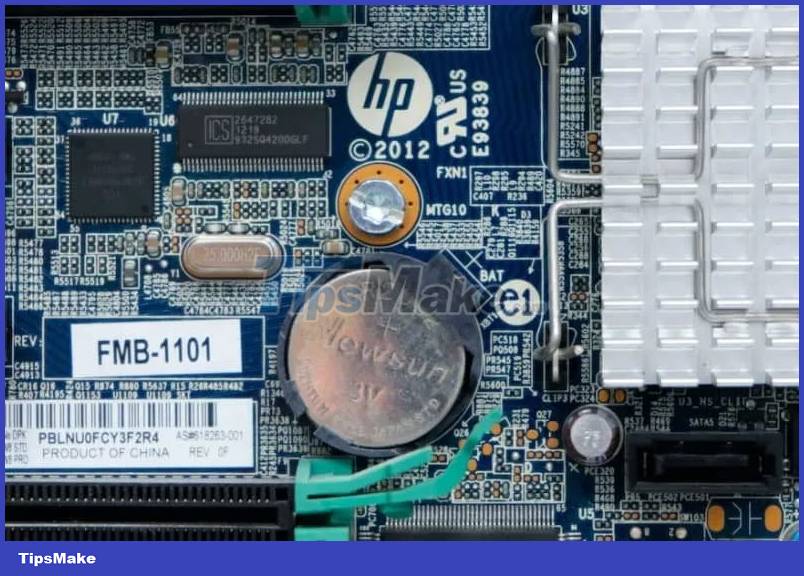
If there is no other way to reset the CMOS, you can erase the saved settings by removing the CMOS battery. This battery allows the volatile CMOS memory to remain powered even when the computer is disconnected from the outlet. By removing and replacing the battery, you clear the CMOS, forcing it to reset.
Turn off your computer and disconnect it from the wall outlet. Press the power button several times to completely discharge the capacitor.
Find the CMOS battery on your motherboard. The most common is the CR2032 battery, about the size of a coin, as shown below. You'll find it near the PCI Express slots on almost any motherboard. Refer to your motherboard manual for its exact location.

Gently remove the CMOS battery. If it is secured with a metal clip, slide the battery out of the clip. Be careful not to bend the clamp. Wait a few minutes, replace the CMOS battery, and restart your computer.
If this doesn't work or you're still having problems, you may need to replace the battery. This is especially true on older computers.
Reset CMOS using motherboard jumper
By manually adjusting the jumper, you can enable the CMOS clear function.
Turn off your computer. Disconnect your computer from the wall outlet. Press the power button several times to completely discharge the capacitor.
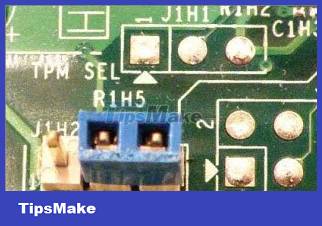
Open your computer case and locate the CMOS clear pins. Typically it will be a two or three pin configuration mounted on the motherboard, labeled CLEAR, RESET or even CLRPWD for 'clear password'.

On a three-pin configuration with a shared middle pin, move the jumper up to connect the middle pin and the previously disconnected pin. For two-pin configurations, remove the jumper completely.
Wait a few minutes then return the jumper to its original configuration. Restart your computer.
What to do after resetting CMOS?
When resetting the CMOS, you will erase all custom BIOS settings. For example, if you change the boot order to boot from USB first, this will revert to the default hard drive.
After the reset, you will need to go back into the BIOS and adjust your settings if necessary. Just remember to avoid any changes you made previously that would require a CMOS reset. Of course, if you reset due to a virus, this is not a problem.
Finally, you may have to reset your date and time. The CMOS battery stores this information. Your computer may or may not automatically make changes. If you want to convert your old BIOS to UEFI to support newer systems, learn how to do it and see if the conversion is possible.