How to Replace Awning Fabric
Replacing awning fabric on an RV can seem intimidating, but it is actually quite simple once you know what to do. The key to getting the job done is to have at least 2 other people helping you. Not only will this make the task easier and...
Table of Contents
Part 1 of 4:
Removing the Roller
-
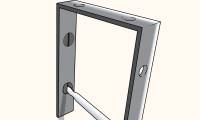
 Remove the bolts holding the awning to the top of the RV. Get onto a step ladder, and find the bolts holding the awning to the top of your RV. You can find them on either side of the awning, and what secures the metal legs to the RV. Use a cordless electric drill to remove these bolts.[1]
- Put the bolts into a plastic bag. Label the bag clearly, then set it aside.
-
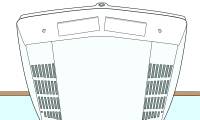
 Remove the screws holding the fabric to the track. If you take a close look, you'll notice that the fabric is tucked into a track. There is a set of screws holding the fabric to the track so that it does not slide around. Use your electric drill to remove these screws; there's 1 screw at each end of the track.[2]
- Place the screws into another plastic bag. Label the bag and set it aside as well.
-
 Have someone help you pop the lower legs out and prop the awning up. Head down to the bottom of your RV and find the brackets holding the legs in place. Working together with another person, pop these legs out of the brackets. Extend the legs, then stand them up on the ground so that the awning is propped up.[3]
 -
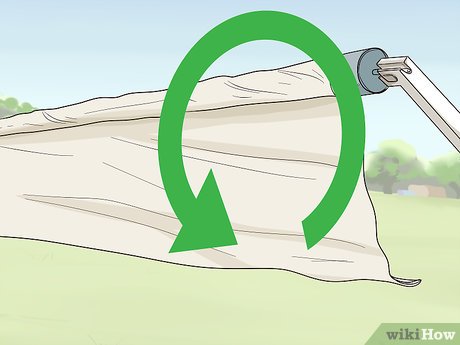
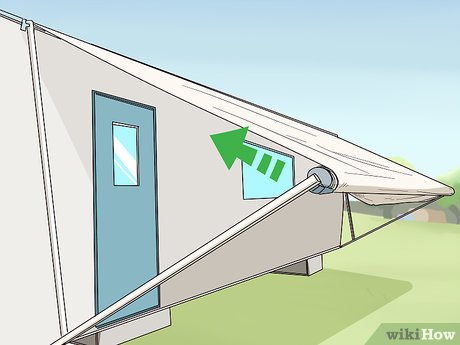
 Flip the control lever to extend the awning by 1 foot (30 cm). Find the control lever on the right side of the awning's roller tube. Flip it, just like you would when fully extending the awning. Use the awning rod to pull the awning away from the RV by 1 foot (30 cm).[4]
 -
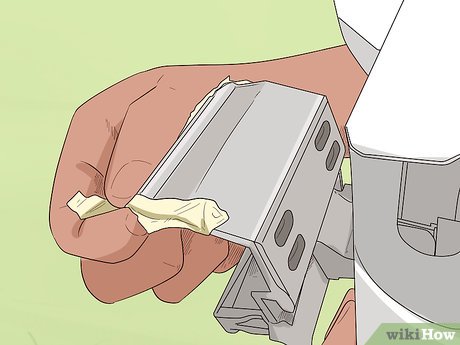
 Cover the sharp edges of the brackets with tape. There will be a metal bracket at each end of the awning's roller tube. The edges of these brackets are sharp, so cover them with pieces of masking tape or electrical tape. This will keep you or your RV from getting scratched up.[5]
 -
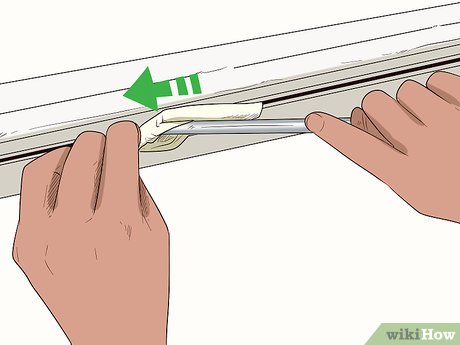
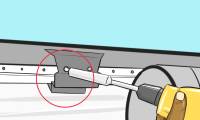
 Spread open the end of the track with a flathead screwdriver. Stick the end of a flathead screwdriver into the end of the track; it does not matter which end of the track. Move the screwdriver up and down like a lever to pry apart the end of the track. This will make it easier to slice the fabric out.[6]
- If the fabric is old, there may be some sealant connecting it to the track. Cut this sealant away. If you notice any grit, scrape that away too.
-
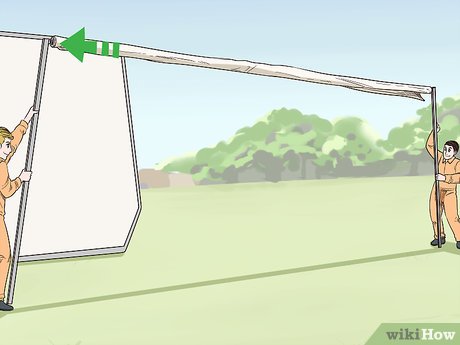
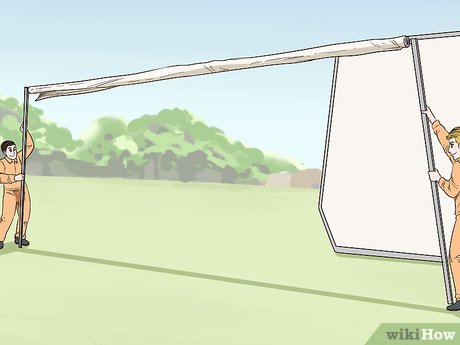 Work with 1 or 2 other people to slide the fabric out of the track. Have a person grab hold of each awning leg. Lift the legs up off the ground, and begin to walk alongside the RV, towards the end of the track that you split open. If needed, have a third person tug the fabric along the track.[7]
 -
 Set the awning roller on the ground. Working together with the second person, slowly lower the awning onto the ground. It would be even better if you placed a set of cinder blocks or large bricks under the awning roller to prop it up.[8]
- Consider working on top of a tarp. This way, if you drop anything, it will be easier to find.
Part 2 of 4:
Removing the Spring
-
 Lock the spring on the back end of the awning roller tube. Find the plastic cap on the left side of the tube. It is smaller than the main endcap and typically black. Pop the cap off, then insert a Philips head screwdriver into the hole. This will lock the spring inside the roller tube.[9]
- The back of the awning roller tube is on the left. The front of the roller tube is on the right side.
-
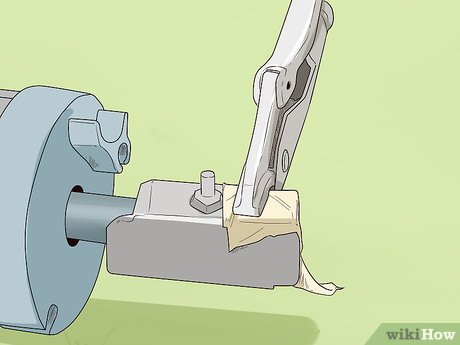
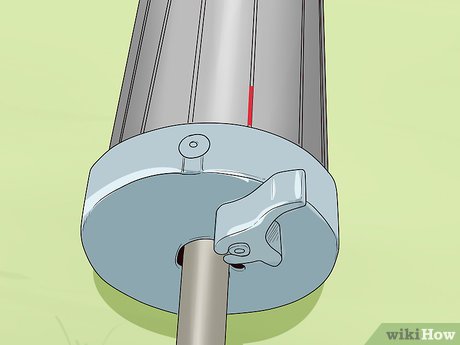
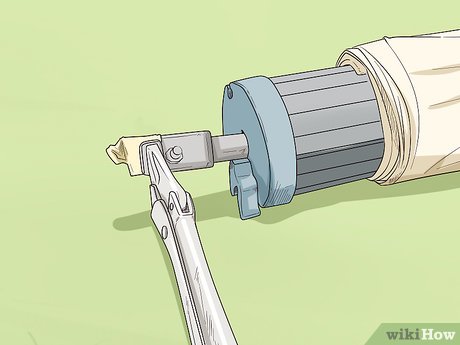
 Remove the bolt and leg from the front end of the awning roller tube. Head over to the right side of the roller tube. Have someone hold the awning leg steady for you. Use a box wrench to loosen the bolt that holds the leg onto the roller tube, then remove both the bolt and the leg. Set them aside on the ground.[10]
 -
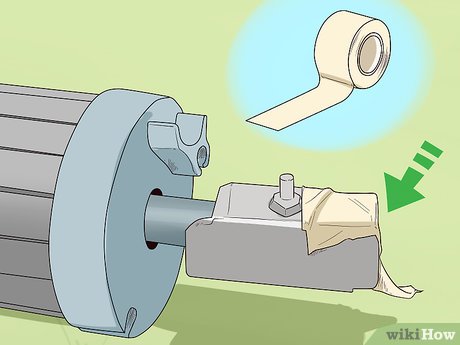 Reinsert the bolt and cover the bracket with tape. Leave the awning leg on the ground. Put the bolt back into the roller tube. Cover the exposed bracket edges with masking tape or electrical tape. This will keep you from getting scratched.[11]
 -
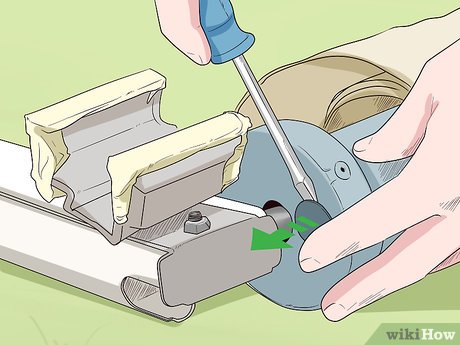
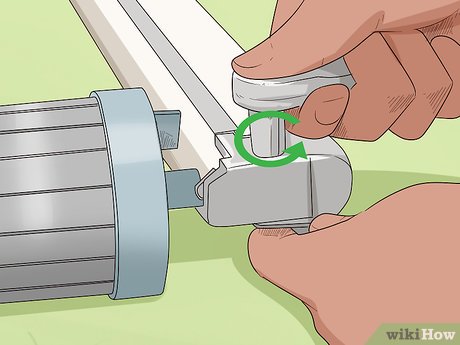
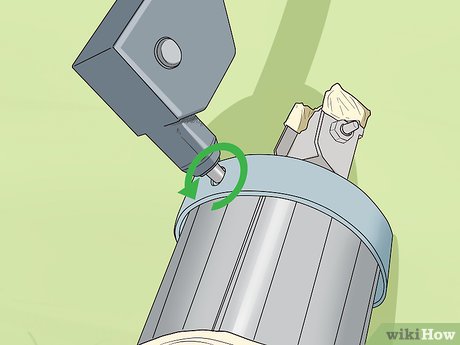
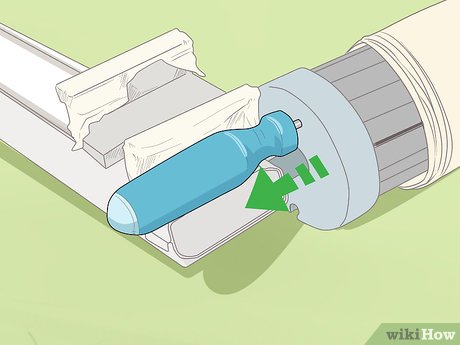
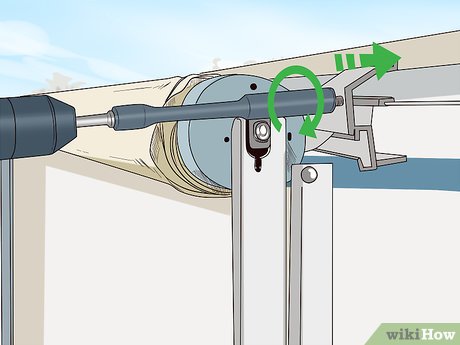
 Use a vise grip to release pressure, flip the lever, then unroll the spring. Clamp a vise grip onto the bolt. Lift the vise to release the built-up pressure. Flip the lever to the "roll-off" position. Use the vise grip to unroll the spring clockwise; count the rotations.[12]
- It is very important that you count the rotations. You will need to use the same amount to screw the bolt back on.
-
 Mark the lever on the roller tube, then remove the vise grips. Find the control lever, then mark its position on the roller tube with a permanent marker. You'll be taking the roller tube out shortly. Having the tube marked will ensure that you put everything back together as it was.[13]
 -
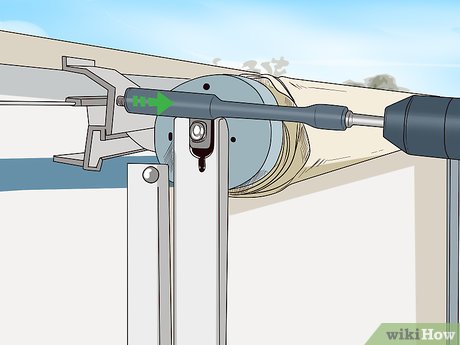
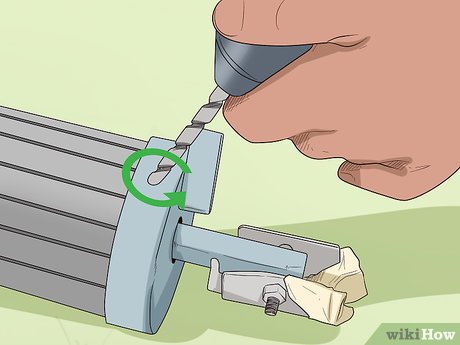 Remove the pop rivets from the endcap, then remove the spring. Use a cordless drill to loosen the pop rivet. Tap the rivet with a hammer to remove it the rest of the way. Rotate the roller tube so that you can see the underside, and repeat the process for the second pop rivet.[14]
- Pop rivets are a type of screw. You will find them on the outer edge of the endcap. They are what secures the endcap to the roller tube.
- Have someone help you rotate the roller tube. A person at each end of the tube should do the trick.
-
 Slide the spring assembly out of the roller tube. Grab the endcap and pull it off of the roller tube. The spring assembly should come out right with it. Set the endcap and the spring assembly down someplace safe.[15]
Part 3 of 4:
Replacing the Old Fabric
-
 Roll the old fabric off of the tube, then mark the channels. Ask a helper to stand at the other end of the tube. Working with the other person, roll the fabric off of the tube so that the bare metal is exposed. Note the channels that the fabric is tucked into, and mark them with a permanent marker.[16]
- There are usually 3 channels, but the fabric is only inserted into 2 of them.
- If your awning has a valance, draw a "V: next top the channel that the valance is tucked into.
-
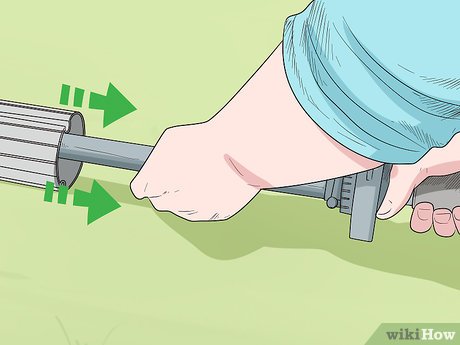
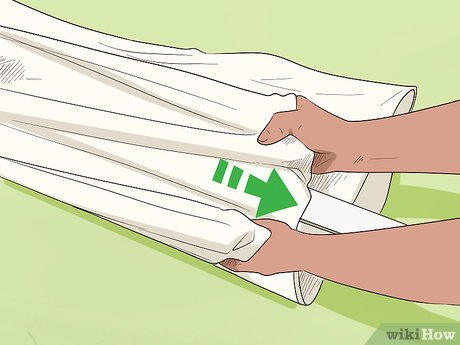 Slide the old fabric off of the roller tube. Have someone hold the end of the roller tube while you pull the fabric off. It might be easier to slice the fabric down the middle, between the 2 channels, with a knife first. This way, you can slide the fabric off in 2 pieces. Discard the fabric when you are done. [17]
 -
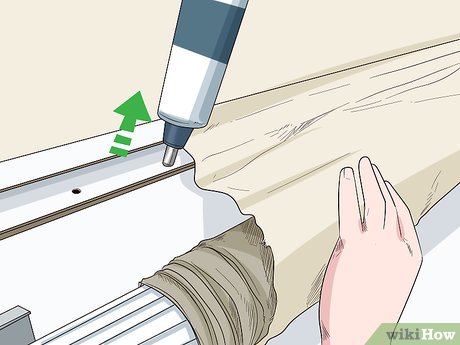
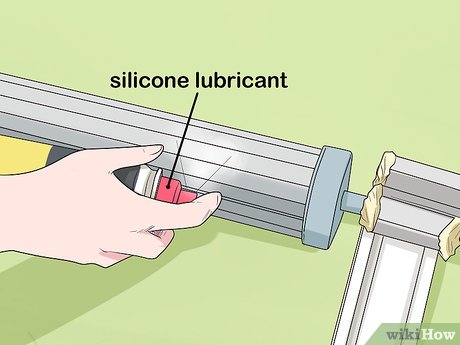 Spray silicone lubricant into the channels you marked. Get a spray silicone lubricant with a nozzle. Place the nozzle into the channel, then squeeze the trigger as you walk alongside the roller tube.[18]
- Do not use silicone caulking. It is not the same thing.
- You can find spray silicone lubricant online and in hardware stores.
-
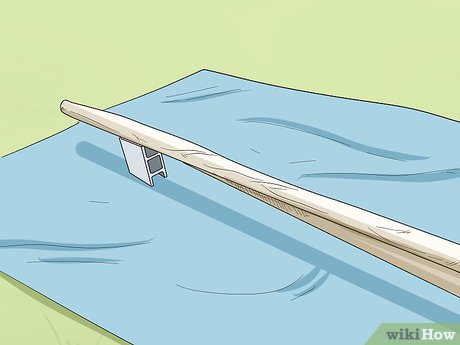
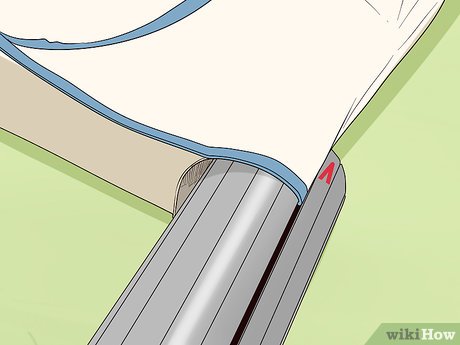 Insert new awning fabric into channels you marked. Get out your new awning fabric and position it over the front of the roller tube. Tuck the ends of the fabric into the channels that you marked and ensure that it is centered. Also, make sure that the valance is in the channel you marked with a "V."[19]
- Awning fabric has beading inside it. Make sure that this beading is inside the channels.
-
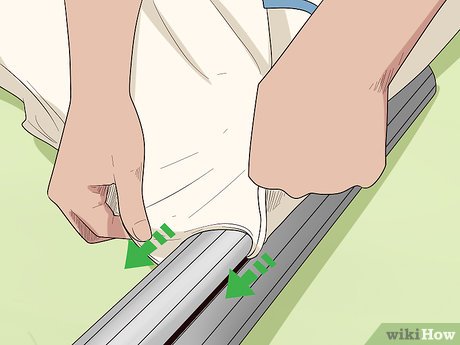 Slide the fabric down the length of the roller tube. Hold the fabric firmly to either side of the 2 channels. Have another person hold the roller tube steady for you. Slowly walk down the length of the tube towards the end, pulling on the fabric as you do so.
- The silicone lubricant should make this step easy. If needed, spray more lubricant into the channels.
-
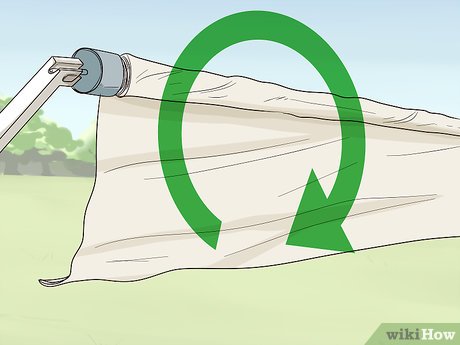
 Roll the fabric onto the roller tube with 1 to 2 other people. Have 1 person at each end of the roller tube. Working with the other person, roll the fabric around the tube. You will need to lift the tube up as you pull the fabric under it. Use a third person to help smooth the fabric as needed.[20]
Part 4 of 4:
Reassembling the Awning
-
 Reinsert the spring assembly and the pop rivets. Pick the spring assembly up and slide it back into the roller tube. Rotate the endcap until the line you made earlier matches up with the awning control lever. Use a pop riveter to reinsert the rivets.[21]
- Do the top rivet first, then rotate the tube and do the bottom rivet.
-
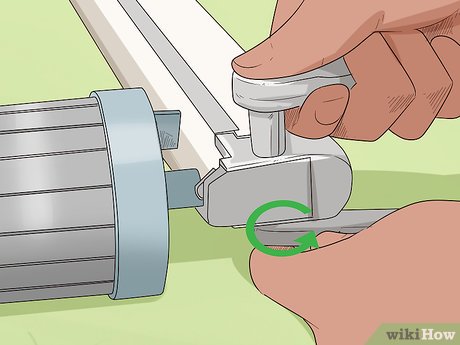
 Clamp the vise back on and rotate it the same amount as before. Place the vise grip back onto the bolt. Lock it into place, then rotate it counterclockwise. Count the rotations as you rotate it, then stop when you reach the number you counted earlier.[22]
 -
 Remove the vise, reattach the awning leg, and peel the tape off. Take the vise grip off first. Pop the awning leg back into place, then reinsert the bolts and screws. Peel the tape off of the bracket.[23]
 -
 Snap the bracket legs back in, then remove the tape and screwdriver. Take the legs that are attached to the RV, and lower them into the legs on the ground. Snap them back into place, then peel the tape off of the top brackets. Remove the Philips head screwdriver from the back/left end of the roller tube and replace the plastic cap.[24]
 -
 Clean and lubricate the track, then cover the open end with tape. Cover the end of a flathead screwdriver with a paper towel, then stick it into the track. Slide the screwdriver back and forth along the track to remove any dirt. Lubricate the track, then cover the split end with tape.[25]
- Spray the inside of the track with spray silicone lubricant, just like you did for the 2 channels on the roller tube.
- The split end of the track is the end that you pried open with the flathead screw driver. The edges are sharp, so cover them with masking or electrical tape.
-
 Slide the fabric into the track with 2 other people helping you. This is just like when you slid the fabric out of the track, but in reverse. Have a person hold up each awning leg. Have a third person slide the end of the fabric into the split end of the track. Walk alongside the RV, tugging on the fabric as you go.[26]
 -
 Remove the tape from the brackets and screw them back into place. Prop the legs on the ground, and roll the awning out by 1 foot (30 cm). Remove the tape from the brackets, then screw them back into place. When you are done, you can snap the legs back into place at the base of the RV.[27]
- For an even more durable finish, coat the screws with a waterproof sealer first. Silicone caulking will work great here.
-
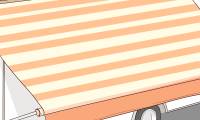
 Snap the legs back into place and straighten the awning. If you have not already, snap the awning legs back into place at the base of the RV. Unroll and reroll the awning a few times until you find the pull strap. If the awning is not straight, unroll and reroll it a few more times, tugging on the edges as needed.[28]
 -
 Reinsert the screws. Find the screws that held the awning fabric to the track. Place them back into the track, and screw them in place. Your awning is now complete.
Was this article helpful?
Your feedback helps us improve.


Reader Comments 0
Sign in with email or Google to join the discussion.