Table of Contents
To remove malware with Bkav, first update the application, then run the scan that matches the situation: a quick scan for a routine check, a full scan when infection is suspected, or a custom scan for a specific drive, folder, or removable device. Review the results before deleting files, keep backups of important data, and scan again after remediation.
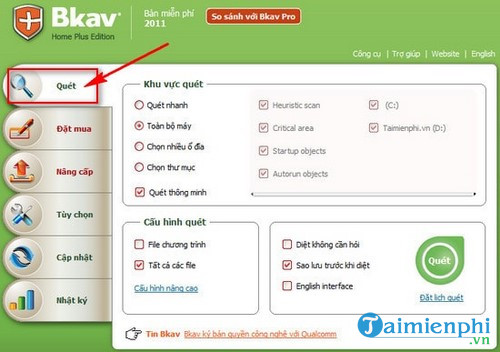
The screenshots in this guide show an older Bkav interface. Current Bkav Home, Bkav Pro, or Bkav Internet Security releases may use different names and layouts, but the safe scanning workflow remains similar.
Before starting a Bkav scan
- Download or update Bkav only through the official Bkav website or the update function in the installed application.
- Make sure the Bkav license or free edition is active and that virus definitions are current.
- Install pending Windows security updates and restart if required.
- Back up important documents to storage that malware cannot rewrite.
- Keep only one real-time antivirus product active. Do not install several full security suites to “increase” protection.
If an infection is already showing clear signs—such as file encryption, ransom notes, unknown administrator accounts, or security settings that immediately turn off—disconnect the PC from untrusted networks before scanning.
Choose the right scan type
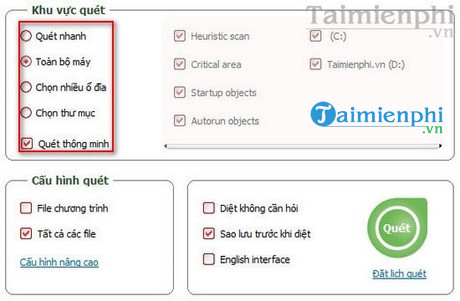
- Quick or smart scan: Examines common infection locations and active areas. Use it for a routine check or an initial assessment.
- Full or deep scan: Examines more of the local system and takes longer. Use it when Bkav reports a threat, suspicious behavior continues, or you need a thorough check.
- Custom scan: Targets selected drives, folders, files, or removable media. Use it for a USB drive or a known download location.
Run a virus scan with Bkav
- Open Bkav and allow it to finish updating. If the product has a separate Update command, run it before the scan.
- Open the Scan section.
- Select Quick, Full, Deep, or Custom scan according to the options offered by your version.
- For a custom scan, select only the drives or folders you intend to examine.
- Review the advanced options. Enable backup-before-cleaning if it is available and you know where the backup will be stored.
- Select Scan and leave the PC powered on until the process finishes.
Review and handle detections
Do not treat every alert as proof that a file is malicious. Security tools can flag administrative utilities, scripts, or uncommon software heuristically. Check the detection name, file path, publisher, digital signature, source, and whether the file is required by a legitimate application.
- Quarantine is usually safer than immediate permanent deletion because it isolates the item while preserving a recovery path.
- Delete or clean only after confirming the item is malicious or following verified Bkav guidance.
- Allow or exclude a file only when you have independently verified it. Never exclude an entire drive or Downloads folder.
- Restart if Bkav needs to remove a component that was in use.
If you enable an automatic-cleaning option, make sure important data is backed up first. Cleaning an infected document or executable can fail or remove the entire file.
Scan again and confirm protection
- Restart Windows after remediation when prompted.
- Update Bkav again and repeat a quick or full scan.
- Open Windows Security and confirm that Windows recognizes Bkav as the active security provider.
- Check the quarantine and scan log so you know what was changed.
- Monitor the PC for redirects, disabled security settings, unfamiliar processes, or renewed alerts.
If the same threat returns, do not keep deleting it without finding the source. A scheduled task, browser extension, synchronized folder, infected USB drive, cracked installer, or another device on the network may be reintroducing it.
Advanced settings and tools
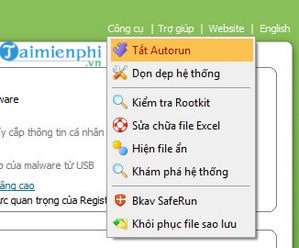
Older Bkav versions exposed protection and internet-control settings under an Options page. Current editions may include real-time protection, web protection, USB scanning, ransomware protection, firewall controls, scheduled scans, or other modules. Leave core protection enabled unless verified Bkav Support asks you to change it for troubleshooting.
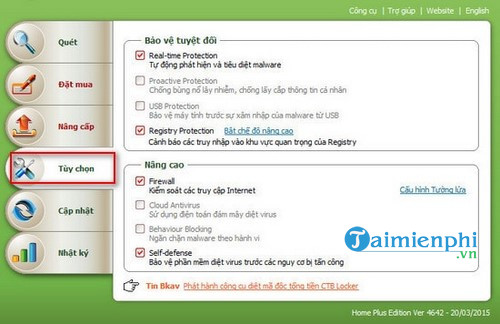
The legacy Tools tab also included system cleanup, autorun controls, and rootkit-related features. Antivirus and cleanup are different tasks: deleting temporary files does not remove an infection, and “speed” tools should not be used as evidence that a computer is secure.
When to contact Bkav Support
Contact support when Bkav cannot remove a detection, the same malware returns, the product will not update, or Windows no longer starts normally. Bkav may ask you to create a diagnostic file with its support utility. TipsMake explains how to use Bkav Tool and exchange the BL, BT, and BS files.
For a second opinion on a non-confidential file or link, compare these online virus scanners. Uploading a file sends it to a third party, so never submit private or proprietary material.
If passwords or session cookies may have been stolen, change important passwords from a different known-clean device and enable multi-factor authentication. For a persistent or high-impact infection, restoring from a known-good backup or reinstalling Windows may be safer than continuing to trust the existing system.
Related Articles
 Use the Cmd Command to Remove Viruses on Windows Computers3 minutes read
 How to Use Bkav Tool to Check for Viruses3 minutes read
 Nearly 3,000 New Viruses Appeared in September3 minutes read
 How to Update BKAV to the Latest Version, Update BKAV3 minutes read
 Bkav 2014 Software Launched Soon with Anti Leak Technology3 minutes read
 How to Remove Viruses on Your Computer - Summary of the Most Effective Way6 minutes read
Reader Comments 0
Sign in with email or Google to join the discussion.