How to Set Up VNC on Mac OS X
Method 1 of 5:
Understanding VNC
-
 Definition: VNC stands for Virtual Network Computing.
 -
 Purpose: VNC allows you to remotely send keyboard and mouse input across a network or the internet from one computer to another and even view exactly what is on the screen of the other computer. This allows you to control a computer like you were sitting in front of it from another room, another building, or even another country depending on the setup.
 -
 How it works: In the most basic of terms when you connect to a remote machine through VNC you see in a window the screen of the remote machine and you are able to control it as if you were sitting in front of it. Any actions taken through the window directly affect the remote machine.
 -
 The components:
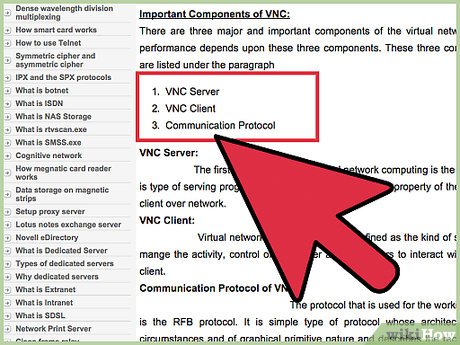
- The Server: The VNC server is the computer whose screen you want to share, this computer runs the server software allowing other computers to connect and control it.
- The Client: A VNC client is any computer connecting to and taking control of a server.
- The Protocol: The protocol used is the method of communication between the client and the server. The protocol is determined by the software and generally the user cannot change it so for the purpose of this document it will suffice to say that it is there but you do not need to worry about it.
Method 2 of 5:
Mac OS X 10.4 or 10.5 - Setup as Server
Mac OS X 10.4 and 10.5 include the server component out of the box so all we need to do is turn it on.
-
 Open your System Preferences from your blue apple menu.
 -
 Click the Sharing icon under the 'Internet and Network' category.
 -
 Highlight the Apple Remote Desktop component in the list of items.
 -
 Click Start to fire up Apple Remote Desktop service.
 -
 If you are NOT connecting with JollysFastVNC or ScreenSharing you need the following steps:
- Click Access Privileges to open the more advanced options.
- Check on VNC viewers may control screen with password and define a password.
-
 You can close the System Preferences. You're done!
Method 3 of 5:
Mac OS X 10.4 - Setup as Client
- To connect to your new VNC server from a remote machine you will need a VNC Viewer but luckily there are a number of free options out there. The steps for setup will depend on the viewer you choose follow the documentation closely and you will have no problems creating a connection.
- JollysFastVNC is currently the fastest and actively developed VNC client including many features not available in any other client.
- Chicken of the VNC is an older client that is confirmed to work with this method simply connect using the IP address of the Server computer. (On the server use Safari or Firefox and goto www.whatismyip.com)
- (Chicken of the VNC is no longer actively developed and has been replaced by a new one called Chicken, http://sourceforge.net/projects/chicken/ )
Method 4 of 5:
Mac OS X 10.5 - iChat Method
Leopard includes screen sharing built into iChat. Although it is not the best method, it is the easiest.
-
 Open iChat using a .Mac account or Bonjour if both computers are on the same network.
 -
 Select your buddy in the main buddies list.
 -
 At the bottom of iChat is a Screen Sharing button that looks like two squares one over the other.
 -
 Select either Share My Screen With or Ask to Share 's Screen.
 -
 iChat takes care of the rest.
- To end the session press [Command]+[Esc] on either computer.
- NOTE: Someone needs to be at the remote computer for this method to accept or initiate the sharing session.
Method 5 of 5:
Mac OS X 10.5 - Finder Method
Server
-
 Open the Sharing System Preferences pane.
- Open System Preferences from your black apple menu.
- Click Sharing.
-
 At the top of the Services list is Screen Sharing. Select it and turn it On.
 -
 Where it says Allow access for:, choose All users.. This will make things easier.
 -
 If you are not using ScreenSharing or JollysFastVNC you have to:
- Click the Computer Settings button.
- From the next window check on Anyone may request permission to control screen.
- On the same window enable the VNC viewers may control screen with password option and choose a password. This allows computers running VNC software that do not support all security methods, such as Chicken of the VNC.
Client
-
 Click somewhere on the Desktop that is empty to activate the Finder.
 -
 Select the Go menu at the top of the screen and then Connect to Server.
 -
 On the window that opens type vnc:// followed by IP address of the computer to which you want to make a connection. (Example: vnc://10.1.1.22)
 -
 Click the Connect button.
 -
 If it works you will have the option to connect as a registered user or by asking for permission.
- If you select registered user you will need to enter a username and password for an account on the server computer.
- If you select to ask for permission someone will need to be at the remote computer and click allow.
Share by
Jessica Tanner
Update 04 March 2020


