Table of Contents
Ubuntu 26.04 LTS can be installed from a bootable USB on a 64-bit PC or laptop. The safest process is to back up the computer, verify the official ISO, boot the live environment, test the hardware, and read the disk-layout summary before committing changes. Erase disk and install Ubuntu permanently deletes the selected drive.
What you need
- A PC with a 64-bit Intel or AMD processor.
- A USB drive large enough for the Ubuntu 26.04 desktop image; it will be erased.
- A current backup of every file you cannot replace.
- The Ubuntu 26.04 LTS desktop ISO from Canonical.
- A USB-writing tool such as balenaEtcher or Rufus.
- The device's boot-menu key and, for encrypted Windows systems, the BitLocker recovery key.
Ubuntu publishes LTS releases every two years and standard security maintenance for Ubuntu 26.04 LTS runs to May 2031. The edition is named Resolute Raccoon.
1. Download and verify Ubuntu 26.04 LTS
Download the 64-bit PC (AMD64) desktop image from the official Ubuntu release page. AMD64 is also the correct image for most modern Intel PCs.
Compare the ISO's SHA-256 hash with Canonical's published checksum. Verification detects a corrupt or unexpectedly modified download before it becomes installation media. Canonical provides a separate verification tutorial.
2. Create the bootable USB
Creating installation media is not the same as copying the ISO file onto a drive. In balenaEtcher:
- Select the Ubuntu ISO.
- Select the correct USB drive.
- Choose Flash and wait for writing and verification to finish.
Check the target twice. The USB-writing step erases the selected device. Disconnect unrelated external drives first. Our comparison of USB boot creation tools includes Etcher and alternatives.
3. Prepare a Windows dual-boot computer
If you intend to keep Windows:
- Back up Windows and create recovery media.
- Save the BitLocker recovery key; firmware or boot changes can trigger recovery.
- In Windows Disk Management, shrink the Windows partition to create unallocated space. Do not create Linux partitions in Windows.
- Disable Windows Fast Startup before sharing NTFS data partitions with Ubuntu.
- Keep both operating systems in the same firmware mode, normally UEFI.
If the installer cannot see a drive that Windows uses, the storage controller may be configured for Intel RST/RAID. Do not switch it blindly; changing that mode can make Windows unbootable unless Windows is prepared first. Consult the computer manufacturer's instructions.
4. Boot from the USB
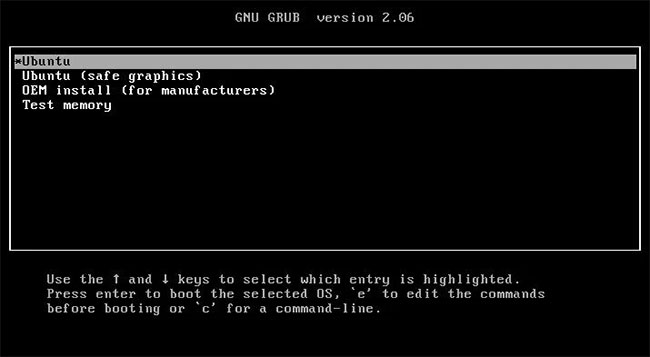
Insert the USB and restart the PC. Open the one-time boot menu—commonly F12, Esc, F2, or F10, depending on the manufacturer—and select the UEFI entry for the USB.
If the standard entry produces a black screen or corrupted display, try the safe-graphics option. Do not disable Secure Boot unless a documented hardware or driver issue requires it; Ubuntu normally supports UEFI Secure Boot.
5. Try Ubuntu before installing
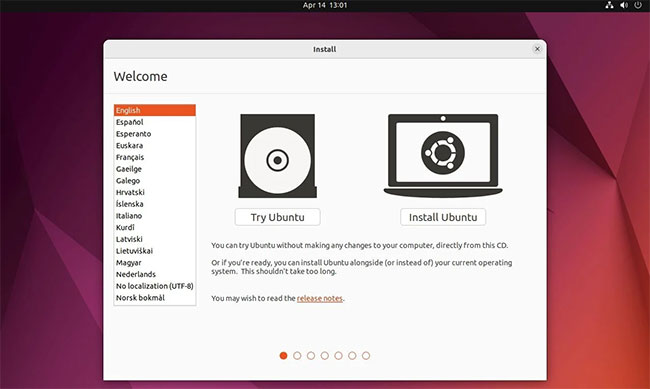
Select Try Ubuntu to start a live session that runs from the USB without installing to the internal drive. Test Wi-Fi, Ethernet, sound, Bluetooth, display scaling, touchpad, keyboard, webcam, sleep, and external monitors.
The live session is temporary. Files and settings usually disappear after restart unless the USB was created with a persistence feature. When the hardware works, open Install Ubuntu.
6. Complete the installer setup
The exact screens and wording can change between point releases. The screenshots below illustrate the main decisions; follow the labels shown by the 26.04 installer.
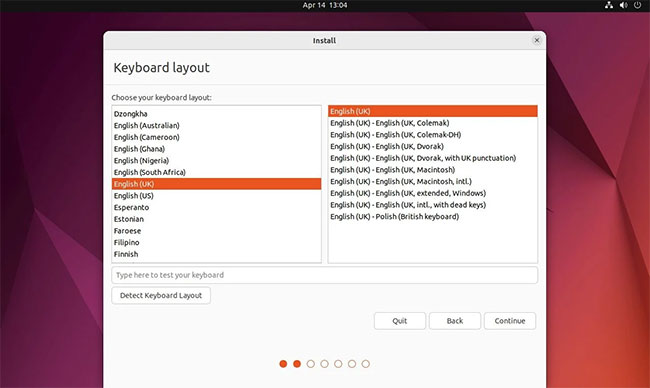
Language, accessibility, keyboard, and network
Select the installation language, any accessibility settings, and the keyboard layout. Connect to a network if you want updates and third-party components during installation, although an offline installation is possible.
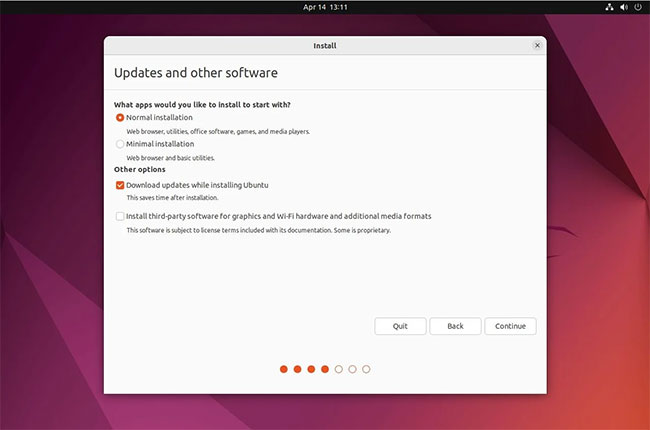
Interactive installation and app selection
Choose the normal interactive installation unless you have a tested automated configuration. Select the default or extended application set according to your needs. Optional proprietary third-party software may improve graphics, Wi-Fi, and media support; review the licensing choice before enabling it.
7. Choose the disk layout carefully
The installer may offer one or more of these choices:
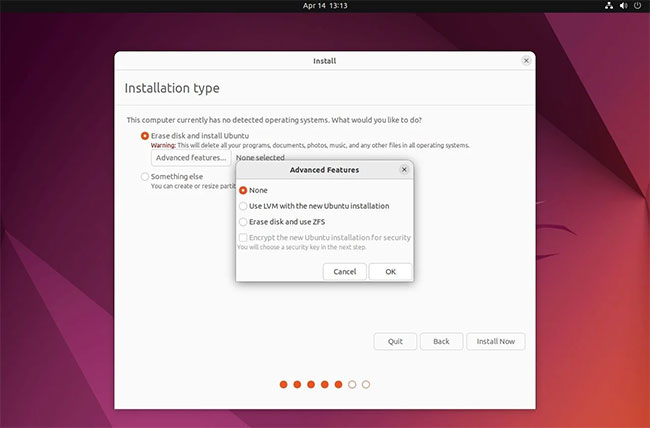
- Install alongside another operating system: preserves the detected system and lets the installer allocate available space. Confirm the proposed sizes.
- Erase disk and install Ubuntu: deletes partitions and data on the selected drive. Use only when the entire drive is intended for Ubuntu.
- Manual installation: lets experienced users create or select partitions and mount points.
Before selecting Install, verify the drive model and capacity, not only its device name. On a UEFI system, an existing EFI System Partition can normally be reused without formatting. A typical manual layout includes an ext4 root filesystem mounted at /; a separate home partition is optional, and Ubuntu can use a swap file instead of a dedicated swap partition.
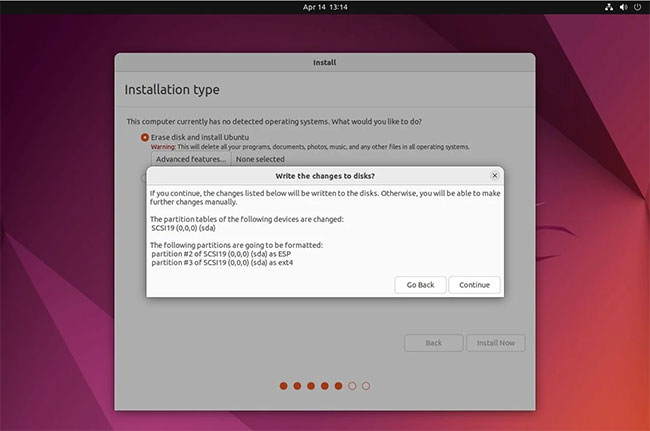
Read the final “write changes to disk” summary line by line. If any partition or drive is unexpected, go back and stop the installation. This is the last practical checkpoint before destructive writes begin.
8. Create the user and select the time zone
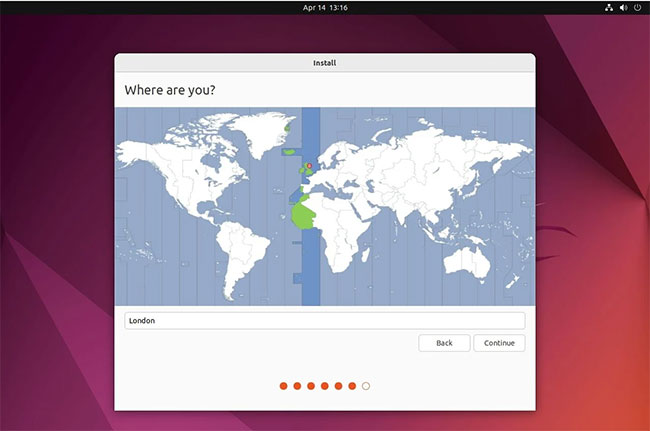
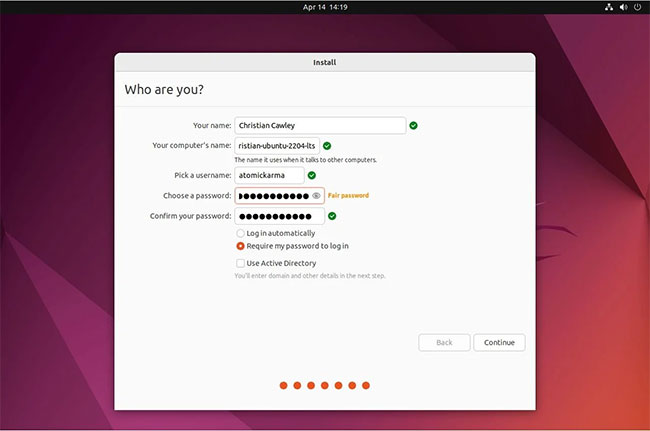
Choose the correct time zone, then enter your name, computer name, username, and a strong password. Automatic login is convenient but exposes the desktop to anyone with physical access; requiring the password is safer for a laptop.
9. Restart and update Ubuntu
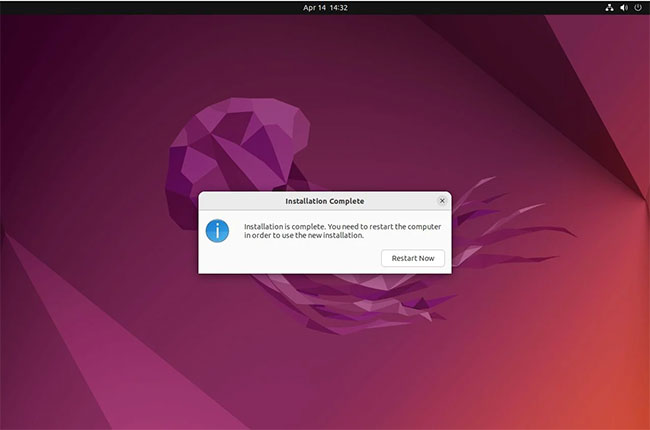
When installation finishes, choose Restart. Remove the USB when prompted and press Enter. If the computer starts the installer again, shut it down, remove the USB, and boot from the internal drive.
After the first login, install updates through App Center/Software Updater or run:
sudo apt update
sudo apt full-upgrade
Restart if the updater installs a new kernel or requests it. Then open Software & Updates > Additional Drivers to review any recommended proprietary driver, restore personal files, and configure backups.
If the installed system will not boot
- Open the firmware boot menu and select the Ubuntu entry.
- Confirm the installation USB has been removed.
- If Windows requests BitLocker recovery, use the saved recovery key.
- For a black screen, try an older kernel or recovery option from GRUB and investigate the graphics driver.
- Do not reinstall immediately if valuable partitions still exist; boot the live USB and back up data first.
Canonical's Ubuntu Desktop installation tutorial remains the best reference for the current installer flow.
Related Articles
 How to Install Ubuntu in Parallel with Windows Using USB9 minutes read
 How to Install Ubuntu 13.107 minutes read
 How to Install Ubuntu 22.04 LTS on PC or Laptop10 minutes read
 How to Install Putty SSH Client on Ubuntu 20.04 LTS4 minutes read
 How to Install Ubuntu on Virtualbox Virtual Machine11 minutes read
 Instructions to Install Ubuntu Directly from the Hard Drive4 minutes read
Reader Comments 0
Sign in with email or Google to join the discussion.