Table of Contents
To access a PC with TeamViewer, install the appropriate official client, then choose either an attended support session or authorized unattended access. Attended support is the better starting point when another person is present to approve the connection. Unattended access needs separate setup on a device you own or administer.
Choose the right module
- Full client: for people who provide support or manage remote connections.
- QuickSupport: for a person receiving help without setting up ongoing unattended access.
- Host: for authorized ongoing access to a remote device.
Platform capabilities differ. A supported mobile app does not necessarily allow the same control as a Windows PC. Check the current license terms as well; business use may require a paid license.
Install the official software
- Open the official TeamViewer download page and choose the module and operating system you need.
- Open the downloaded installer and verify its publisher.
- For the Windows full client, follow the installation prompts and review the license and data-processing terms before accepting them.
- Complete installation and open TeamViewer. Sign in if your chosen workflow requires an account.
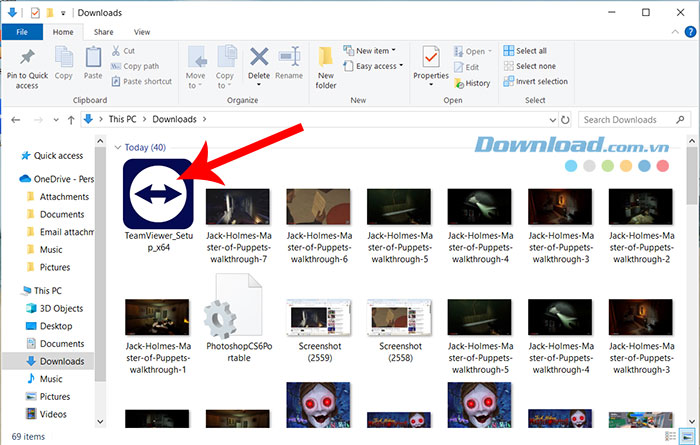
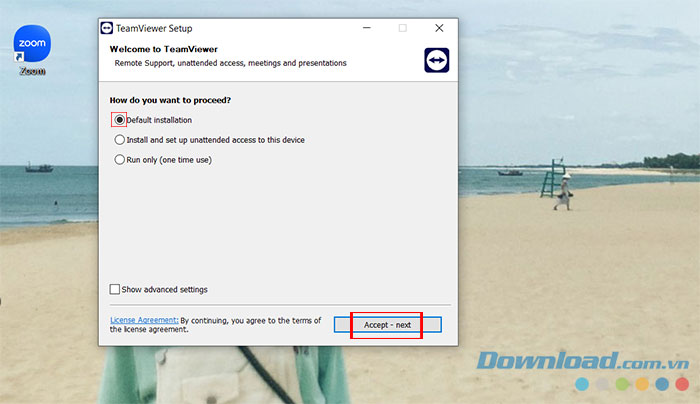
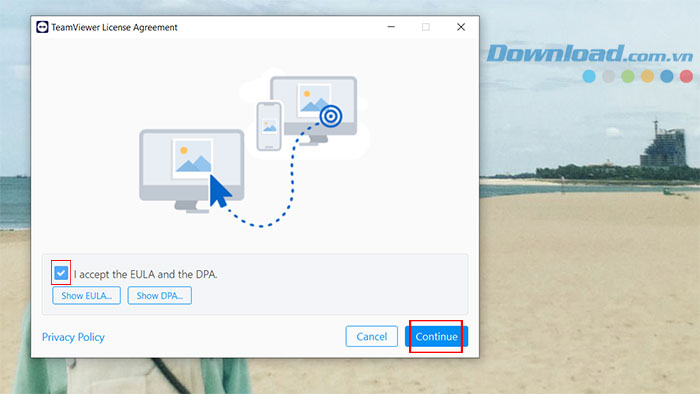
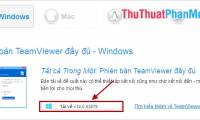
These screenshots show an older Windows setup flow. Current labels may differ; do not select an installation type only because it appears in an old screenshot.
Provide help through a session link or code
- The supporter opens Remote Support and creates a new session.
- They share its session link or code directly with the intended recipient.
- The recipient opens the link or enters the code in the appropriate Get help area. QuickSupport can be used when the full client is not installed.
- The supporter starts the session, and the recipient verifies who is connecting before allowing access.
See TeamViewer's attended support instructions for the current interface. Explain the intended changes and end the session when the agreed work is complete.
Connect with the classic ID-and-password interface
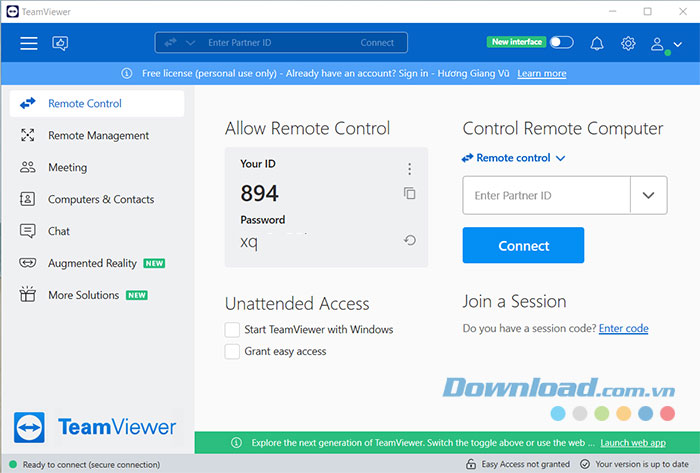
In an interface that uses device IDs, the person providing help enters the remote computer's ID in the Partner ID field and selects Connect. They then enter the remote device's current session password when prompted. The person receiving help shares those session details only with the verified supporter.
This session password is not the person's email, Windows, or TeamViewer account password. Keep the two roles clear: entering a Partner ID connects you to another computer; displaying your own ID lets someone identify your device. TipsMake's remote computer and phone support guide covers the distinction.
Set up unattended access only when needed
For your own PC or an approved managed device, use TeamViewer Host or the supported device-assignment workflow. Assign the remote device to the authorized account, enable the intended access method, and protect the account with two-factor authentication. Test access before relying on it away from the machine.
The PC must remain powered on, online, and configured to run the required service. Sleep, shutdown, network restrictions, and organization policies can prevent a connection. Follow TeamViewer's unattended-access security guidance and document how to revoke access.
Troubleshoot without weakening protections
- Check that both devices are online and using supported, updated clients.
- Confirm the intended session or device ID rather than reusing an old code.
- On platforms that require screen-recording or accessibility permissions, review and grant only the access needed for the authorized task.
- If Windows administrator prompts cannot be controlled remotely, have an authorized person handle them locally or use the documented administrator workflow.
Do not disable UAC or security software simply to make a session work. Never grant access to an unexpected caller claiming your computer needs urgent repairs. When finished, disconnect, review any ongoing access you enabled, and remove it if it is no longer required.
Related Articles
 How to install and use TeamViewer on Linux
 How to use Teamviewer without installation
 Instructions for installing and using Teamviewer
 TeamViewer 15.1.5: Supporting software, free remote access
 Instructions for installing TeamViewer to control remote computers
 How to Install and Use TeamViewer 15 on Windows
Reader Comments 0
Sign in with email or Google to join the discussion.