Table of Contents
Install the TeamViewer Full Client if the device will start and receive remote connections. For one-time incoming help, TeamViewer QuickSupport is usually the lighter option; for a permanently managed computer, TeamViewer Host is designed for unattended access. Download the correct module from TeamViewer's official site or an official mobile app store.
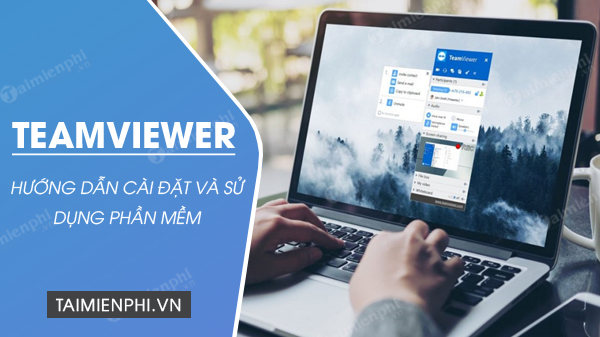
Choose the right TeamViewer app first
| Module | Use it when |
|---|---|
| Full Client | You need to start outgoing sessions and also receive connections. |
| QuickSupport | You need temporary attended help and do not want a full installation. |
| Host | You administer a computer that must be available for authorized unattended access. |
| Mobile Full Client | You want to control a remote computer from Android, iPhone, or iPad. |
| Mobile QuickSupport | You want to share a mobile device's screen for support; control capabilities depend on the operating system and device. |
Go to the official TeamViewer downloads page. Do not use an unexpected link sent by a caller, and never install remote-access software to process a refund or “secure” a bank account.
Install TeamViewer on Windows
- Download the TeamViewer Full Client for Windows. Choose the build that matches the operating system architecture; TeamViewer recommends its 64-bit client for 64-bit Windows.
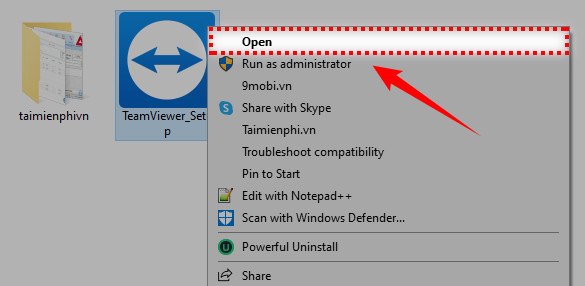
- Open TeamViewer_Setup.exe from Downloads. In the Windows security prompt, verify the publisher is TeamViewer Germany GmbH before selecting Run.
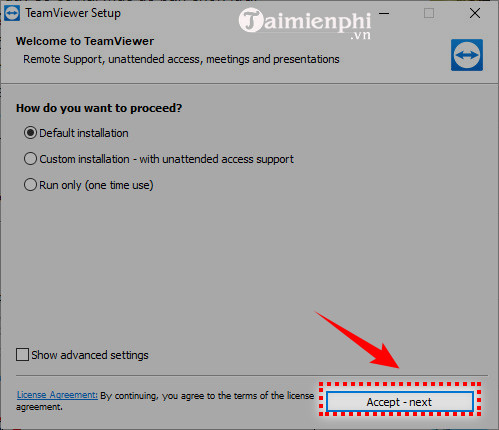
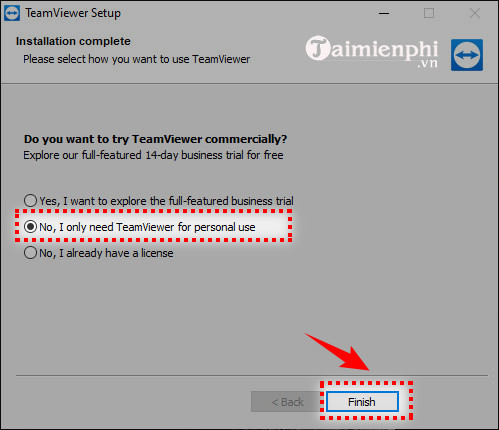
- Select Default Installation for the normal full client, then choose Accept—Next. If the screen offers different choices from the screenshot, use the current on-screen description rather than selecting an option by position.
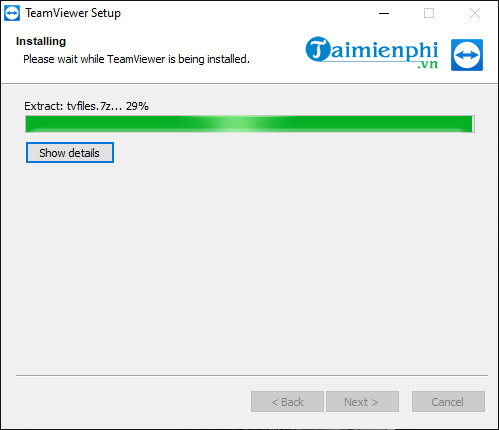
- Wait for the installation to finish. Read the displayed EULA and data-processing agreement, select the acceptance checkbox if you agree, and choose Continue.
Older installers may ask whether the software is for personal use, a business trial, or an existing license. Answer truthfully. Free personal use does not cover commercial work, and installing the client does not activate a paid license.
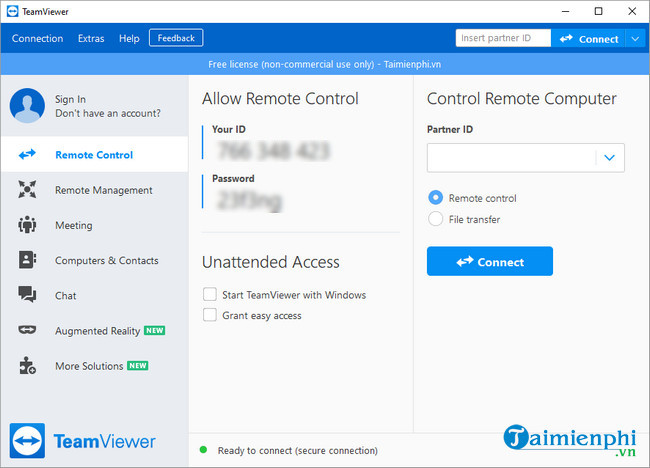
Launch TeamViewer after setup. The current TeamViewer Remote interface can differ from this older screenshot, but it should provide sign-in and remote-support or device controls.
Install TeamViewer on macOS
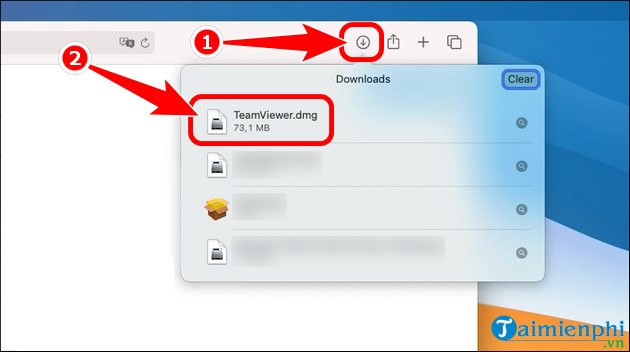
- Download the current macOS full client from TeamViewer. Open the downloaded TeamViewer.dmg file.
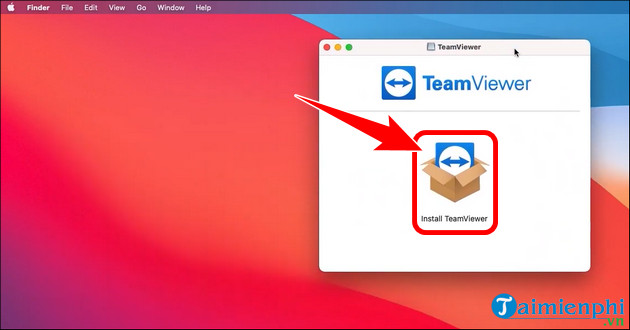
- Open Install TeamViewer Remote. If macOS displays a security alert that identifies TeamViewer as the source, select Open.
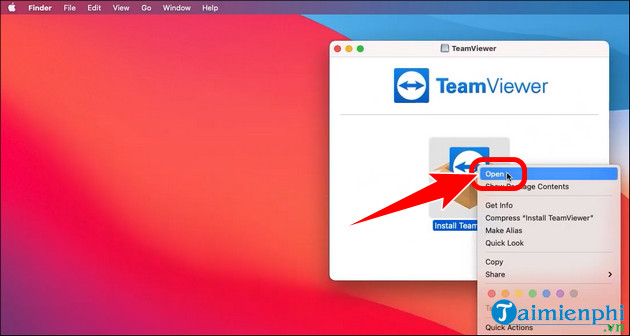
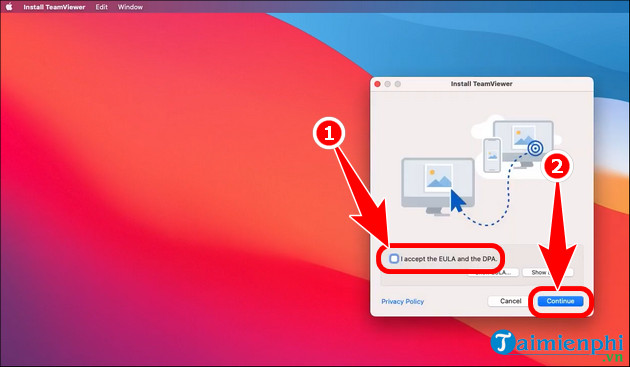
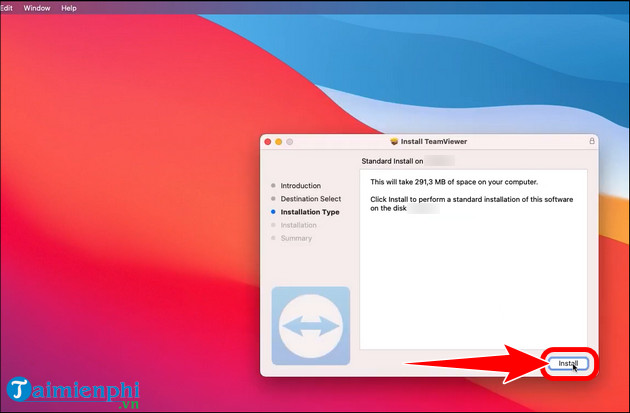
- Review and accept the displayed license and data-processing terms, then continue through the standard macOS installer. Enter an administrator password only in the normal macOS installation prompt.
Grant macOS permissions deliberately
macOS blocks remote-control capabilities until you approve the relevant privacy permissions. Open System Settings > Privacy & Security, or use TeamViewer's Help > Check system access screen. Enable only what the workflow requires:
- Screen Recording lets the remote user see the Mac's display.
- Accessibility allows keyboard and mouse control.
- Remote Desktop supports persistent remote access on applicable macOS versions.
- Full Disk Access is needed for broader file access and transfer; do not grant it if the session does not need files.
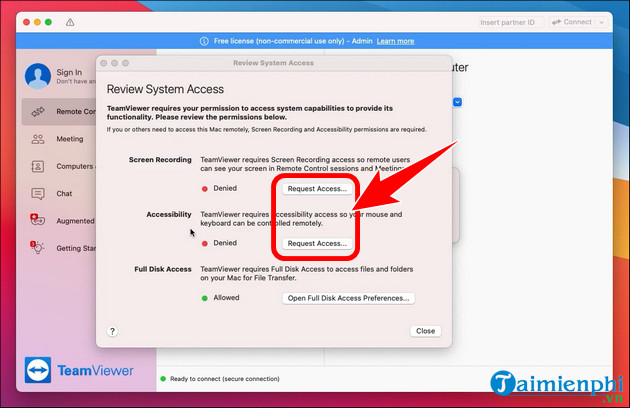
Restart TeamViewer if macOS asks you to do so after changing a permission. The app can open without all permissions, but screen viewing, input, or file transfer may remain limited.
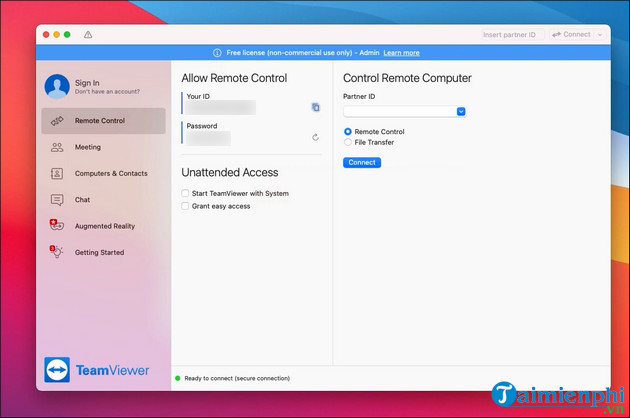
Install TeamViewer on Android, iPhone, or iPad
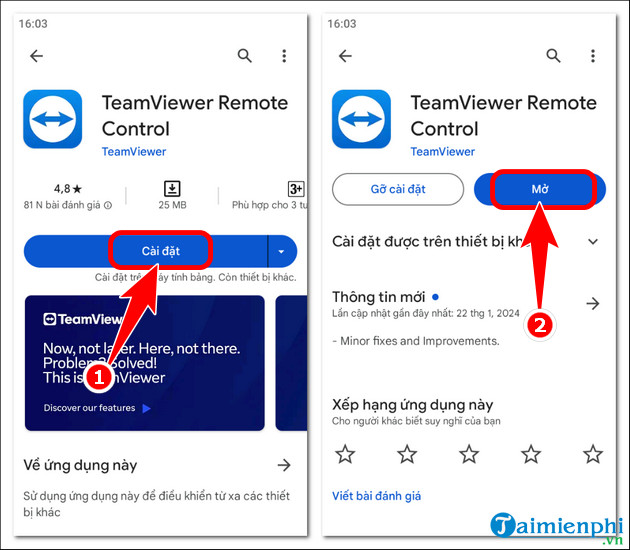
- Open Google Play or Apple's App Store and search for the official TeamViewer app. Choose the Full Client to control a remote computer; choose QuickSupport if the phone itself will receive help.
- Check the developer name, install the app, and open it. Avoid APK files and unofficial mobile builds.
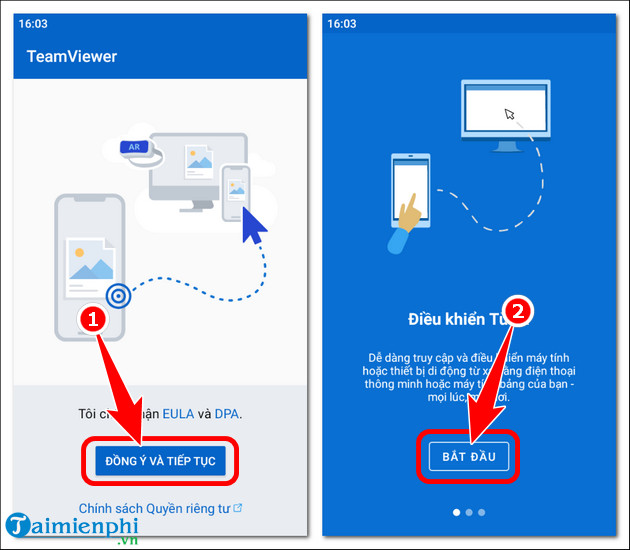
- Read the terms and privacy information shown by the current app, then continue if you agree. Allow notifications, local-network access, screen broadcast, or other permissions only when the feature you are using needs them.
Sign in with a verified TeamViewer account if the app requires it for outgoing connections. Our guide to creating and securing a TeamViewer account covers verification and two-factor authentication.
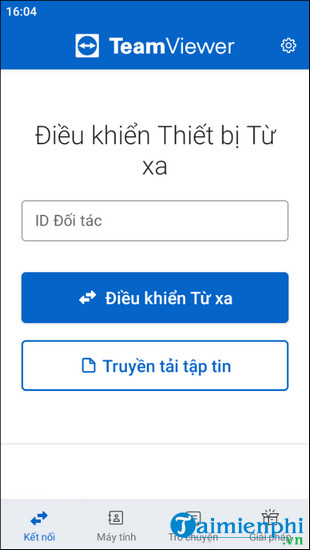
Start an attended remote-control session
The current TeamViewer Remote workflow may use a session link or code, a saved device, or a TeamViewer ID. For an ID-based connection:
- Open TeamViewer on both devices and make sure the remote person expects the connection.
- On the controlling device, enter the remote computer's TeamViewer ID in the remote-control area and start the connection.
- Enter the one-time password shown by the remote computer, or wait for the remote user to approve the session, depending on its configuration.
- On the remote computer, review the request and any available permissions before accepting.
- Disconnect when the work is complete. Do not leave permanent access enabled after a one-time support session.
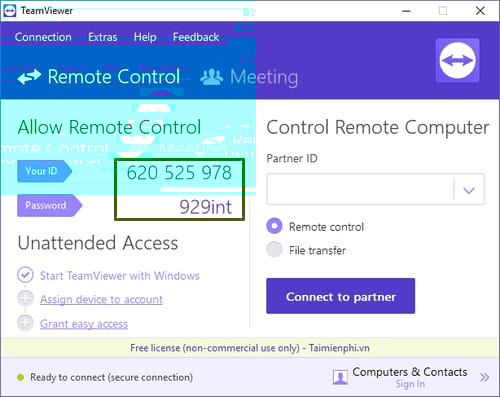
Do not rely on a fixed digit count for the ID or password; the values and interface can vary by product generation and configuration. A TeamViewer ID identifies a device, while a random session password is an authentication credential and must remain private. For more detail, see our TeamViewer remote-control walkthrough.
Installation troubleshooting
- Windows blocks the installer: verify it came from TeamViewer and that the publisher is correct. On a work computer, ask the administrator rather than bypassing application controls.
- Mac screen is black or cannot be controlled: recheck Screen Recording and Accessibility in Privacy & Security, then restart TeamViewer.
- The mobile app cannot find a computer: confirm the remote client is online, the account or ID is correct, and both apps are current.
- You need only one support session: use QuickSupport instead of configuring unattended access.
- You see a commercial-use message: review TeamViewer's current licensing terms; reinstalling does not change the allowed use.
TeamViewer's current installation documentation should take priority when a button label differs from these older screenshots.
Related Articles
 How to Use Teamviewer Without Installation4 minutes read
 How to Installing and Using Teamviewer: Step-by-Step Guide3 minutes read
 Instructions for Installing Teamviewer to Control Remote Computers7 minutes read
 What Is TeamViewer? Explained2 minutes read
 How to Install and Use Teamviewer on Linux7 minutes read
 How to Install Teamviewer8 minutes read
Reader Comments 0
Sign in with email or Google to join the discussion.