Table of Contents
Overview
This guide explains how to install and remove optional features in Windows 11 in clear, practical terms. It covers the key concepts, recommended steps, common limitations, and useful checks so you can make a better-informed decision.
On Windows 11, you can install or remove many optional features to expand the functionality of your computer. For example, you can configure features such as Windows Subsystem for Linux, Windows Sandbox, Hyper-V, Windows Hello Face, etc. Some features can be enabled directly from the Windows management page because the installation is available, while some other features can only be downloaded through Settings. Below are instructions for installing or removing features on Windows 11.
How to install features on Windows 11
Step 1:
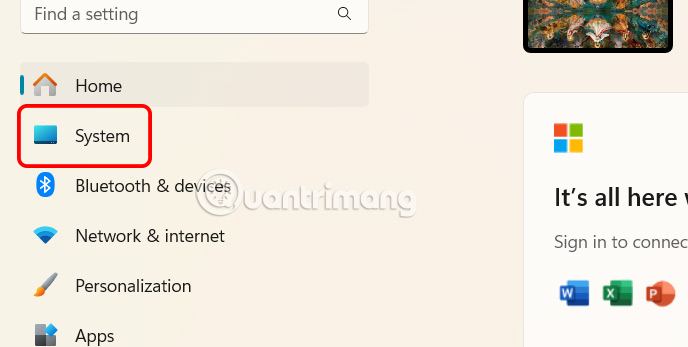
Press Windows + I to open Settings, then click on System on the left side of the interface.
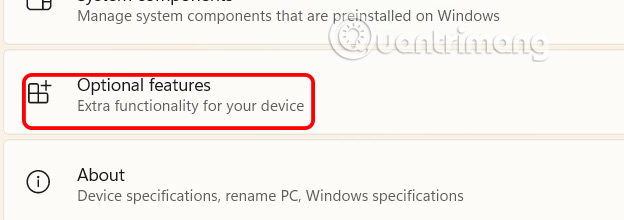
Look at the interface next to it, scroll down and select Optional features.
Step 2:
Switch to the new interface, the user clicks on the View features button.

Step 3:
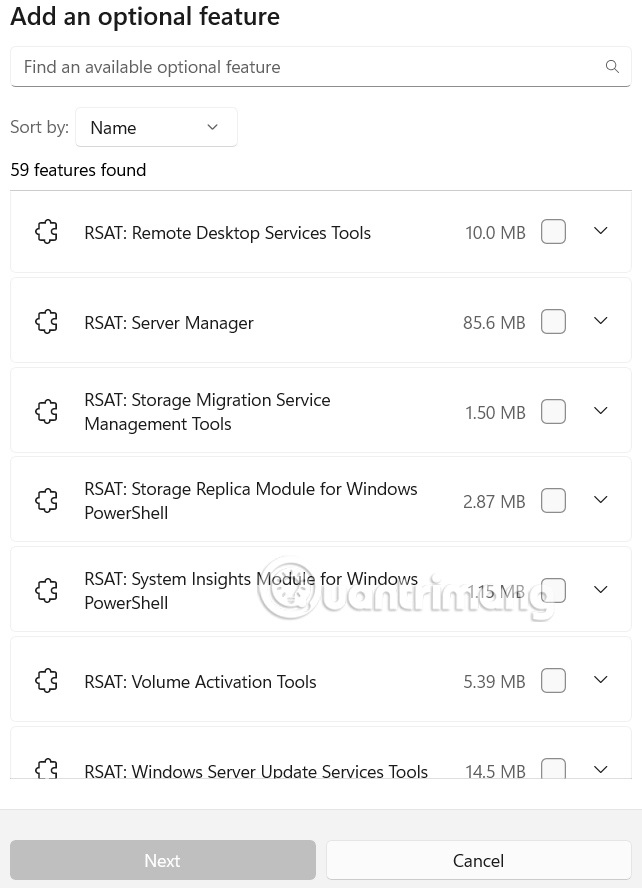
Displays a list of optional features on Windows 11 for you to check, and select the optional features on Windows 11 that you want to install. Click the down arrow to see more details about a feature. You can select multiple features at once.
Step 4:
Finally, click Add to proceed with installing the optional feature on Windows 11. Wait for the installation process to complete.

How to remove optional features on Windows 11
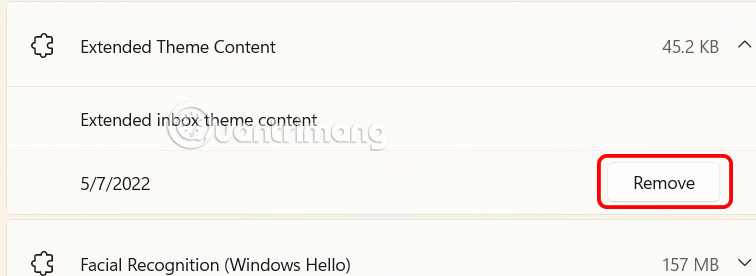
We also need to click on Optional features. Next, you also see the list of optional features and you find the installed optional feature you want to delete.
At this point, the user just needs to click Remove.
How to enable optional features on Windows 11
Features available through the Windows features interface also extend the functionality of Windows 11. However, since these components are included in every setup, you don't need an Internet connection to activate them.
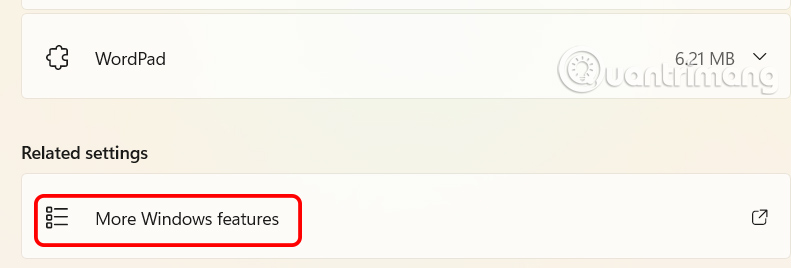
Click on More Windows features below as shown.
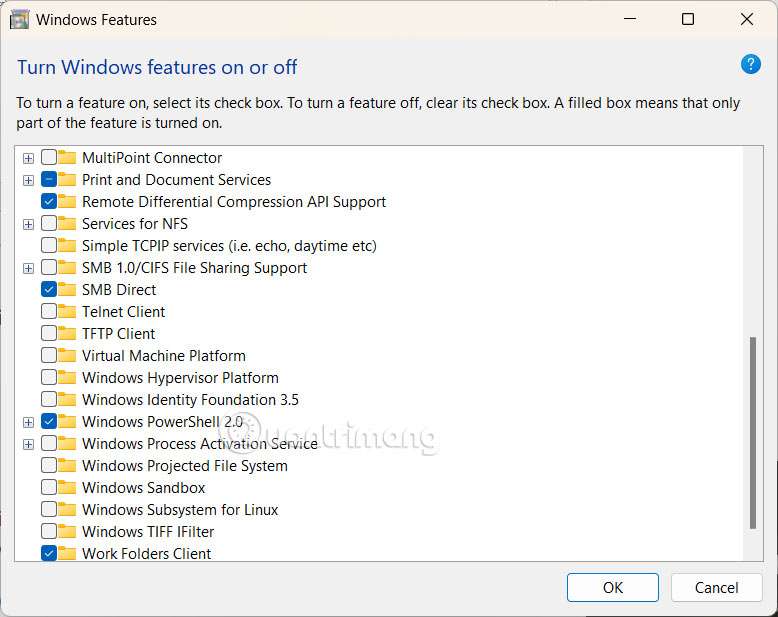
Now you just need to check the feature to activate and press OK.
Key Takeaways
Use the guidance above as a practical reference for instructions for installing features on Windows 11. Check compatibility, follow the steps carefully, and verify important details with official documentation when software, security, accounts, health, or purchases are involved.
FAQ
How do I install and remove optional features in Windows 11?
Follow the steps in this guide in order, confirm each setting before continuing, and save, restart, or reconnect the device when the instructions require it.
What should I check before I begin?
Confirm the correct device, account access, software version, compatibility, and a current backup whenever the process could affect files, settings, or security.
What should I do if the process does not work?
Repeat the steps carefully, check for model or version differences, install available updates, and consult the manufacturer's official support documentation.
Related Articles
 How to Install and Remove Optional Features in Windows 113 minutes read
 What Are the Features of Windows 10 Windows Features?13 minutes read
 Paint and Wordpad Will Become Optional Features on Windows 103 minutes read
 What Is 'Optional Quality Update' on Windows 10?7 minutes read
 How to Remove All AI Features from Windows: Step-by-Step Guide4 minutes read
 Add-ins in Excel: How to Install and Remove3 minutes read
Reader Comments 0
Sign in with email or Google to join the discussion.