Table of Contents
When installing a printer, you may sometimes encounter the 'Windows cannot connect to the printer' error message on the screen.
What does the "Windows cannot connect to the printer" error mean?
The "Windows cannot connect to the printer" error, often accompanied by error codes 0x0000007e, 0x00000002, or 0x0000007a, occurs when the system is unable to establish a connection with the printer. Possible causes include incompatible printer drivers, improperly shared printer functionality on the network, or a malfunctioning Print Spooler service.
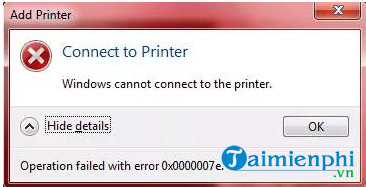 Error code 0x0000007e - Windows cannot connect to the printer
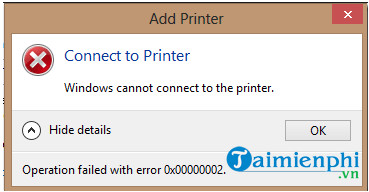 0x00000002 -
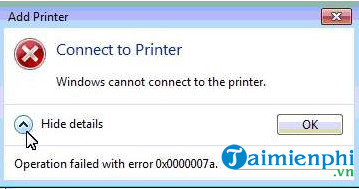 0x0000007a -
Instructions on how to fix the "Windows cannot connect to the printer" error.
Here are some ways to fix the "Windows cannot connect to the printer" error that you can refer to.
1. Method 1: Restart the Print Spooler service
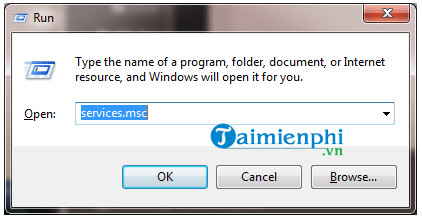
Step 1 : Press Windows + R to open the Run command window. Step 2 : Type services. msc and press Enter or click OK.
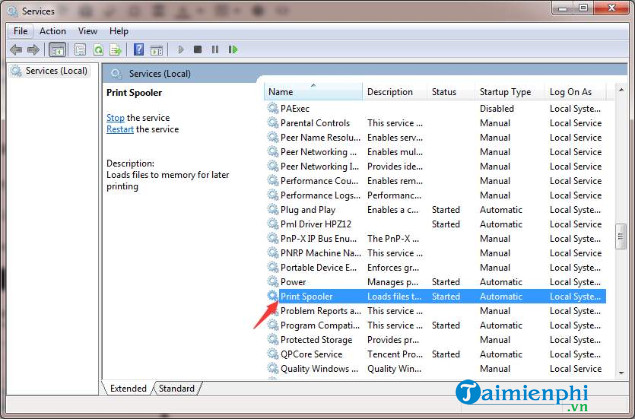
Step 3 : In the Service window, in the Name field, find and double-click the Print Spooler service.
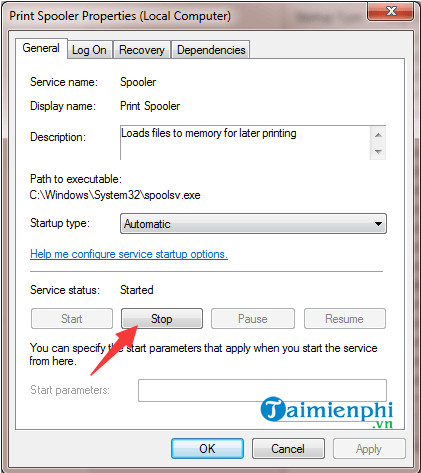
Step 4: In the next window, under Service Status, click the Stop button.
Step 5: Next, click the Start button to restart the service.
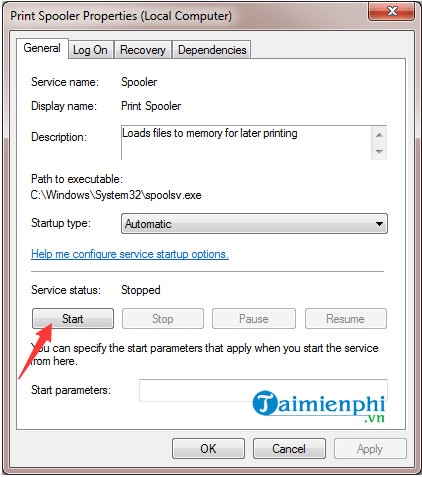
Step 6: Finally, click OK and add the printer again to see if the error persists. - If the error still remains, refer to the following troubleshooting steps.
2. Method 2: Create a new Local port
Follow the steps below to create a new Local port and fix the "Windows cannot connect to the printer" error:
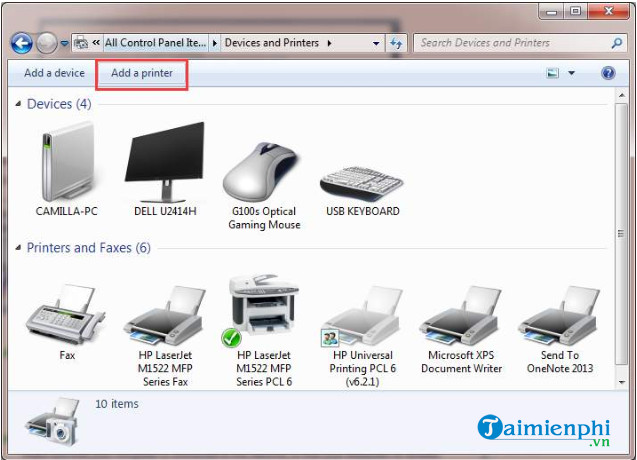
Step 1: Open Control Panel. Step 2 : In the View by section, set it to Large icons, then find and click Devices and Printers.

Step 3: click "Add a printer" in the upper corner of the window. Note that you will need to log in to the computer as an administrator.
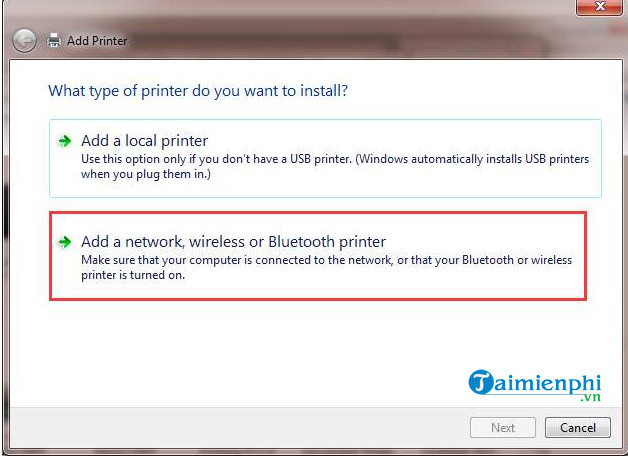
Step 4: Select Add a network, wireless, or Bluetooth printer.
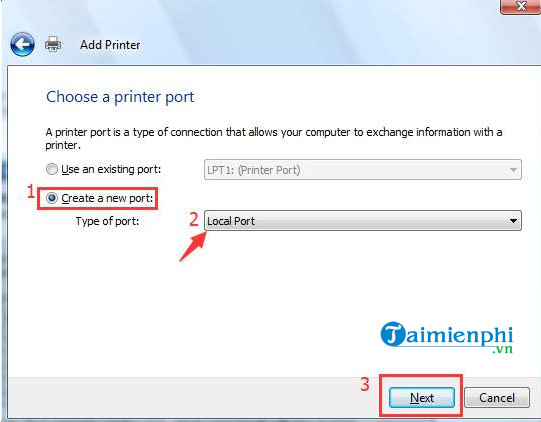
Step 5 : Select Create a new port,set Type of port to Local Port, then click Next.
Step 6: Enter the port name in the box (the port name is the printer address), then click OK.

Step 7: Select the printer model and then click Next.
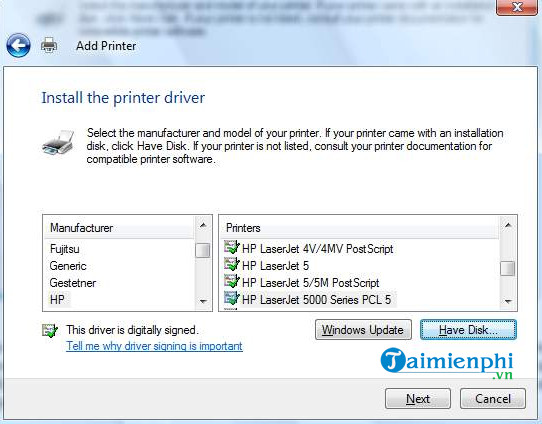
Step 8 : Follow the on-screen instructions to complete adding the printer and check if the "Windows cannot connect to the printer" error persists.
3. Method 3: Delete the printer driver
Sometimes the cause of the error may be the printer itself. Try deleting the printer driver and reinstalling it to see if the error persists.
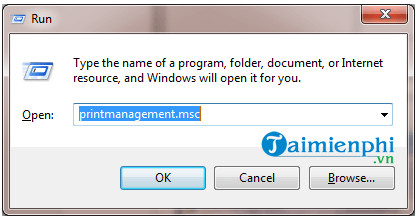
Step 1: Open the Run command window by pressing Windows + R. Step 2: Type printmanagement. msc into the command prompt and press Enter or click OK.
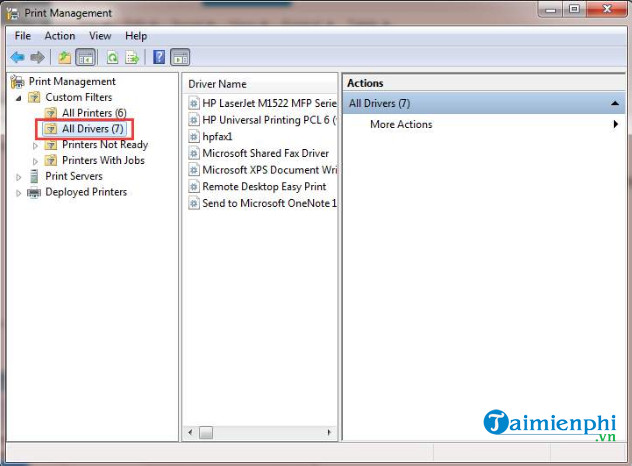
Step 3: In the left pane, find and click All Drivers.
Step 4: In the right-hand pane, find and right-click the printer driver and select Delete.
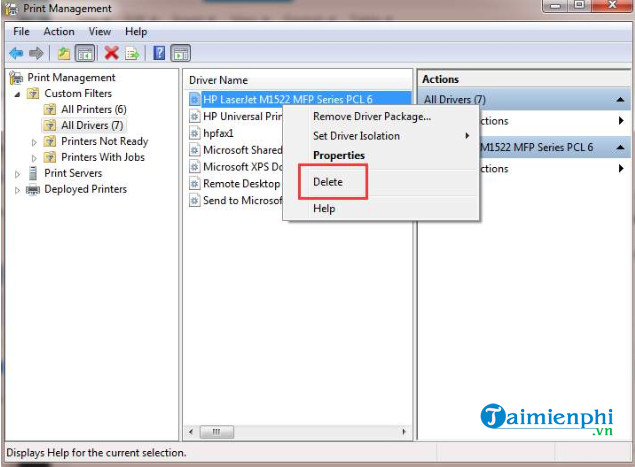
Follow the same steps to remove other printer drivers.
Step 5: Finally, redownload the printer driver and check if the "Windows cannot connect to the printer" error persists. - If you are using a Canon LBP 2900 printer, you can download the Canon 2900 driver here. Then proceed to your computer.
4. Method 4: Manually copy "mscms. dll"
Step 1: Open C:Windowssystem32 and find the file named " mscms. dll ".
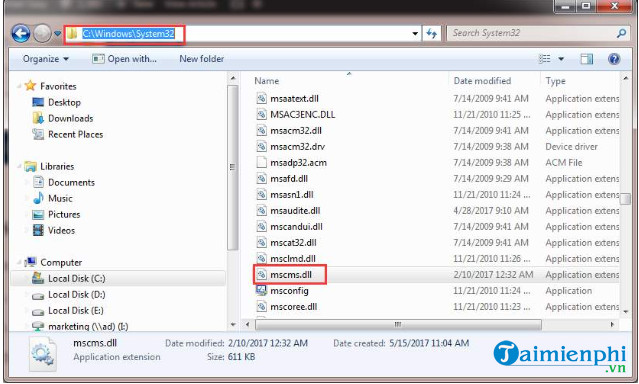
Step 2: Copy the file to the following path:
C:windowssystem32spooldriversx643 if you are using 64-bit windows
C:windowssystem32spooldriversw32x863 if you are using 32-bit windows
Step 3: Try connecting to the printer and check if the error persists.
5. Method 5: Delete Subkey
Warning: Improperly editing Registry keys can cause serious system problems, so you should back up your registry before you begin.
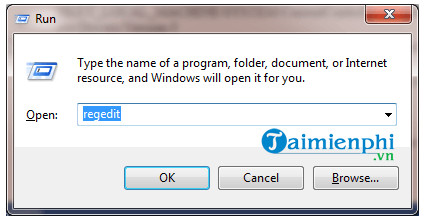
Step 1 : Stop the Print Spooler service. Step 2: Open the Run window by pressing Windows + R. Step 3 : Type regedit and press Enter.
Step 4: In the next window, navigate to the following path:
HKEY_LOCAL_MACHINESOFTWAREMicrosoftWindows NTCurrentVersionPrintProvidersClient Side Rendering Print Provider
Find and right-click Client Side Rendering Print Provider, then select Delete.
Step 5: Restart the Print Spooler service. Step 6: Restart your computer and add the printer again to see if the error persists.
The article above from TipsMake has just guided you on how to fix the "Windows cannot connect to the printer" error. If you have any questions or need clarification on how to fix the printer not receiving print commands from your computer, please leave your comments in the comment section below the article.
Frequently Asked Questions
How can you fix the 'Windows Cannot connect to the Printer' Error in Windows 11/10?
When installing a printer, you may sometimes encounter the 'Windows cannot connect to the printer' error message on the screen.
What does the "Windows cannot connect to the printer" error mean?
The "Windows cannot connect to the printer" error, often accompanied by error codes 0x0000007e, 0x00000002, or 0x0000007a, occurs when the system is unable to establish a connection with the printer.
What should you know about instructions on how to fix the "Windows cannot connect to the printer" error?
Here are some ways to fix the "Windows cannot connect to the printer" error that you can refer to.
Was this article helpful?
Your feedback helps us improve.
Related Articles
 How to Fix Windows Cannot Connect to the Printer Error6 minutes read
 How to Fix Windows Errors Not Connected to the Printer9 minutes read
 Instructions for Fixing the Error 'Windows Cannot Connect to the Printer'4 minutes read
 Instructions to Fix Windows Cannot Connect to the Printer Error Explained6 minutes read
 How to Rename the Printer on Windows 104 minutes read
 Instructions on How to Fix the Error of the Computer Not5 minutes read
Reader Comments 0
Sign in with email or Google to join the discussion.