How to fix Raspberry Pi screen not working error
If you are having problems with your Raspberry Pi screen not working, you are not alone.
If you don't see any HDMI output on your display, this guide provides easy-to-follow troubleshooting tips to help you resolve the issue and get your display working properly again.
1. Check the cable connection
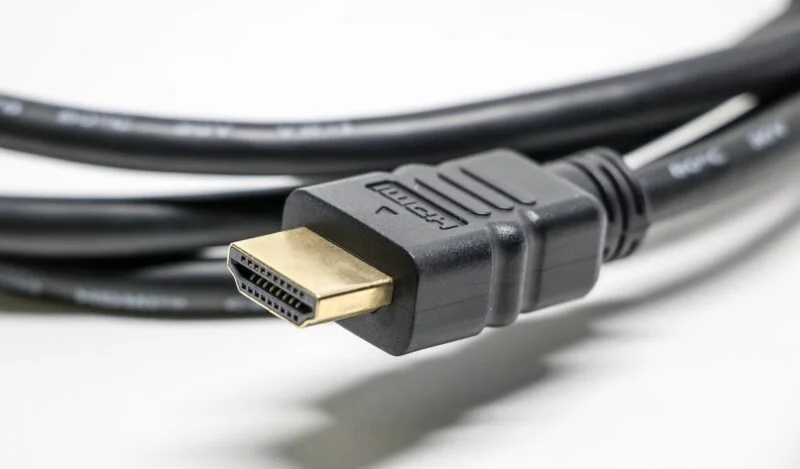
The first thing you should check is the HDMI cable connection between the Raspberry Pi and the display. Is the cable fully connected at both ends? Is it damaged? If you suspect a problem with the cable, change it to another cable and check to see if the problem persists.
Also, to rule out port issues, try connecting other devices using the same cable to see if the display works. If your Raspberry Pi 4 has two HDMI ports, you can try using the remaining port.
Note: The Raspberry Pi 4 by default powers HDMI0 and turns off HDMI1 if it cannot detect a display on that port.
2. Check the SD card

Sometimes, the SD card inside the Raspberry Pi can become corrupted, which can cause the operating system to behave erratically or not work at all (this can happen even on new models). If that's the case with your SD card, the simplest solution is to re-flash the card.
To do so, you can use Raspberry Pi Imager to reinstall Raspberry Pi OS on the memory card. You can also try installing Windows 11 on Raspberry Pi 4 if you have the latest model.
Once you have reinstalled the SD card with the Raspberry Pi OS or selected Windows 11 on the Raspberry Pi 4, make sure the card is securely inserted into the Raspberry Pi's SD card slot. A partially inserted or loosely connected SD card can lead to boot issues or prevent the operating system from loading correctly.
3. Connect the display first, then turn on the power
To establish a successful connection between the Raspberry Pi and the display, you need to connect the display before turning on the Raspberry Pi. This requirement may seem like an inconvenience, especially for those new to Raspberry Pi, but it's a standard procedure, not a glitch.
To enable your Raspberry Pi to recognize a connected display after powering it on – a process commonly known as 'hot-plugging' – specific configurations need to be made in the Raspberry Pi's firmware. The need for these settings stems from the way the Raspberry Pi's hardware or firmware initializes the display settings before loading the operating system.
4. Use shorter cables
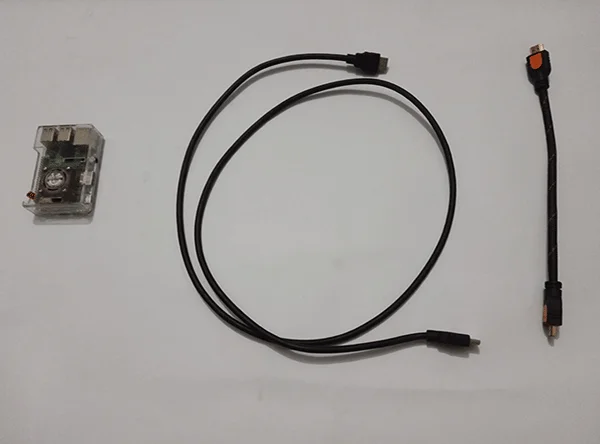
If plugging the cable in before turning on the power doesn't help, the cable may have a problem. Typically, the voltage from the Raspberry's HDMI pins is much higher than the voltage from the other side of the cable. This is called 'voltage drop'.
Where does the voltage go when this happens? Whenever an electron passes through a piece of wire, it tends to leave behind some heat, so the missing voltage becomes heat. For your display and the Raspberry Pi, that means some signals become so weak as to be undetectable as they travel to the other side.
If you want to reduce the electrical energy wasted as heat then you should choose a shorter cable – the shorter the cable, the better. A 30cm long HDMI cable is an ideal choice.
5. Check your screen
What if the problem lies with the screen itself? Older displays may require more current from the HDMI signal due to wear and tear. A shorter cable might work, but that's only good if the monitor can pick up a weak signal.
How weak a signal can the Raspberry Pi produce? It largely depends on the model, usually somewhere under 200mA – maybe even a quarter of that. Raspberry Pi 4 Model B uses a BAT54XV2T5G diode for its output. This diode is limited to 200mA and the signal is shared with all outputs such as GPIO, audio and USB. In contrast, HDMI compliance requirements set a maximum current of 500mA for HDMI signals.
If you have another display available, try connecting your Raspberry Pi to it. This step can help you determine whether the problem lies with the original display's ability to receive HDMI signals.
6. Use the Sources button on the remote control
This is a fix for those using Raspberry Pi on TV. TVs often default to listening from the antenna port instead of the HDMI port and will not automatically receive HDMI output when you plug it in.
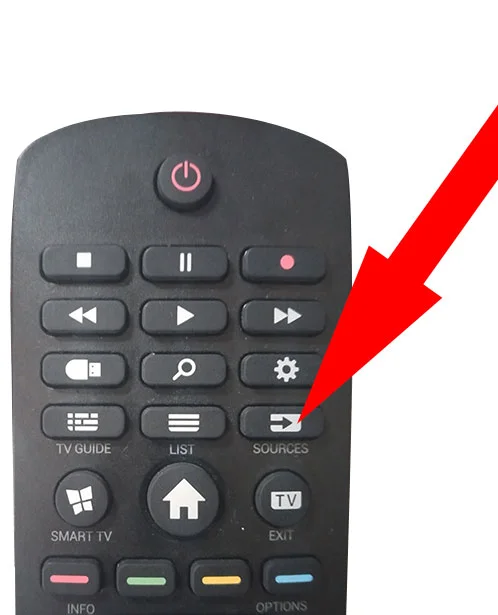
To solve this problem, use the 'Sources' button on the remote control to change the TV's input source.
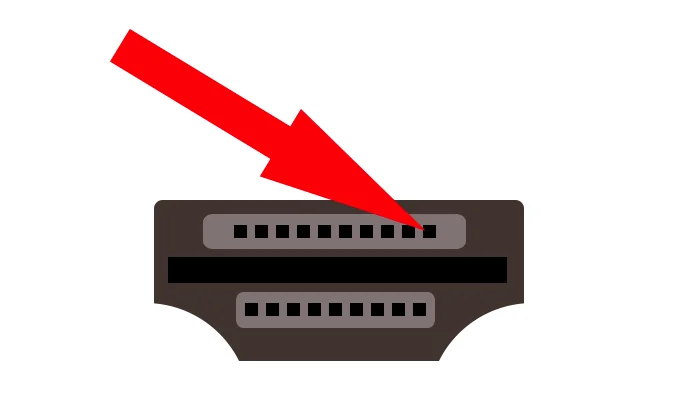
7. Edit config.txt
The 'config.txt' file plays a similar role to the BIOS settings on a traditional computer, allowing you to control low-level system functions and hardware drivers on the Raspberry Pi. Unlike the regular BIOS that you access during boot, adjusting Raspberry Pi settings requires directly editing the 'config.txt' file.
Start by removing the SD card and using a card reader or microSD adapter to connect the card to another computer. It's important to avoid selecting the Format disk option if prompted, as this will erase all data on the card, including the Raspberry Pi OS - just click Cancel instead. Once you have access to the tag's contents, navigate to and open the config.txt file.

In this file, you will need to locate the line #hdmi_safe=1 and uncomment it by removing the # at the beginning of the line. After making this change, save the file, safely remove the SD card from the computer, then reinsert it into the Raspberry Pi. Finally, connect the HDMI cable and turn on your Raspberry Pi to apply the new settings.
If the Raspberry Pi's screen still doesn't work, go back to step 1 and when you get to step 4, look for the following lines:
#hdmi_force_hotplug=1
#config_hdmi_boost=4
Select one then continue to step 5. Remember to re-comment any lines you previously uncommented before anything else.
8. Turn Raspberry Pi into a headless computer
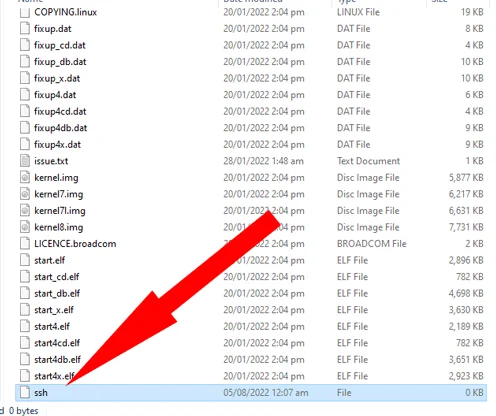
In case your Raspberry Pi refuses to cooperate with an external display - perhaps due to hardware problems or damage - converting it to a headless system can be a practical solution. This approach allows you to bypass the need for a monitor, keyboard, or mouse, controlling the device remotely using the Secure Shell (SSH) protocol for secure access and management from another computer. .
To achieve this, start by removing the memory card from the Raspberry Pi and connecting it to another PC. Create a new file named ssh on the card; This action will automatically enable SSH mode on your Raspberry Pi on startup.
In addition, you need to prepare a network connection by creating another file named wpa_supplicant.conf. This file is necessary to automatically connect your Raspberry Pi to the WiFi network. Using a text editor, open the wpa_supplicant.conf file and enter the necessary network configuration details:
country=US ctrl_interface=DIR=/var/run/wpa_supplicant GROUP=netdev update_config=1 network={ scan_ssid=1 ssid="" psk="" }
- Change the two-letter country code in country=US to your country code. You can check your two-letter country code through the ISO website.
- Enter your WiFi name or SSID in quotes on the ssid="" line and your password on the psk="" line. Click Save.
Check everything, release, then reinsert the memory card into the Raspberry Pi. Once powered on, the Raspberry Pi will automatically find your WiFi SSID, attempt to log in with the password, and allow you to connect to it via SSH.
Tip: If you can't use Open with to open the file in a text editor, you can temporarily add '.txt' to the end of the file name to associate it with Notepad. Remove that part after pasting the code.
You can use an SSH client like PuTTY to log into your Raspberry Pi as long as it is on the same WiFi network as your PC.
- Raspberry Pi launches Touch Display 2 touchscreen, priced at only $40
- The Raspberry Pi 4 has errors in the board design, cannot work with USB-C cables that are 'electronically marked'.
- Fix Raspberry Pi not connecting to WiFi / Ethernet
- How to connect directly to a Raspberry Pi without Internet
- How to add an ADC to Raspberry Pi: What you need to know
- The 5 best options to run Android on Raspberry Pi
- Raspberry Pi Zero vs Model A and B, how are they different?
- How to boot Raspberry Pi 4 from USB or over the network
- How to install Windows 10 IoT Core on Raspberry Pi 4
- 3 ways to boot multiple operating systems on Raspberry Pi
- How to build Android TV Box with Raspberry Pi
- How to install OBS Studio on Raspberry Pi OS
- How to use HDMI-CEC on the Raspberry Pi
- Instructions on 2 ways to install MongoDB on Raspberry Pi
- How to turn off WiFi of Raspberry Pi
- How to install a virtual keyboard in a Raspberry Pi
- 3 ways to edit file boot / config.txt on Raspberry Pi
- 8 best lightweight operating systems for Raspberry Pi


-
 26 amazing applications of the Raspberry Pi mini-computer.
-
How to create a wireless Android Auto dongle for your car using Raspberry Pi
-
5 things Raspberry Pi does better than any other computer.
-
How to boot Raspberry Pi 4 from USB or over the network
-
How to set up Raspberry Pi as a web server
-
7 Projects for the New Raspberry Pi 5 16GB
 26 amazing applications of the Raspberry Pi mini-computer.
 How to create a wireless Android Auto dongle for your car using Raspberry Pi
 5 things Raspberry Pi does better than any other computer.
 How to boot Raspberry Pi 4 from USB or over the network
 How to set up Raspberry Pi as a web server
 7 Projects for the New Raspberry Pi 5 16GB