How to change the mechanical keyboard switch at home with 5 steps
However, no matter how good the product is, after a period of use the product needs to be replaced and repaired. So how to change the mechanical keyboard switch at home?
Can the switch be replaced?
Before answering the question: Can the switch be replaced? then let's learn about the concept related to mechanical keyboard switch?
The switch is shaped like an electrical outlet and is located under each key button of a computer keyboard. In each switch, there is a movement structure with springs to create 2-way elasticity for the keys and metal contact pins.
With this design for mechanical keyboards, it makes it easier and faster to replace, repair or clean compared to normal keyboards because there is no need to remove the entire keyboard, just remove the damaged key button. replaceable and repairable. Doing so will save time as well as labor costs.
Mechanical keyboards have a completely different structure than normal keyboards. The keyboard is usually a strong board with a rubber button to receive commands from the user. When damaged, there will be signs of damage spreading to the next keys, even damage to the circuit board.
In contrast to the mechanical keyboard, which has a different design, the keys are not linked together, or if they are, they are linked together in small groups. separate subgroups. The cost as well as the time to repair takes place quickly and conveniently. From here can completely answer the question: Can the switch be replaced? It can be completely replaced with small cost and quick repair time.
How to replace mechanical keyboard switch
How to replace the mechanical keyboard switch? Is the next question that people who are interested in mechanical keyboards or are using mechanical keyboards are interested. How to replace the mechanical keyboard switch will have the following steps:
Step 1: Prepare
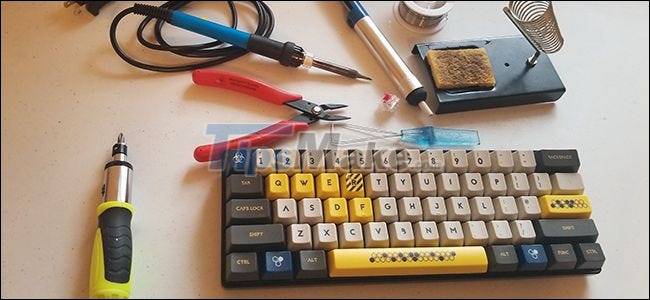
With this step, the person who replaces the mechanical keyboard switch needs to prepare tools: hand-held heat sealer, screwdriver, pliers, switch clip and keycap clip.

Step 2: Clean the keyboard that needs to be repaired or replaced.
This step is extremely necessary in replacing the switch that many people have overlooked. In the process of using a mechanical keyboard, very small dust particles can creep into each key on the computer keyboard, which invisibly causes button jamming, which directly affects the user. Cleaning before replacing the mechanical keyboard switch will make disassembly easier.
Step 3: Remove the keycap
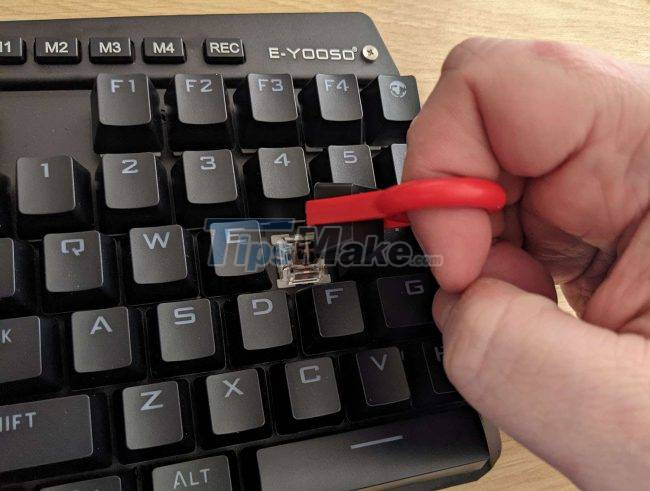
In this step, the first thing to do is to use the keycap clip to remove the keycap that needs to be replaced. If you don't have a clamp, you can use a similar tool or use your hands to disassemble it. Note that when lifting the keycap, it should be straight, not tilted, making it difficult to disassemble and affect the switch inside.

Step 4: Disassemble the switch that needs to be replaced.
First, you need to look closely at the switch to clearly see the connection. In each switch, there will be 2-3 small welds, about the size of a small ballpoint pen. Take the soldering machine to melt the weld and then use the switch to remove the switch that needs to be replaced completely.
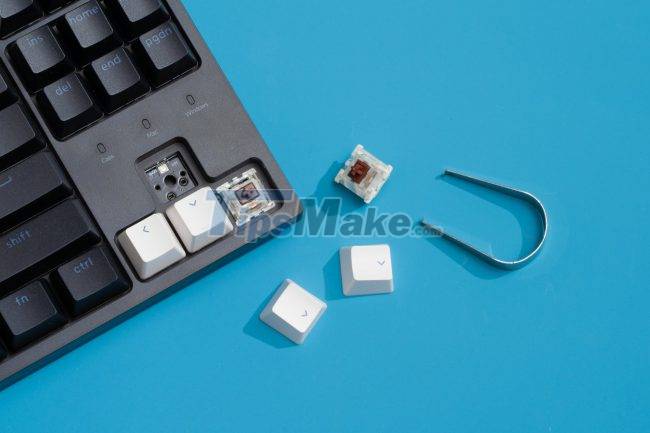
If the old switch is firmly plugged in, it is difficult to disassemble in one go, you can completely shake the two sides evenly to make the removal process easier. How to use the switch to pull out the switch: clamp it in the groove, shake it gently on both sides to pull it out, replace the switch with a new one, and re-solder it.
Next, look closely at the new switch to clearly see the exact position of the solder joints, pins and put the switch in the right position. After placing in the correct position as the original, then proceed to weld the joints. Note that the foot of the switch is quite thin, easy to break, so when plugged in, you need to be gentle if you don't have a dedicated tool.
Step 5: Test the new switch before re-attaching the keycap.
This step is extremely important before attaching the keycap because the switch that is loosely attached or not with the correct power will not be able to work. Need to check carefully by pressing to test the sensitivity of the keyboard and then proceed to install the external keycap.
Above are 5 steps for you to replace the mechanical keyboard switch at home. The way to replace the mechanical keyboard switch is extremely simple and cost-effective. In addition to regular maintenance, with these 5 simple replacement steps, you can completely design a new look for your keyboards and make them more unique and attractive. Doing this helps you increase work productivity, achieve high efficiency.
How to change the mechanical keyboard switch without tools
Especially in mechanical keyboards is a way to change the mechanical keyboard switch without tools. This means that there are some mechanical keyboard switches that are designed to support hot-swapping on the spot, just using a switch clip. Corresponding to the fact that you do not need to use a soldering iron to disassemble or reattach the switch, just shake it gently to remove and reinstall it, you already own a new switch.
However, when replacing the mechanical keyboard switch, you do not need this tool when replacing the new switch, you should be very careful because this switch is linked by a plug instead of a solder joint. But the small size plug is usually very thin and easy to break, just a strong action can break the pin, so when replacing such a mechanical keyboard switch you need to be very careful.
The replacement steps are the same as mentioned above, just don't use a soldering iron. When disassembling, use the switch to get into the slot and gently shake the two sides to pull the switch out.

With the two ways to replace the mechanical keyboard switch mentioned above, users can consider choosing the type that suits their own needs as well as their budgeted budget.
In the process of regular use, cleaning and maintenance will help the mechanical keyboard to have a longer lifespan and better serve the needs of the user. The keyboard is suitable for all users, for different work purposes, especially receiving positive feedback from gamers or professional gamers.
Above all, when reused, it saves quite a bit of cost from repair, maintenance or replacement because users can completely repair themselves at home, so the product has received a positive reception from users. from its launch until now.
If you are using a regular keyboard then try switching to a mechanical keyboard. So with the way to change the switch will help you save more repair costs. Please refer to the latest mechanical keyboard models at the Website or chat on Fanpage for advice.