How to Find Your Apple ID
Method 1 of 2:
Using iPhone or iPad
-
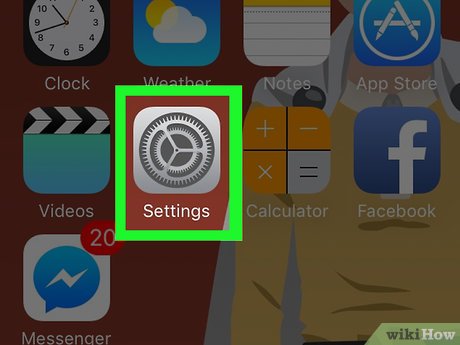
 Open Settings. It's a gray app that contains gears (⚙️) and is typically located on your home screen.
 -
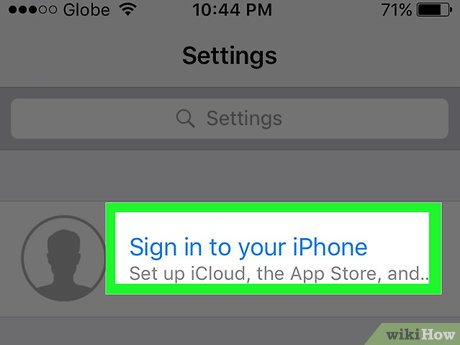
 Tap Sign in to (Your Device). It's at the very top of the Settings menu.
- If you're already signed in to your device and you see your name at the top instead, tapping on your name will take you to a page that displays an email address bellow your name. That email address is your Apple ID.
- If you are running an older version of iOS, instead tap iCloud and check to see if you are signed in to your device at the top. If you are signed in you will see an email address displayed under your name. That email address is your Apple ID.
-
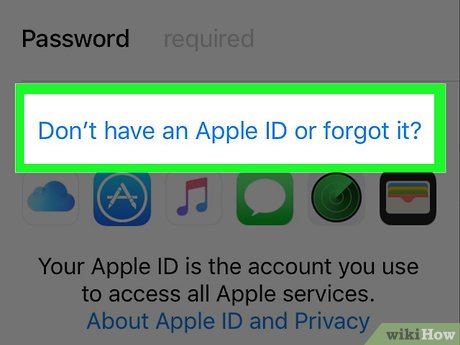
 Tap Don't have an Apple ID or forgot it?. It's below the password field.
- If you are running an older version of iOS, instead tap Forgot Apple ID or Password?
-
 Tap Forgot Apple ID. It's in the center of the pop-up menu.
 -
 Tap Forgot Apple ID?. It's below the "Apple ID" field.
 -
 Enter your information. Type your first name, your last name, and your email address into the labeled fields.
 -
 Tap Next. It's in the upper-right corner.
 -
 Enter your phone number. Type in the phone number associated with your Apple ID, ending in the last two digits displayed on the screen.
 -
 Tap Next. It's in the upper-right corner.
 -
 Tap Reset with Phone Number. It's at the bottom of the screen.
- A verification code will be sent by text message to your number. If the verification code doesn't autofill, enter it on the screen and tap Next.
- If you don't have access to the phone number, tap Don't have access to your trusted number? at the very bottom of the screen and follow the on-screen prompts to recover your Apple ID.
-
 Enter your passcode. Enter the passcode you use to unlock your phone's screen.
 -
 Enter a new password. Type a password into the labeled space and re-enter on the next line.
- Your password must have at least 8 characters (including a number and an uppercase and lowercase letter) with no spaces. It also shouldn't have three consecutive characters (ggg), be your Apple ID, or a previous password you've used in the last year.
-
 Tap Next. It's in the upper-right corner of the screen.
 -
 Tap Agree. If you're not automatically signed into iCloud, enter your new password into the labeled field.
- Your Apple ID will be displayed in the field labeled "Apple ID."
-
 Tap Sign In. It's in the upper-right corner of the screen.
- The screen will intermittently display the message "Signing into iCloud" as it accesses your data during the sign-in process.
-
 Enter your iPhone's passcode. This is the unlock code you established for your device when you set it up.
 -
 Merge your data. If you'd like any calendars, reminders, contacts, notes, or other data already stored on your iPhone to be merged with your iCloud account, tap Merge; if not, tap Don't Merge.
- Your Apple ID, which is an email address, will be displayed under your name at the top of the screen.
Method 2 of 2:
Using Desktop
-
 Open the Apple menu. Do so by clicking on the black Apple icon in the upper-left corner of the screen.
 -
 Click on System Preferences. It's near the top of the drop-down menu.
 -
 Click on iCloud. It's an icon containing a blue cloud on the left side of the window.
- If you're signed into your Mac with your Apple ID, your Apple ID will be the email address under your name in the left pane of the window.
- If you're not signed in, you'll be prompted to enter your Apple ID and password.
-
 Click on Forgot Apple ID or password?. It's below the password field in the dialog box.
 -
 Click on Forgot Apple ID. It's located near the bottom of the dialog box.
 -
 Click on iforgot.apple.com. It's in the text of the dialog box or enter iforgot.apple.com into your browser.
 -
 Enter your information. You will need to enter your first name, last name, and email address associated with the Apple ID. You can enter in any prior email addresses as well, but this isn't required.
- Click on Next when you've finished filling out the form.
- There is a very good chance that your Apple ID is your current email address.
-
 Verify your birthday. You will need to enter in your birthday before you can proceed with retrieving the Apple ID.
 -
 Choose how you want to retrieve the Apple ID. You are given two options for retrieving your Apple ID: you can receive your login information via email, or you can answer a couple security questions and have it displayed in your browser.
- If you choose to have the information sent to your email, it will be sent to your current email address as well as any other email addresses you have associated with the account.
- If you choose to answer security questions, you will be asked two of the questions you set up when you created the ID originally.
-
 Reset your password. If you chose to answer the security questions, your Apple ID will be displayed on the next page. You will be asked to create a new password for your Apple ID. If you asked to retrieve your Apple ID via email, you will receive an email with a password reset link. The email address you received the message on is your Apple ID.
Share by
Micah Soto
Update 24 March 2020


