Table of Contents
This practical guide explains how to fix bad system config info with clear steps and useful context. It also covers common requirements, potential problems, and the details that can help you get better results.

Bad System Config Info error mainly occurs because an important system file is corrupted or duplicated. The system responds by shutting itself down to protect the device.
In some cases, users see and stop 0x00000074 with the message Bad System Config Info. This error occurs when your device has corrupted Regedit or corrupted BCD file data. The BCD file contains important data related to system startup.
If you have encountered this error, don't worry too much. Follow the instructions below to fix the problem without having to reinstall the new operating system.
Fix Bad System Config Info
Repair BCD. Files
As mentioned, BCD files are very important for the smooth running of the system. You can fix them by following the instructions below. You need to have a USB Boot / USB rescue.
Please create a USB Boot Win according to the instructions in this article or with the Media Creation Tool. Then you plug the USB into the computer, the Windows installation interface will appear.
Select the installation language and then click Next.

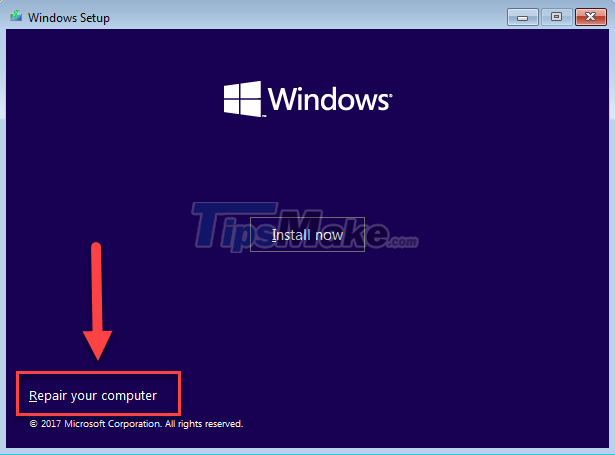
In this step, you do not click Install now, but select Repair your computer.
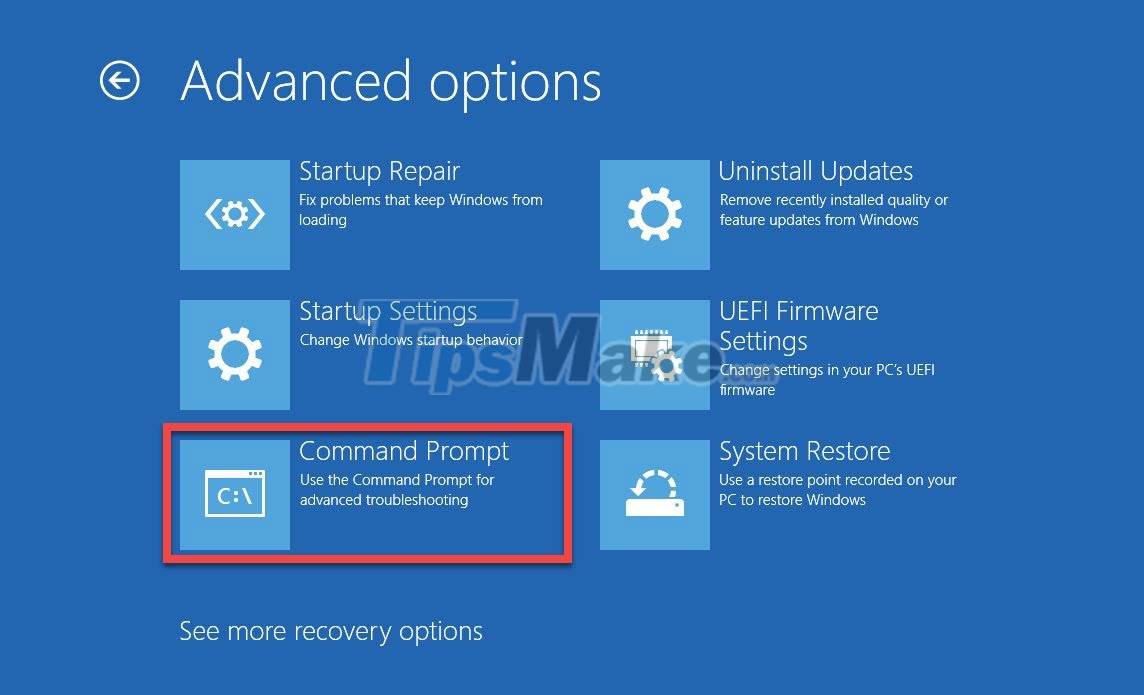
You navigate to Troubleshoot >> Advanced options >> Command Prompt.
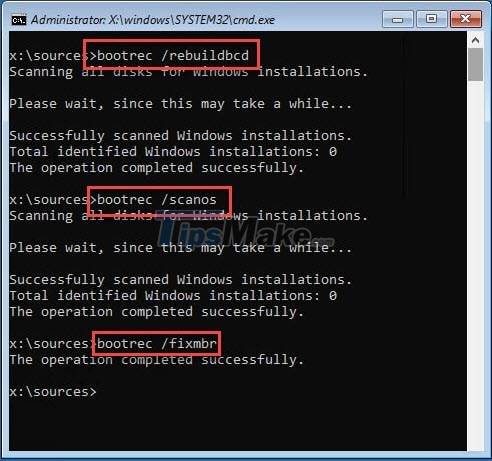
In the Command Prompt, enter the following commands in turn to edit the BCD file.
- bootrec /rebuildbcd
- bootrec /scanos
- bootrec /fixmbr
Now type exit to exit Command Prompt and then restart the computer. Check if the problem is resolved or not.
Edit the BCD. File
Another problem with a BCD file is that it can incorrectly store the amount of RAM available, the number of CPU cores, or any other information that is different from the actual amount. You can edit the BCD file again by entering the following commands in the Command Prompt to fix the error.
Do the same as above to open the Command Prompt in the Troubleshoot interface.
Type the following commands one by one to edit the BCD file (each line is one press of Enter):
- bcdedit/deletevalue {default} numproc
- bcdedit/deletevalue {default} truncatememory

You can now type exit to exit and restart the computer.
Driver Update Failed
Faulty drivers are often the cause of BSoD, especially after you've just changed a piece of hardware. In such a case, you should update any faulty drivers on the system if any.
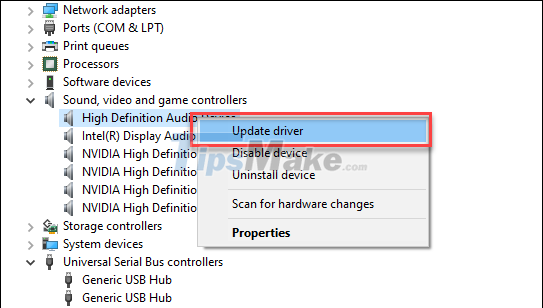
To update the problem driver, press Windows + X, and then open Device Manager.

You open each Device Manager category to see if there are any drivers marked with a yellow exclamation point.
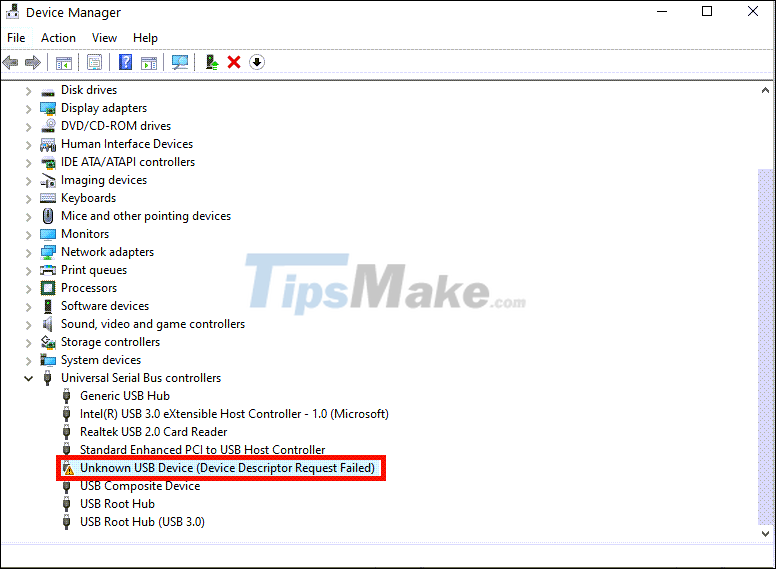
If so, right-click it and select Update Driver.
Select Search automatically for drivers so that the system automatically searches and installs the latest drivers for the device. If you downloaded the driver on the vendor's website, select Browse my computer for drivers.
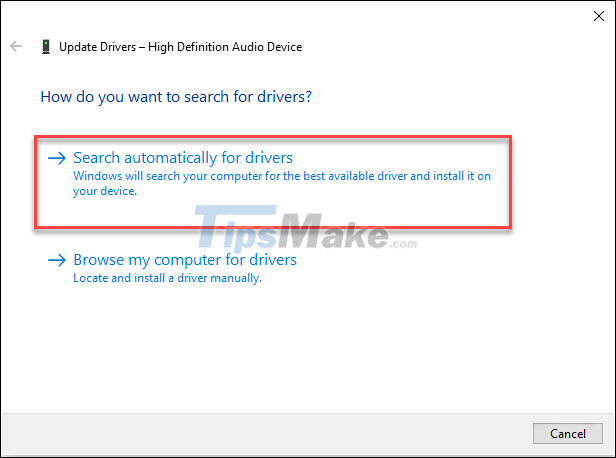
Do the same for all drivers with an exclamation mark next to them. Once done, your problem will be solved.
Run Memory Diagnostics
You can also perform a test using the Memory Diagnostics tool to make sure that there aren't any memory problems.
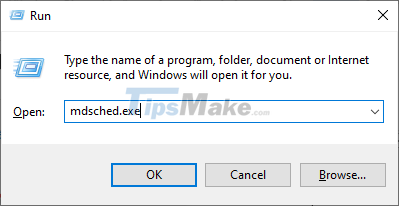
To run a memory test, press Windows + R to open the Run dialog box. Type mdsched.exe and press Enter.
Select Restart now and check for problems, the computer will restart immediately.
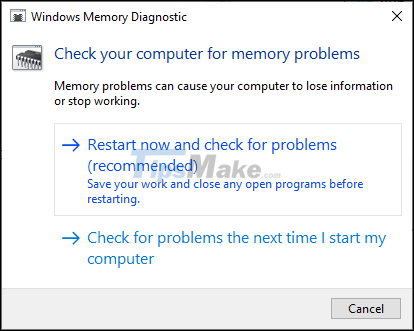
When the computer restarts, it automatically goes into memory scanning mode to find any bad sectors. If found, you should prioritize replacing the RAM so that you no longer experience the blue screen.
Repair Faulty Disk Components
It is possible that the error is caused by the hard drive or a faulty drive inside it. This can be checked by performing a deep scan without using any third party tools.
To perform the test in Windows 10, find Command Prompt and open the application as administrator (Run as administrator).
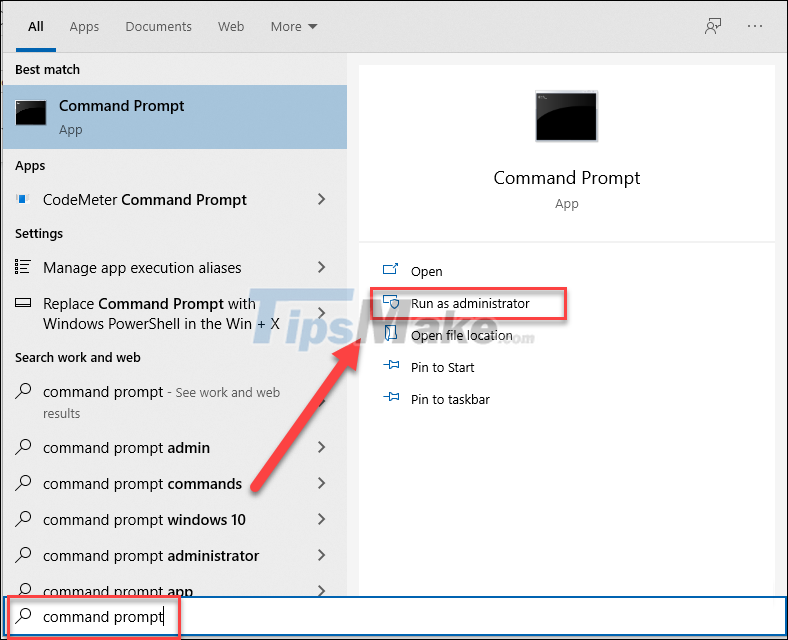
Enter the following command:
Chkdsk C: /f /r /x
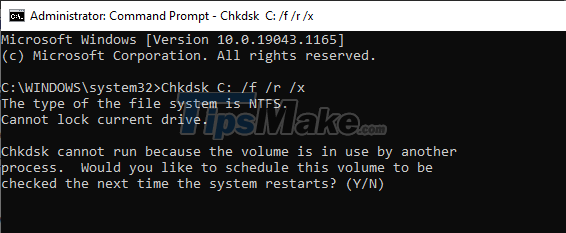
You will then be asked about performing a scan the next time the computer boots, enter Y to agree.
Now restart your computer and it will perform a scan on the storage drive. Note that the scan may take some time to complete.
Scan for Corrupted System Files
Windows 10 comes with a built-in tool to fix corrupted system files. This tool is System File Checker (SFC) which can automatically repair system files. Its job is to replace any damaged or missing files.
Find PowerShell in the search box and run the application as administrator (Run as administrator).

Enter the command sfc /scannow to scan the corrupted file. Wait for the scan to complete, and it will automatically fix the error right away.

Conclude
If you experience a blue screen with the message 'Bad System Config Info', you should find a way to fix the error immediately instead of temporarily ignoring it. The methods above can both help you fix it and make sure you don't experience another blue screen. If the situation persists, you should consider reinstalling the operating system.
Conclusion
Understanding Bad System Config Info makes it easier to compare options, avoid common mistakes, and apply the information in this guide more effectively. Review the relevant requirements before making changes or choosing a solution.
FAQ
How do you fix bad system config info?
Follow the steps in this guide in order, confirm the required settings or tools, and verify the result before making additional changes.
Is it safe to fix bad system config info?
It is generally safe when you follow the recommended instructions, use trusted tools, and avoid changing settings you do not understand.
What should you do if the process does not work?
Recheck the requirements, restart the device or application when appropriate, and review each step for missed settings or compatibility issues.
Related Articles
 How to Fix 'Bad System Config Info' Error in Windows 105 minutes read
 How to Fix Windows System32 Config SYSTEM Error Is Lost4 minutes read
 A Config File: What It Is and How to Safely Edit the Config File?7 minutes read
 Fix Bad Module Info Windows 10: How to Fix Bad_module_info on5 minutes read
 Expected Configuration Fallout 5 PC4 minutes read
 30+ Tricks 'About: Config' Improves Firefox Browser: Browser Firefox22 minutes read
Reader Comments 0
Sign in with email or Google to join the discussion.