How to fix a non-functional keyboard after installing or updating Windows?
Are you frustrated because your keyboard isn't working, or it's not responding after installing or updating Windows 10, 8, or 7? How can you fix this annoying problem?.
Why is my keyboard not working or unusable after installing or updating Windows? What are the causes? How to fix this error? Refer to Taimienphi's computer tips and tricks below to find out how to resolve this issue.

Guide to fixing Windows keyboard errors after installing Windows.
Fixing keyboard not working after installing or updating Windows.
Method 1: Uninstall the Windows update.
Suppose after updating to the latest version of Windows 10 , your keyboard malfunctions or doesn't work properly. This could be due to an incompatible keyboard driver with the new Windows update. To fix this, you should uninstall the Windows update.
Follow the steps below:
First, open the Control Panel window, then find and click on Programs and Features => View the installed updates .
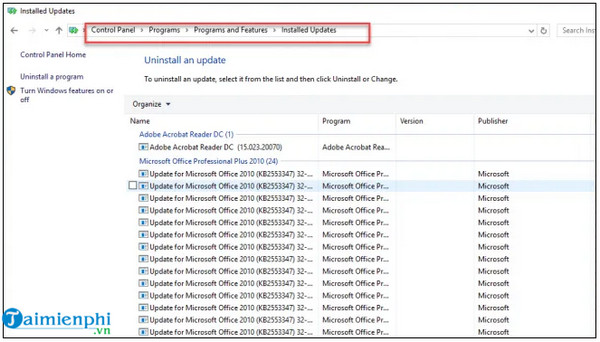
Here you will see a list of all the updates you have recently installed on your system. Find and right-click on the most recent update and select Uninstall to remove it.
Finally, restart your computer to apply the changes and check if the keyboard is working and usable. If the problem persists, refer to some of the troubleshooting steps below.
Method 2: Update to the latest keyboard driver version.
In many cases, the cause of a malfunctioning or unusable keyboard may be a driver issue. Try updating to the latest driver and check if the problem persists.
First, type "Device Manager" into the Search box on the Start Menu, then click on it in the list to open the Device Manager window.
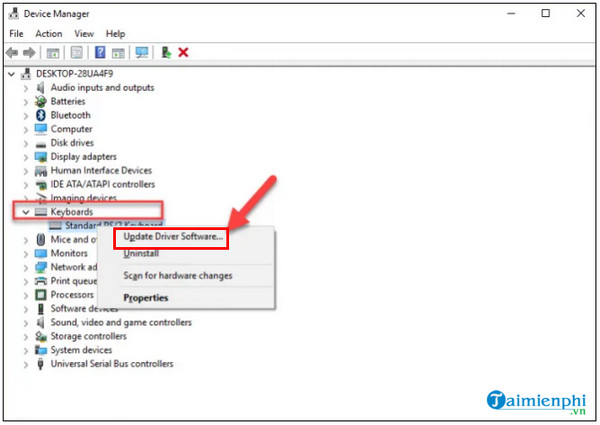
In the Device Manager window, find and expand the Keyboard section . Then find and right-click on the keyboard driver and select Update the driver .
In the next window, click on the second option as shown below.
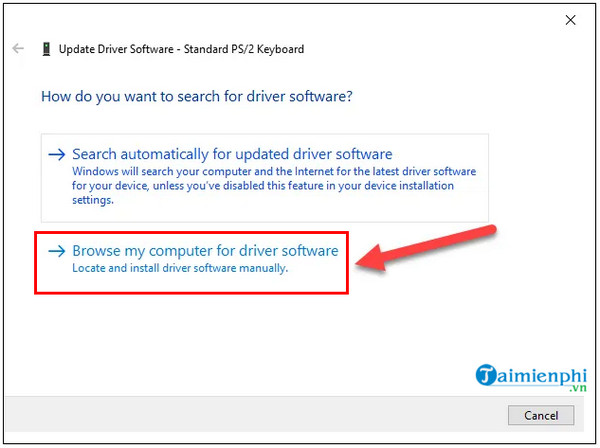
Next, select the option " Let me pick from a list of device drivers on my computer ," then click " Next ."

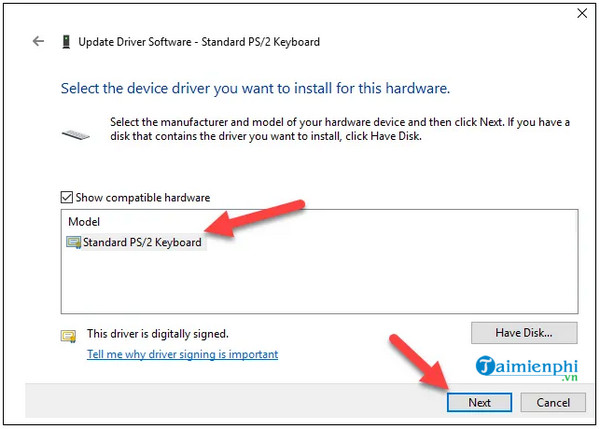
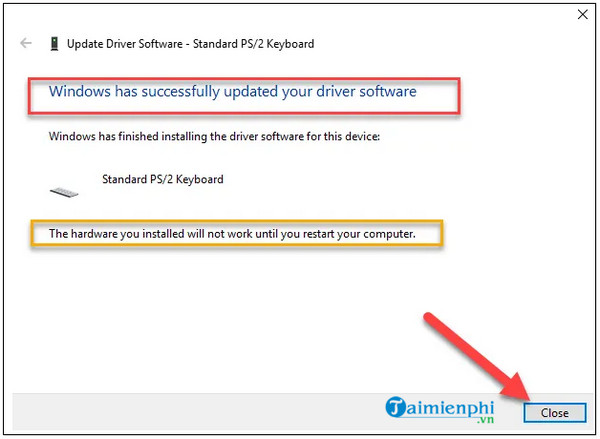
A list of compatible keyboard drivers will then appear on the screen. Select any driver, then click Next.
The driver installation process may take some time. Once the process is complete, restart your system to apply the changes.
Method 3: Turn off the Filter Keys feature.
Finally, if the keyboard still doesn't work after trying the above methods, try disabling the Filter Keys feature and see if the problem persists.
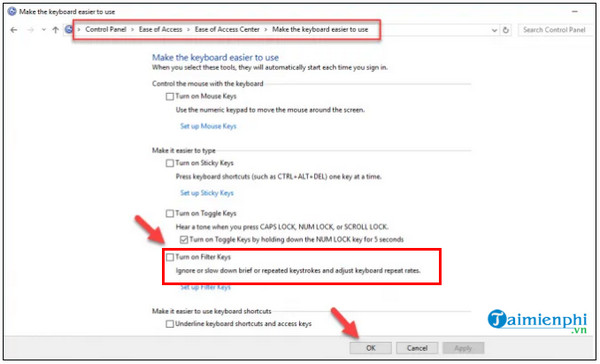
To turn off Filter Keys, open the Control Panel , then find and click Ease of Access => Ease of Access Center => Make the keyboard easier to use.
The next step is to find and uncheck the Filter Keys option , close all open windows, and restart your computer.
Above, TipsMake has guided you through some ways to fix the problem of a non-functioning keyboard after installing or updating Windows. Hopefully, these tips will help you resolve this annoying issue.