Table of Contents
To enable IPv6 on a recent TP-Link router, sign in to the web interface, open Advanced > IPv6, turn IPv6 on, and select the connection type supplied by your ISP. Do not guess a static address or PPPoE credentials; an incorrect WAN configuration can interrupt connectivity.
IPv6 does not automatically make a connection faster or safer. It provides native addressing for IPv6 services and avoids some IPv4 limitations, while security still depends on the router's IPv6 firewall, firmware, and network configuration.
Before enabling IPv6
- Confirm that the ISP provides native IPv6 service.
- Ask which connection type it uses: Dynamic IP (SLAAC/DHCPv6), PPPoE, Pass-Through/Bridge, or Static IP.
- Obtain separate IPv6 credentials, prefix length, gateway, or DNS addresses only if the ISP requires them.
- Update the router to stable firmware for its exact hardware version.
- Back up the current router configuration or record the existing settings.
Open the TP-Link IPv6 settings
- Connect to the TP-Link router through Wi-Fi or Ethernet.
- Open
https://tplinkwifi.net/or the router's local address, often192.168.0.1. - Sign in with the router administrator password.
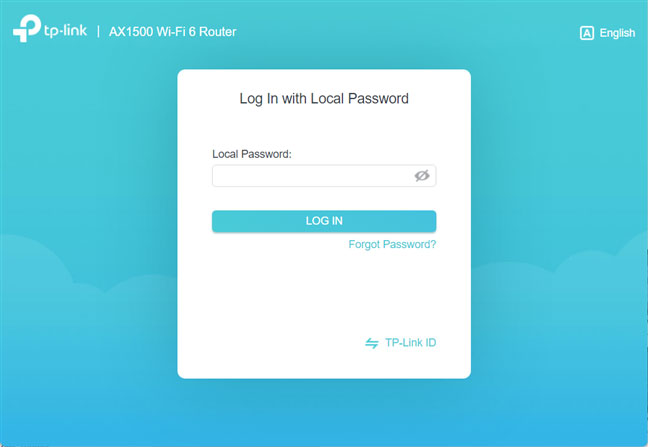
If neither address works, find the network's default gateway instead of resetting the router. The gateway may have been customized or supplied by another upstream router.
- Select Advanced.
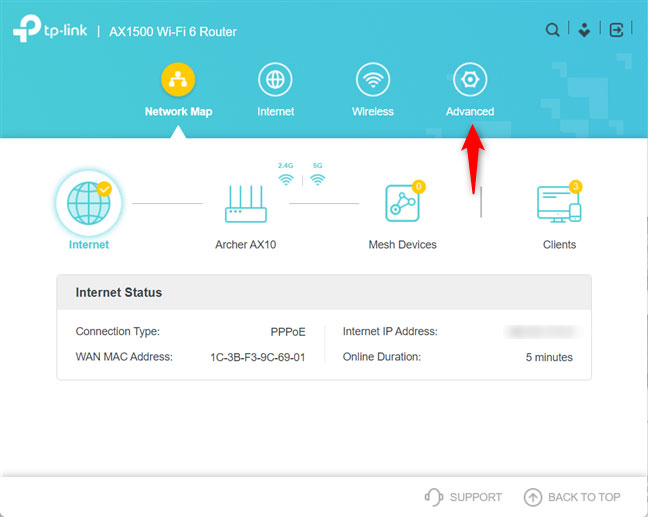
- Choose IPv6 in the left navigation. Menu names vary by model and firmware.
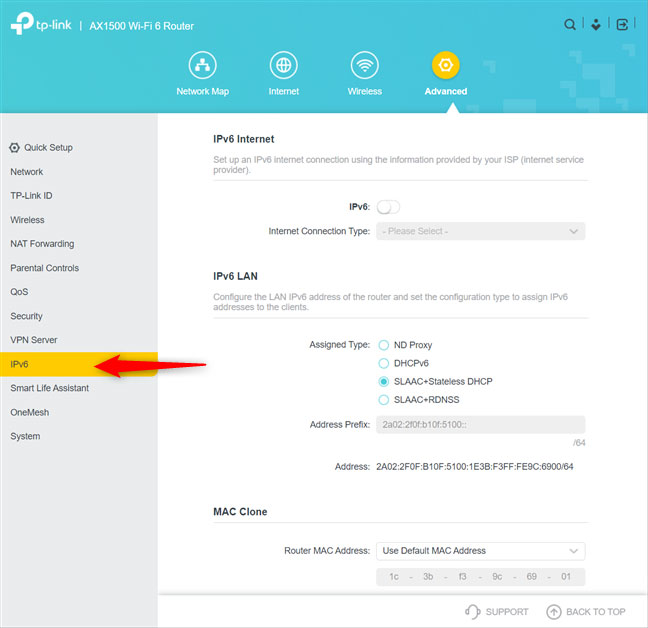
Turn on IPv6 and choose the connection type
Enable the IPv6 switch, then set Internet Connection Type according to the ISP or upstream network.
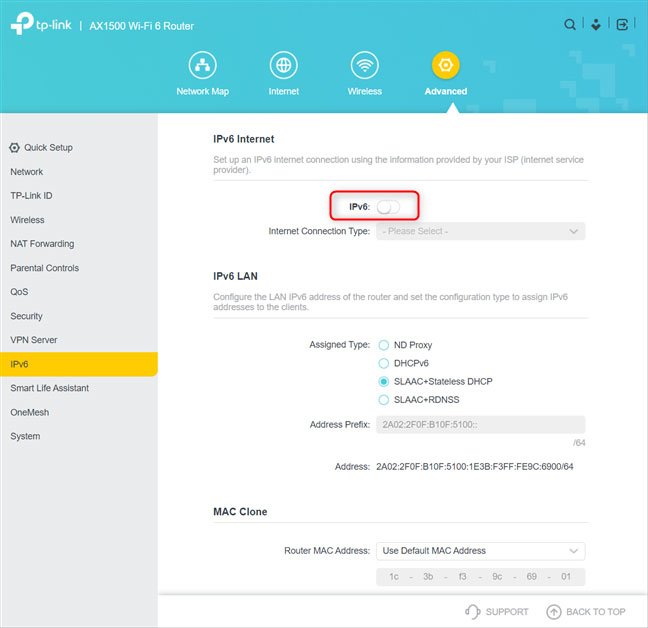
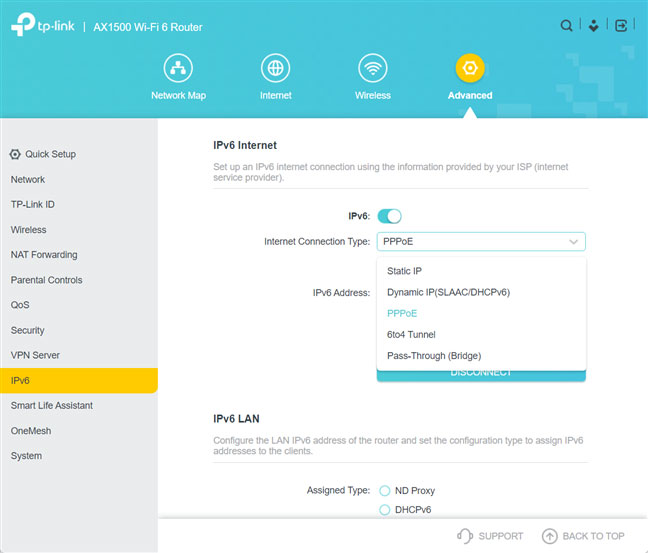
| Connection type | When to use it | Key settings |
|---|---|---|
| Dynamic IP (SLAAC/DHCPv6) | The ISP assigns IPv6 automatically; common on cable and many native IPv6 services | Use Auto for address acquisition and enable Prefix Delegation when instructed. |
| PPPoE | The ISP authenticates the connection with PPPoE | Share the IPv4 PPPoE session unless the ISP provided separate IPv6 credentials. |
| Pass-Through (Bridge) | Another main router upstream already provides IPv6 | Pass IPv6 through rather than starting a second independent WAN session. |
| Static IP | The ISP assigned fixed IPv6 parameters | Enter the exact address, prefix, gateway, and DNS values supplied by the ISP. |
Avoid 6to4 Tunnel unless the ISP or a documented legacy deployment explicitly requires it. Native IPv6 is preferable when available, and many networks no longer provide a reliable 6to4 path.
Dynamic IP configuration
- Select Dynamic IP (SLAAC/DHCPv6).
- Open Advanced Settings.
- Set Get IPv6 Address or Get IPv6 Connection to Auto.
- Enable Prefix Delegation.
- Leave DNS automatic unless the ISP or network administrator requires specific servers.
- Select Save or Connect.
PPPoE configuration
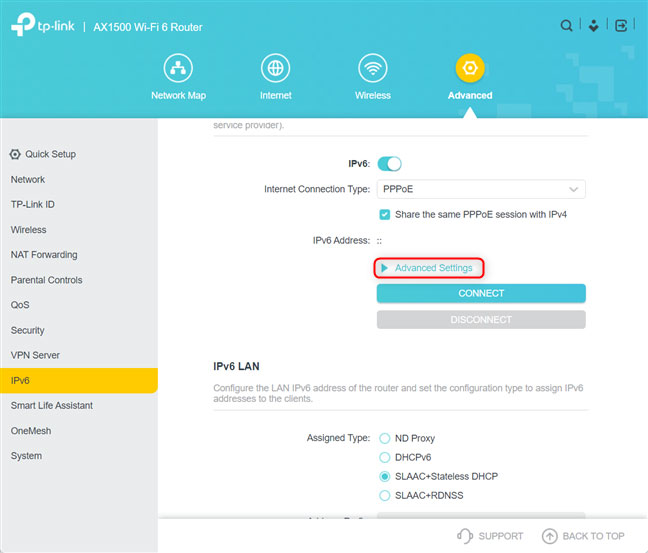
- Select PPPoE.
- Leave Share the same PPPoE session with IPv4 selected when the ISP uses one account for both protocols.
- If the ISP supplied separate IPv6 credentials, clear that option and enter them exactly.
- Under Advanced Settings, use automatic address acquisition and enable Prefix Delegation unless the ISP says otherwise.
- Save the configuration.
Do not replace working IPv4 PPPoE credentials merely to enable IPv6. A dual-stack connection normally keeps IPv4 active while adding IPv6.
DNS and LAN options
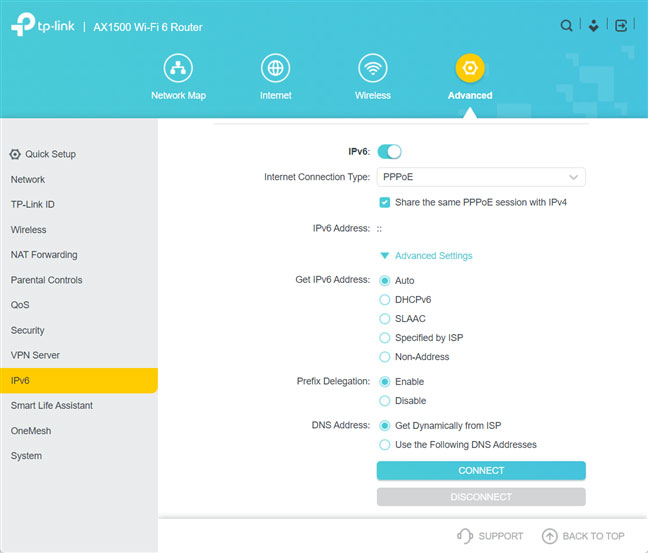
Automatic DNS is the safest starting point. To use custom IPv6 DNS servers, select the manual DNS option and enter valid addresses from the chosen provider. Custom DNS changes name resolution; it does not create IPv6 connectivity if the ISP has not delegated an address or prefix.
On the LAN side, keep Router Advertisement and DHCPv6 behavior at the recommended automatic defaults unless the network has a deliberate addressing plan. Most home clients use SLAAC, DHCPv6, or both depending on their operating system.
Connect and verify IPv6
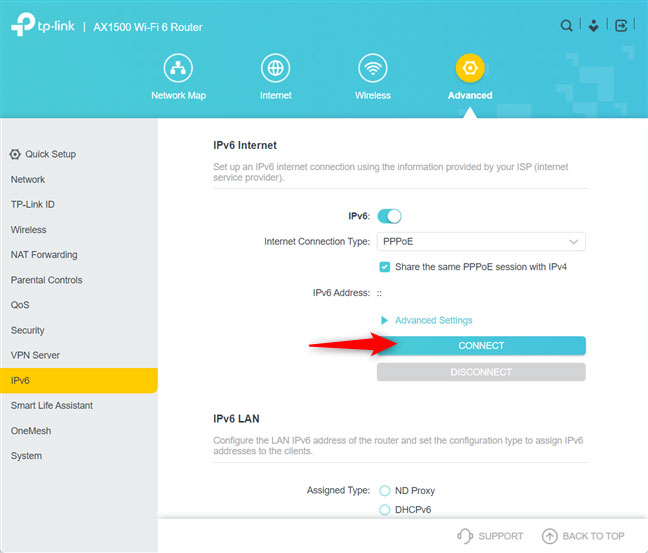
- Select Save or Connect and wait for the WAN status to update.
- Confirm that the router shows a global IPv6 WAN address and a delegated prefix, not only an address beginning with
fe80:. - Reconnect a client or renew its network lease.
- Check that the client receives a global IPv6 address and an IPv6 default route.
- Open several IPv4-only and IPv6-capable sites to confirm that dual-stack browsing works.
A brief reconnection may occur while the router applies WAN settings, but a long outage suggests the connection type or credentials are wrong.
Troubleshooting
- No global IPv6 address: Confirm service availability and connection type with the ISP.
- Router has IPv6 but clients do not: Check Prefix Delegation and LAN Router Advertisement settings.
- Some sites fail: Restore automatic DNS, update firmware, and test again; do not disable the IPv6 firewall.
- TP-Link is behind another router: Use Pass-Through/Bridge when appropriate or configure IPv6 on the upstream router.
- Changes do not persist: Verify the exact TP-Link model and hardware version, then consult its firmware-specific manual.
TP-Link's current IPv6 setup guide documents each supported WAN type. TipsMake also explains how to find the router's default gateway, set up a TP-Link Wi-Fi 6 router, and configure TP-Link PPPoE.
Related Articles
 5 Steps to Enable 5GHz WiFi on TP-Link Router: Top Picks and Buying Guide6 minutes read
 Review D-link Dir-822: Cheap Wi-Fi Router for Home5 minutes read
 2 Ways to Set up Tp-link Wi-Fi 6 . Router16 minutes read
 3 Best Wi-Fi Routers of 202610 minutes read
 How to Create and Add TP-Link ID to TP-Link WiFi 6 Router: Clear Instructions9 minutes read
 How to Configure Pppoe Connection on Tp-link Wi-Fi 6 Router8 minutes read
Reader Comments 0
Sign in with email or Google to join the discussion.