Table of Contents
This practical guide walks through how to create VPN shortcut on Windows 10 desktop, explains the main requirements, and highlights common issues that may appear along the way.
This method won't work if you use a VPN client or a third-party app to connect to the VPN network. In that case, open your VPN app and see if there's an option to add a shortcut on the home screen.
Create VPN shortcut on Windows 10 desktop
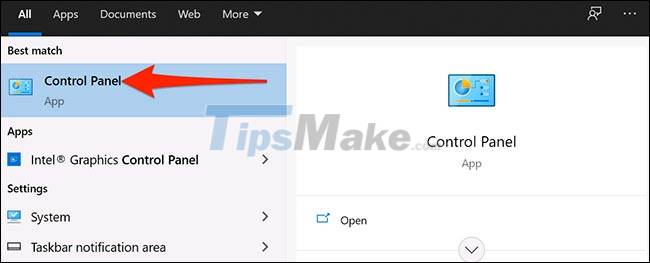
To get started, open the ' Start ' menu and search for the keyword ' Control Panel '. Click the ' Control Panel ' icon in the corresponding search results.
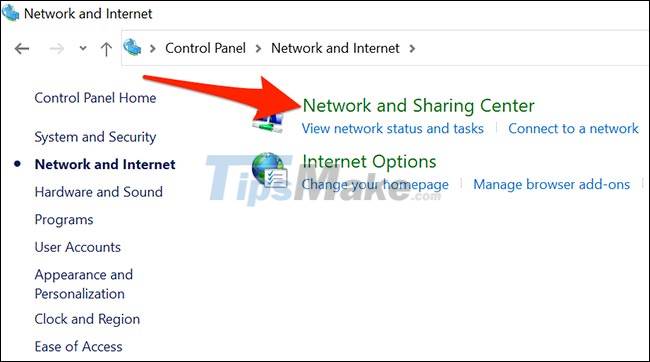
In the Control Panel window, you click the ' View by ' option in the top right corner of the window and click ' Category '. Then select ' Network and Internet '.

In the ' Network and Internet ' settings, you click on the ' Network and Sharing Center ' item .
In the Network and Sharing Center section window, look at the sidebar menu and select ' Change adapter settings '.

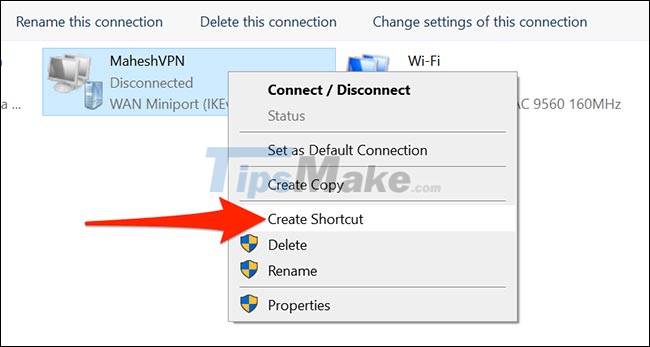
Find your VPN (looks like a two-screen icon). Right-click on that VPN and select 'Create Shortcut ' from the menu that appears.
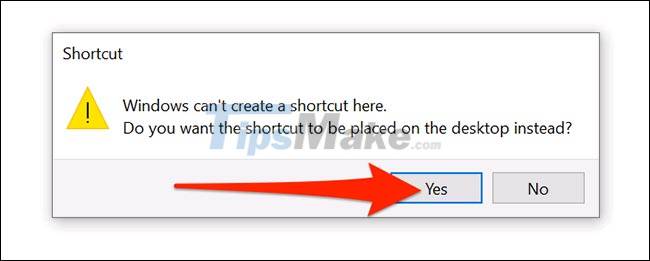
Windows will display a warning saying you cannot create a desktop here. Click ' Yes ' in this warning box and Windows will place another shortcut on the desktop instead.
Thus, your newly created VPN shortcut is now visible on the desktop.

Key Takeaways
Use the information above as a practical reference for how to create VPN shortcut on Windows 10 desktop. Review each step carefully, confirm any requirements, and choose the option that best fits your situation.
FAQ
What does this guide explain about Create VPN Shortcut on Windows 10 Desktop?
It explains the main concepts, practical considerations, and useful steps related to create VPN shortcut on Windows 10 desktop without requiring advanced knowledge.
Who can benefit from learning about Create VPN Shortcut on Windows 10 Desktop?
This information is useful for readers who want a clear overview, practical guidance, and reliable steps related to create VPN shortcut on Windows 10 desktop.
What should I check before applying this information?
Review the requirements, confirm that your device, software, or situation matches the instructions, and back up important data before making major changes.
Related Articles
 Quick Tip: How to Delete 90% of Desktop Shortcuts7 minutes read
 Create Shortcuts, Restart Your Computer ... on the Desktop5 minutes read
 How to Create a Shortcut to Clean the Recycle Bin on Windows 10/11: Clear8 minutes read
 A Shortcut: What It Is and How to Create It on Windows3 minutes read
 How to Create Windows Update Shortcuts3 minutes read
 How to Create a Printer Shortcut on Windows 105 minutes read
Reader Comments 0
Sign in with email or Google to join the discussion.