Table of Contents
This guide explains how to create trash for Android with dumpster using a clear, step-by-step process. It also highlights the settings and checks that can help you avoid common errors.
Most of the data on your Android device when you delete them, there is no way to get back. Therefore, in many cases you accidentally delete certain important files and cannot retrieve them. So why don't we bring trash to Andoird devices, so we can recover them when needed.
With the Dumpster application dedicated to Android devices, we completely find everything in the trash. This feature is similar to the Recycle Bin on the computer, when everything after deletion is in the trash. You won't have to worry about not retrieving the necessary data, but you can restore them in the Dumpster trash. Join the Network Administrator to find out how this trash application works.
Step 1
First of all, we will download the Dumpster application to our Android device according to the link below.
- Download the Dumpster app for Android
Step 2
After completing the installation process, start the app. On the first interface when launching, click Show me how . Dumpster will in turn introduce the features of the app through each page.
On the last page, Click the tick To move to the main interface of the app.


Step 3
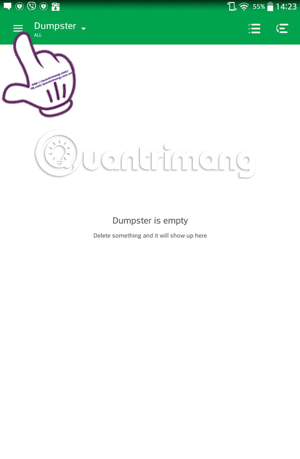
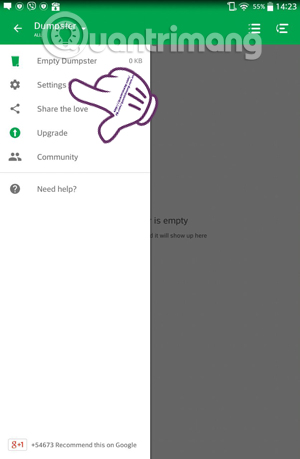
Since the first time used, the data file in the dumpster will not be available. click The 3 dashes icon On the top left of the screen. Appears a list of options, select Settings To change the settings of the app.
Step 4
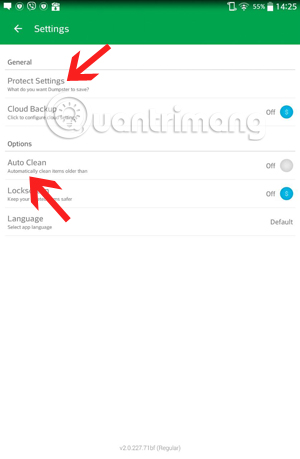
At the Settings interface, you will see many settings. For any item with The $ symbol when you activate On, you will have to spend money to use .
There are two important options for Protect Settings And Auto Clean For us to set up security and automatic removal for the app.
Step 5
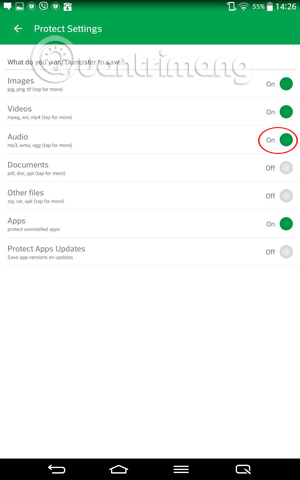
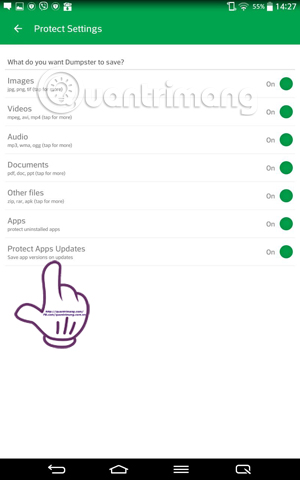
Click Protect Settings . Here, the app provides Lists of different types of junk data For us to choose from: images, audio, text,.
When needed to Save any type of data , click to select it to Turn ON , or Do not want to save any data Press Off . Ideally, we should choose to save all types of junk files
Protect Apps Updates section Will regularly update the security of the app when it comes to the new version if you enable On mode.
Step 6
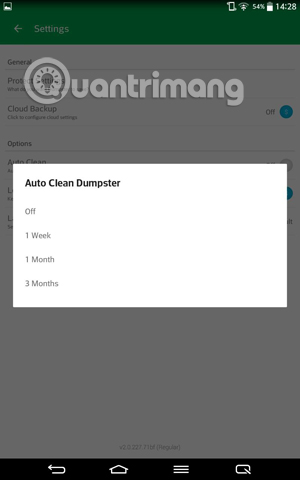
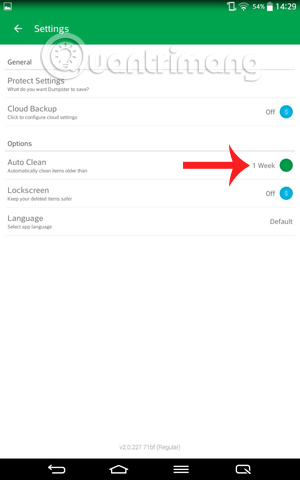
Go back to the Settings interface and select Auto Clean . When you click that item, there will be many different options:
- Off : never delete data.
- 1 Week : automatically delete data after a week.
- 1 Months : automatically delete data after one month.
- 3 Months : automatically delete data after 3 months.
Depending on the purpose of users, you select the automatic delete time to set up for the app.
Step 7
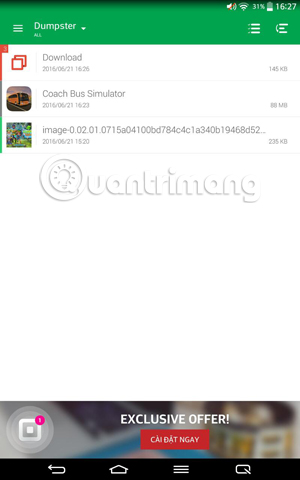
To understand the working mechanism of the app, delete the image or data in the device. Then open Dumpste and all the deleted data will be transferred here, arranged in different topic categories for easy management as well as when retrieving.
When selecting any data in the dumpster, there will be 3 options appear Below including Restore (Restore), Delete (delete the Dumpster question) and Share (share files on social networks). when needed to recover, you need to select Restore to retrieve data from Dumpster only.

How to create trash for Android devices with Dumpster application is also useful. You will be limited to deleting the wrong file and cannot retrieve it when necessary. How to do it again is simple, just a few quick clicks, you can get back all the files you want.
Refer to the following articles
- 3 ways to uninstall apps for Android devices
- 10 easy video editing applications on Android
- 6 high quality movie watching software for Android phones
I wish you all success!
FAQ
What should I prepare before I create trash for Android with dumpster?
Review the requirements in the guide, confirm that your device or software is compatible, and save important work before changing settings related to create trash for Android with dumpster.
Why might create trash for Android with dumpster not work as expected?
The most common causes are incompatible versions, missing permissions, incorrect settings, or an interrupted internet connection. Recheck each step and restart the app or device when appropriate.
Can beginners follow these create trash for Android with dumpster steps?
Yes. Follow the steps in order, avoid skipping confirmation screens, and compare your interface with the screenshots because labels may differ slightly between versions.
Related Articles
 Transport Dumpster in Exchange 2007 (Part 2)9 minutes read
 Transport Dumpster in Exchange 2007 (Part 1)8 minutes read
 Smart Trash: This Is One of the Smartest Trash Bins in the World4 minutes read
 How to Fix Errors Cannot Clean Up Trash on Mac9 minutes read
 How to Empty Trash on Android: Step-by-Step Guide7 minutes read
 How to Add Trash to Permanently Delete Files on Windows 10/118 minutes read
Reader Comments 0
Sign in with email or Google to join the discussion.