Table of Contents
To create sticker from selfie image with gboard successfully, begin with the right preparation and follow each step carefully. The guide also covers common issues you may encounter.
In addition to the default keyboard on the phone, keyboard applications such as Laban Key, Gboard,. bring more useful features for users. Especially with Google's Gboard keyboard application, users will experience a lot more customization capabilities than the default keyboard, data search capabilities and high accuracy.
And in the new version this time Gboard app has added Mini Stickers feature, creating emoticons based on your own selfie. Gboard will use artificial intelligence and machine technology to analyze your photos and thereby create emoticons in many different styles. Join the Network Administrator to learn how to use Mini Stickers on Gboard in the article below.
- How to use AiMee to create a sticker from the face
- How to create Facebook sticker with Zamoji application
- How to insert stickers into videos, images on Zalo
Instructions for creating sticker from selfie photo on Gboard
Step 1:
Start by upgrade or download the app with the latest version at the link below.
- Download the Gboard iOS app
- Download the Gboard Android app
Step 2:
After installation is complete, users accesses Settings On the device, select General settings . In this interface select the Keyboard settings Section. click the Keyboard Section.


Step 3:
Then click Add New Keyboard. Then select The Gboard keyboard .
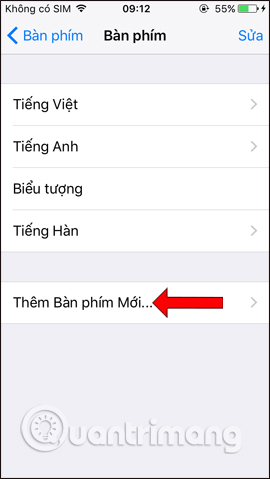
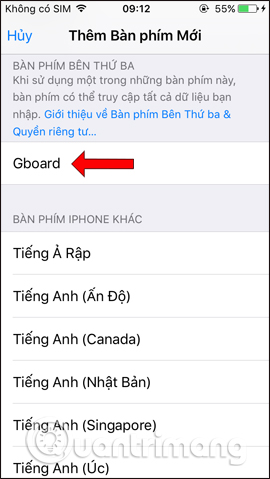
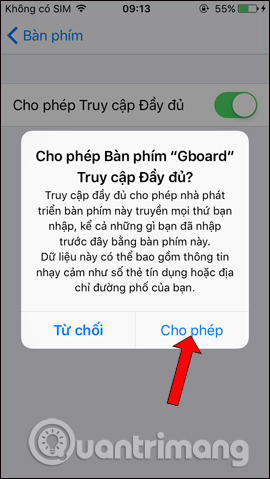
At this point we will see Gboard displayed in the device's keyboard. Click select Gboard And activate Allow full access Mode. Now the system will ask users to confirm again, click Allow .
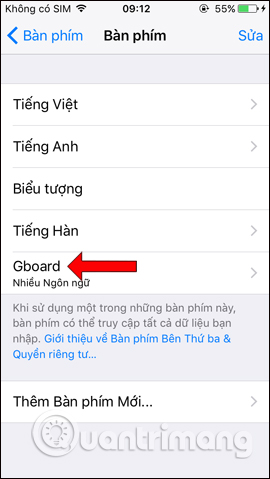
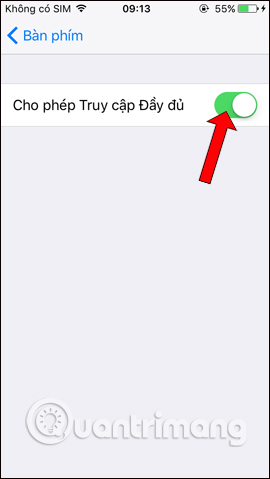
Step 4:
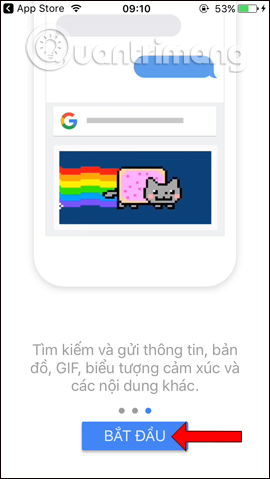
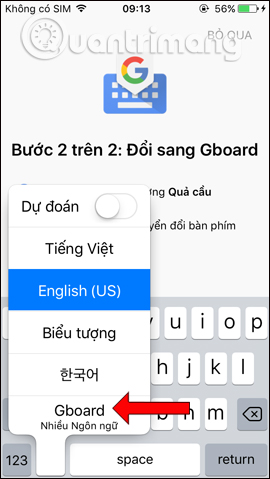
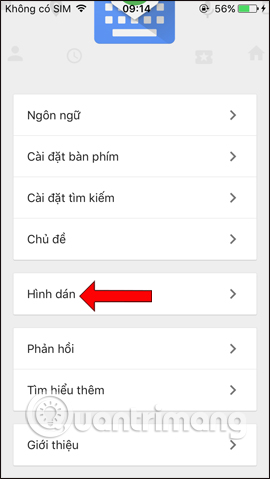
Access the app and you will be asked to switch to the Gboard keyboard. click The globe icon And select Gboard . This is the main interface of the app, click the Paste Section.
Step 5:
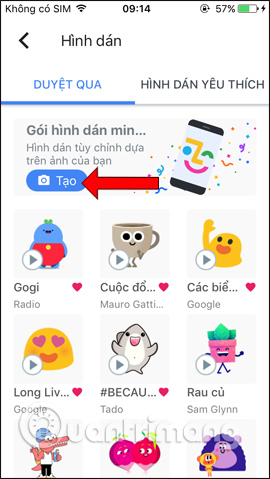
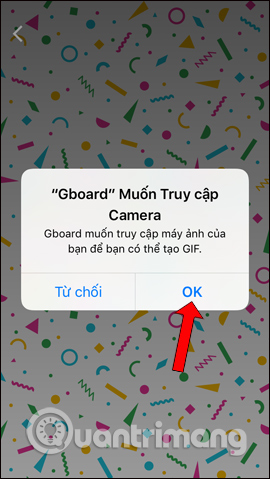
In the new interface, there will be a Package of mini stickers, press Create button . Agree to let the app access the camera application on the device, press OK .
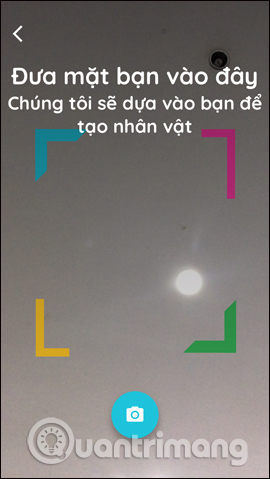
Selfie display interface. Please Take a picture of your face So that it is in the right frame on the screen so that the app can analyze your face.
Step 6:
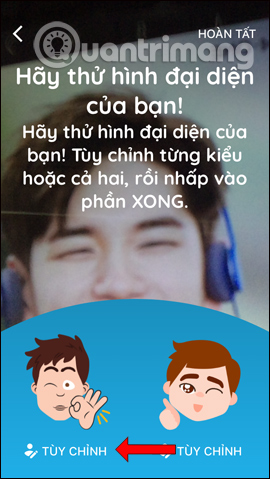
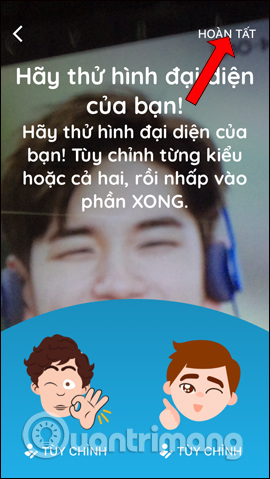
When taking a picture, wait a few seconds for the app to analyze. If there is an error you will receive a notification and ask to take a picture again. If the app is successfully taken, the app will show two different avatars with custom images for each sticker. Click Custom .
Step 7:
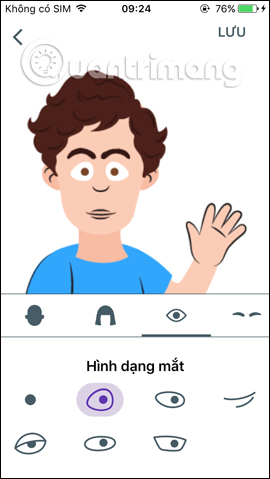
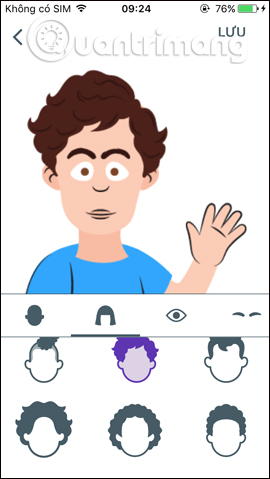
In each sticker, users can edit the parts with different styles they want, like the face, hair, eyes as you like.
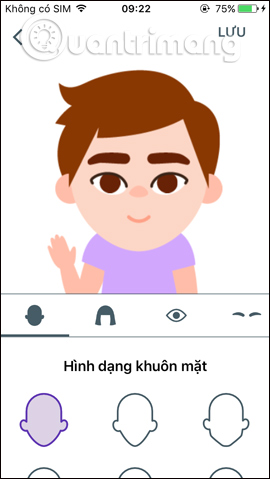
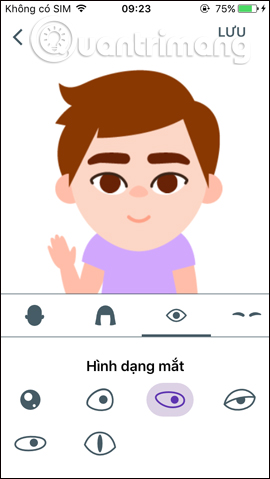
You then edit on both representative sticker images. When editing, Click Save To save the changes.
Step 8:
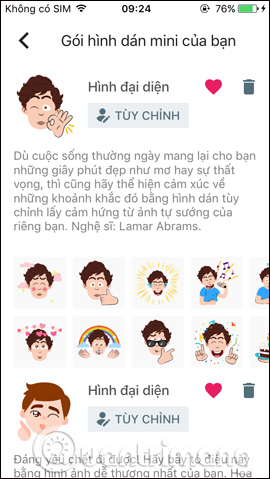
Press the back arrow and will see 2 complete stickers after editing as you like. Click The Finish button At the top right corner. So you already have the sticker package created from your own selfie image.
In the management interface, there will be a Custom button if users wants to edit more, the trash icon to delete the created sticker.
Step 9:
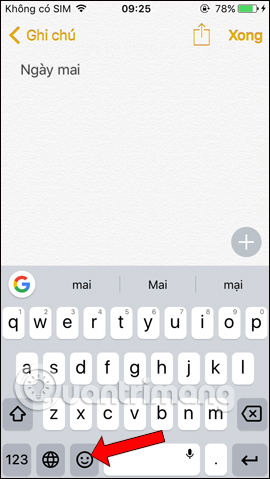
Now open the messaging application, or any editing application, and see the Gboard keyboard already in use. click The stciker icon Below. You will then see the editing options, click The emoji icon .
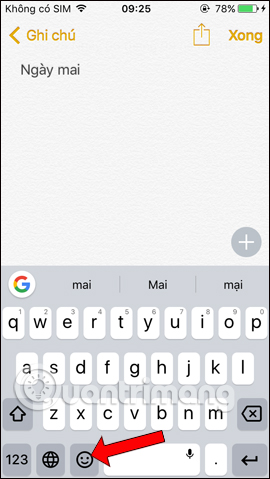
Now users will see the sticker pack that I created earlier, with 2 different face styles. Swipe left or right to select the type of sticker you want to use.
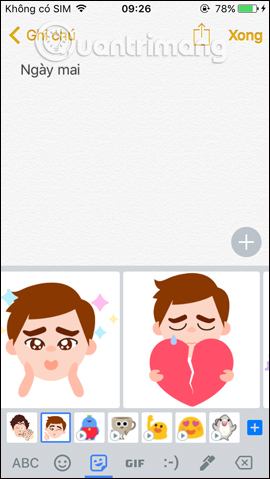
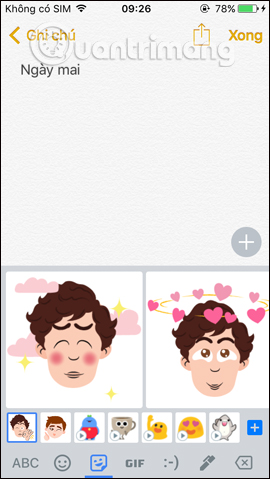
Add an interesting feature that Gboard brings to users. The sticker will be based on your face to give the outline of the sticker first, then users will then edit it at his discretion. The stickers you create will be saved to Gboard for use.
- 11 best Android keyboard apps
- How to create GIF images with Google's Gboard keyboard on iPhone and Android
- How to view the Emoji emoticons of iPhone on Android
I wish you all success!
FAQ
What should I prepare before I create sticker from selfie image with gboard?
Review the requirements in the guide, confirm that your device or software is compatible, and save important work before changing settings related to create sticker from selfie image with gboard.
Why might create sticker from selfie image with gboard not work as expected?
The most common causes are incompatible versions, missing permissions, incorrect settings, or an interrupted internet connection. Recheck each step and restart the app or device when appropriate.
Can beginners follow these create sticker from selfie image with gboard steps?
Yes. Follow the steps in order, avoid skipping confirmation screens, and compare your interface with the screenshots because labels may differ slightly between versions.
Related Articles
 Google Allo Can Now Turn Selfie into Sticker3 minutes read
 How to Create Facebook Sticker with Zamoji Application7 minutes read
 How to Use Sticker Sticker on Twitter?2 minutes read
 How to Create GIFs Using Gboard Keyboard on iPhone: Step-by-Step Guide4 minutes read
 You Can Draw Your Own Emoji on Gboard Right Now5 minutes read
 WhatsApp Adds Custom Stickers and New Text Formatting Options on Android4 minutes read
Reader Comments 0
Sign in with email or Google to join the discussion.