How to create a simple logo with InkScape
Inkscape is one of the best free SVG (Scalable Vector Graphics) applications. This makes Inkscape ideal for creating graphic works capable of retaining the appearance regardless of size.
Inkscape is one of the best free SVG (Scalable Vector Graphics) applications. This makes Inkscape ideal for creating graphic works capable of retaining the appearance regardless of size. And most of these products are logos. Although Inkscape provides a fairly large set of tools, you can create a simple logo by using only one or two of these options.

Because Inkscape is one of the most popular open source graphics applications, many Linux distributions that come with this tool come pre-installed. If you don't have Inkscape yet, search for it via the distribution's official App Store. If you do not intend to use commands, on Debian based distributions you can install Inkscape with:
sudo apt-get install inkscape
Simple logo design guide with InkScape
- Direction of the page
- Line Tool
- Calibration curve
- Roads, curves, and intersections
- Determine the shape
- More colors
- Realistic logo
- Remember to save the file!
Direction of the page
Inkscape's default mode for new documents is vertical. Most logos are larger than the width, so it's better to set the page horizontally.
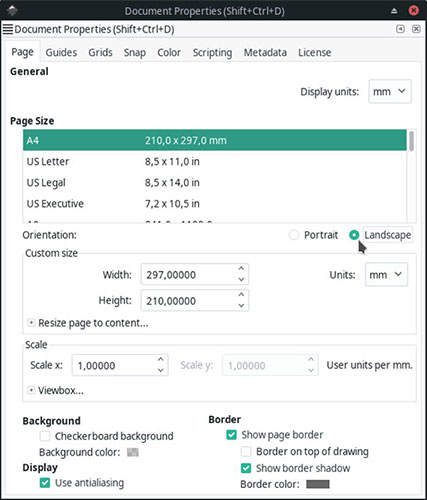
To do this, choose File> Document Properties and change the orientation, right from the Page Size list (s) , to horizontal.
Line Tool
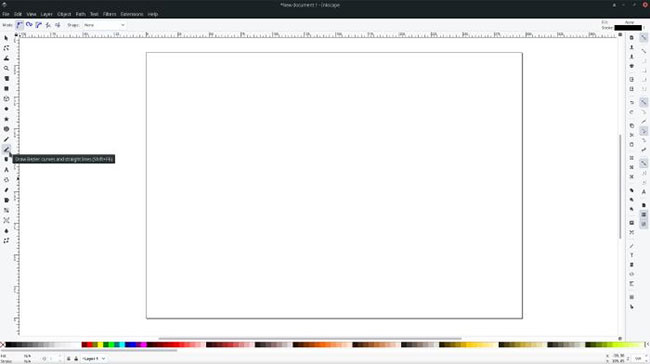
Select the 12th tool from the application toolbar, depicted with a small pencil with a line, which looks like the shadow below. Or, press Shift + F6 . This tool allows you to draw straight lines and Bezier curves.
Calibration curve
Inkscape - and most of its tools - let you design anything you want, wherever you need it, and start from anywhere on a blank page. Sometimes, as in the case of logo design, some restrictions on all this freedom are quite helpful. And the 'limitations' here are the calibration curves.
Using calibration lines can help control the shape of the drawing. By acting as a 'magnet', a click next to these calibration lines changes the position of a point, moving it instantly above the reference line. Proper placement of paths can turn them into a rough 'framework', helping to create the final design.
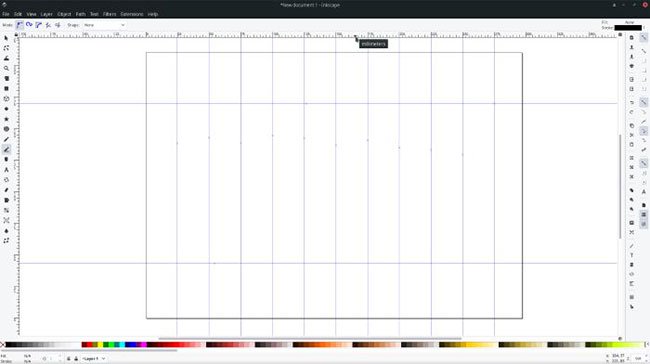
Create benchmarks in InkScape (as in many other applications of the same type) via a hidden shortcut: Hold the left mouse button on one of the two rulers that appear on the edges of the page and drag it to the point where you want it. set a calibration curve. Depending on whether you drag the ruler from the top or the left of the page, you will create a horizontal or vertical calibration line.
To make logo design more comfortable, you should create a 'matrix' of standard lines, similar to what you can see in the screenshot above.
Roads, curves, and intersections
In the case of this example, the article designed a 3-letter logo 'MTE' . Chances are, you'll want to create something different, so instead of giving strict and specific location and click instructions, the article will describe what has been done and at Why did you do that?
Start by drawing the letter 'm' . Like most letters, you will need both straight and curved lines. It is easier to start with a simple line. For example, choose a vertical line on the left side of the page where you want to put the first vertical line.
Click the intersection with a horizontal benchmark at the bottom left. Then click the intersection with a horizontal path in the upper left. The result is a vertical line on the vertical path, beginning and ending at its intersection points with horizontal reference lines.
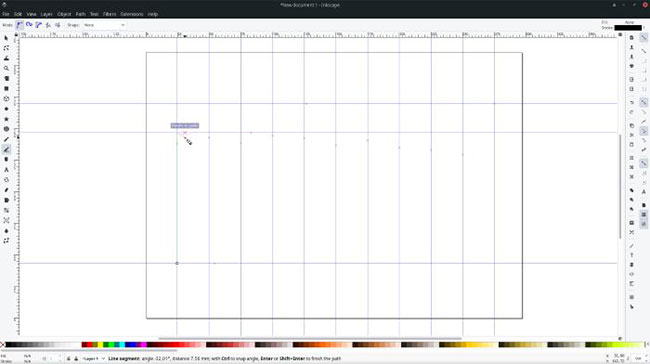
Although the first line has been created, everything is still not complete: The selected tool is still active and waiting for the next step. By scrolling to different parts of the screen, you can see a live preview of the result of the next click.
Determine the shape
Selected lines and the Bezier curves tool create a series of lines and curves. Each new click means ending the first line and starting the next.
To create a curve instead of a straight line, click the left mouse button, then drag the mouse around. You will see on the screen the line changes to a curve, with its curvature and angle determined by the cursor position.
The process of drawing a shape is completed by returning to where it all started, with the last click on the same point at the beginning.
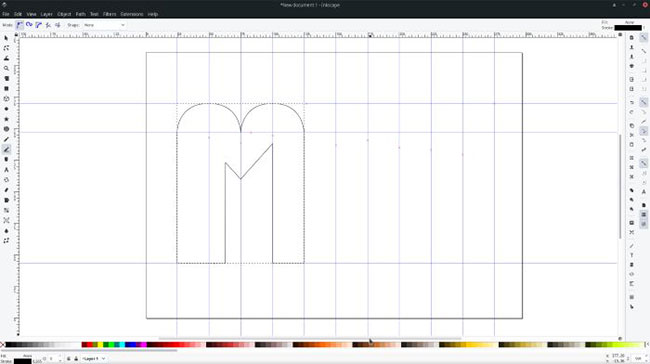
By defining lines and curves through a series of consecutive clicks, you can draw almost anything you can imagine. This is not a question of talent but patience, will and determination. Even if, as in the case of the example, only the letter 'm'.
More colors
By repeating the previous step, the example has designed two more letters to complete its logo. But they are white, or not precisely, on a white background. This is not good for a logo.
To add any shape to a color, select that shape, then choose the color you want. Everything is quite easy. Click the first available tool, display the arrow or press F1 on the keyboard. This is the Selection tool . When it works, you can click on any shape you want to select or left click and drag the rectangle around it.
You can select multiple shapes at once by dragging rectangles around them all or by clicking repeatedly on them while holding down the Shift key.
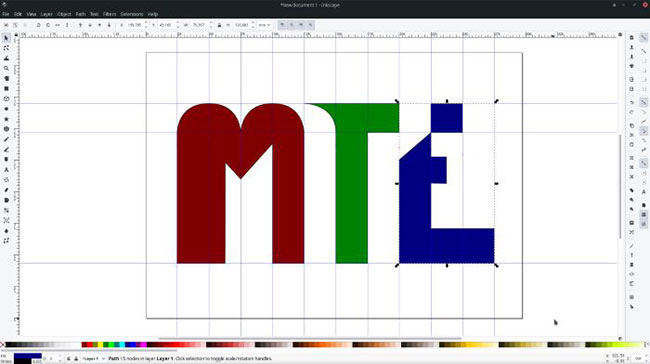
To add color to any selected shape, click the desired shape on the palette at the bottom of the screen or click and drag it onto the object you want to assign. Note that, in this particular case, the second method will only assign color to the borders of the letters because they are currently empty.
Realistic logo
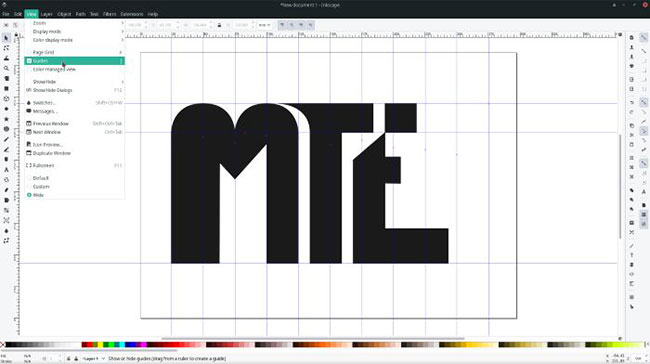
The example logo is almost complete. Using the Selection tool, you can take each letter individually and bring them closer together. The example then replaced the previously used vivid colors with the typical black, which looks more serious. Finally, the article hides the calibration lines by disabling displaying them in View> Guides , so that results can be seen without annoying lines throughout the page.
Remember to save the file!
The final step when designing something is always to go to File> Save . Inkscape doesn't use any weird archive formats and is fully compatible with the widely used format Scalable Vector Graphics, or SVG.
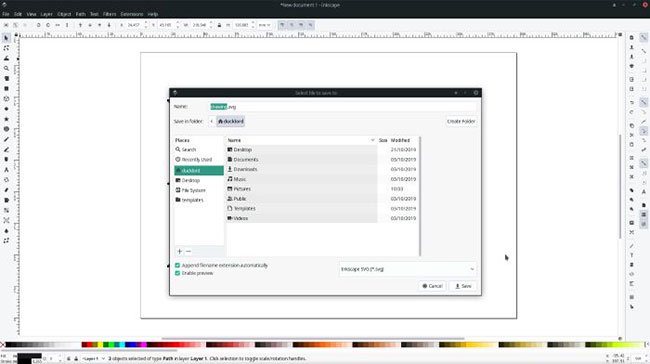
Files of this type store graphic works in the form of mathematical equations, so they are unaffected regardless of screen size. It is also worth noting that all current browsers are compatible, meaning you can use the logo directly in SVG format on your website. The logo will display faster, look better, and be compressed better than JPEG or PNG files.
- Facebook launches a new logo, simple but with many implications
- How to Make a Bowling Pin in Inkscape
- How to create the RSS Feed logo with CSS3
- How to create a logo super fast and beautiful with professional Logo design software AAA Logo
- How to create Gmail logo with CSS3
- Websites that create free online logos


 Configuration steps for multiple Users to remotely connect to Windows Server 2016 using Remote Desktop
  How to Shut Down or Restart Another Computer Using CMD
  3 ways to turn off Your Windows license will expire soon notification on windows
  3 ways to remove a Windows 10 computer from a domain that no longer exists
  How to Convert Excel to Dat
  Fix the error of not being able to convert PostScript files on the printer