How to convert HEIC image format to JPEG on iPhone, Windows and Mac
Although Apple has added the ability to automatically convert HEIC format to JPEG when users share this image format through applications like Apple Notes , Mail , WhatsApp , Instagram , Twitter , or Messenger , but if you want to use What about using JPEG images for other purposes? Fortunately, you can convert HEIC photos to JPEG images right on your iPhone, or from your PC.
How to take photos on iPhone in JPEG format instead of HEIC format
By default, iOS will choose the HEIC format as the main image format when you take photos on iPhone. However, you can change it to the traditional JPEG format from the iPhone's Settings menu . To do this, follow these steps:
Step 1: Open the Settings app on the iPhone.
Step 2: Scroll down and select Camera .
Step 3: Select the Formats option .
Step 4: Here, you will see two options in the Camera Capture section : High Efficiency and Most Compatible . The first option will capture images in the HEIC format, while the Most Compatible option will capture images in JPEG format. Therefore, select the Most Compatible option .
From now on, the iPhone's camera will always take photos in JPEG format. In addition, this option will also change the video format. Instead of recording videos in the new HEVC format, which uses the new H.265 compression standard, the Most Compatible option will record videos in the older compression standard H.264. Note, the Most Compatible option will increase the image file size and video significantly.
You have converted the photo format on iPhone from HEIC to JPEG. However, this conversion will not automatically convert the HEIC photo library available on your phone into JPEG format. For these photos, you need to convert manually in the following ways.
How to convert HEIC image format to JPEG on iPhone
There are two ways to convert HEIC image format to JPEG on iPhone, that is, using Apple's Files app or using a third-party application called Luma .
Method 1: Use the Apple Files app
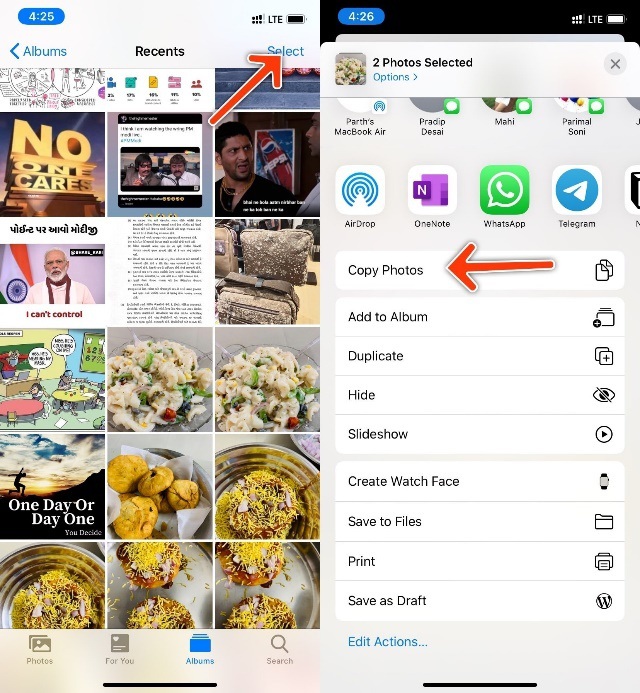
Step 1: Open the Photos app on your iPhone.
Step 2: Click the Select button located in the upper right corner and select the image files you want to convert.
Step 3: Click the Share button at the bottom and select Copy Photos .
Step 4: Open the Files app and navigate to On my iPhone .
Step 5: Create a new folder and name it any, then open it.
Step 6: Touch on any empty position and hold for a moment. From the context menu that appears, select Paste . This will convert the HEIC image to JPEG format.
Method 2: Use a third party application
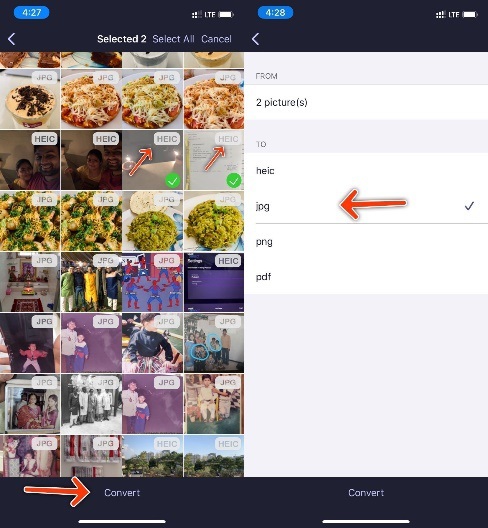
As you can see, you can easily convert HEIC image formats to JPEG using the Files app . However, what if you want to convert it to PNG or PDF format? For these formats, we need to use a third party application called Luma .
Step 1: Download and install the Luma application from the App Store .
Step 2: Open the application and you will see all the photos in the library.
Step 3: For HEIC images, you will see the HEIC label in the upper right corner. Please select the image you want to convert.
Step 4: Click the Convert button at the bottom of the screen.
Step 5: From the menu that follows, you can convert HEIC photos to JPEG, PNG, or PDF.
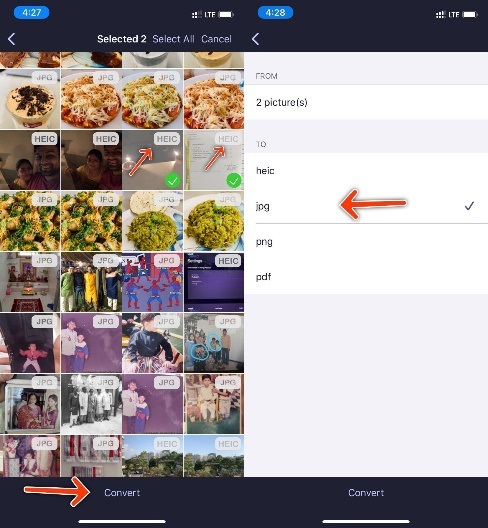
After the conversion process is complete, the resulting image will be saved in the Photos application , you can also choose to delete the original HEIC image if desired. Luma provides a convenient way to convert multiple photos at once. It is also faster than copying and pasting images on the Files app .
How to convert HEIC photos to JPEG on your computer
Use the Transfer to PC or Mac option
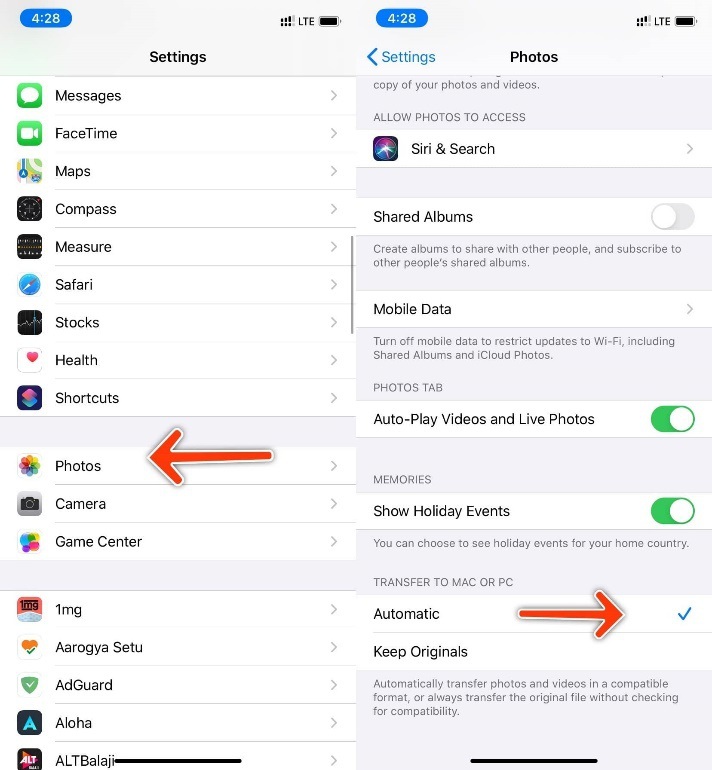
Apple offers the ability to automatically convert HEIC image formats to JPEG when you copy photos from your phone to a PC or Mac. Here are instructions on how to activate this option.
Step 1: Open the Settings app on the iPhone.
Step 2: Scroll down and select Photos .
Step 3: From the menu that appears, you will see the option Transfer to Mac or PC (Transfer to Mac or PC).
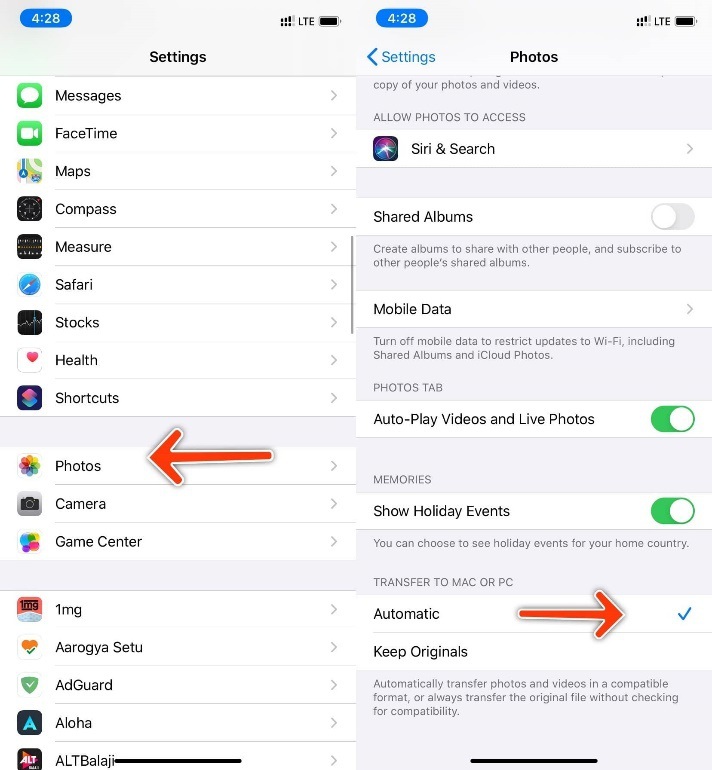
Step 4: Here, select the Automatic option .
The Automatic option automatically converts the HEIC image format to JPEG when you copy photos from iPhone to PC or Mac using a data transfer cable. The Keep originals option retains the HEIC image format when you copy photos from your phone to a PC or Mac.
Use iCloud Web on a PC
By default, Apple backs up all photos and videos on your phone to iCloud cloud storage. If the option to back up photos to iCloud is disabled on your iPhone, you'll need to enable it from the Settings menu .
Step 1: Open the Settings app on the iPhone.
Step 2: Choose your name at the top of the screen, then select iCloud .
Step 3: From the iCloud menu , select Photos and activate the iCloud Photos option .
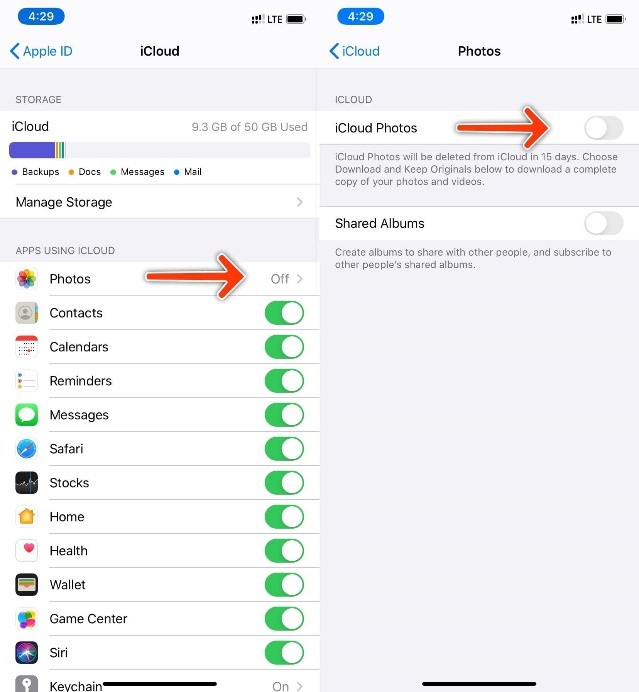
From now on, all photos and videos will be automatically backed up to the iCloud platform, and will be available on all Apple devices using the same Apple ID account. You can access iCloud on a PC from a web browser. If you want to convert HEIC image format to JPEG using iCloud Web, follow these steps.
Step 1: Open the browser on Mac or Windows and access iCloud.com address.
Step 2: Log in to your Apple account.
Step 3: Here, you will see Apple services on iCloud platform.
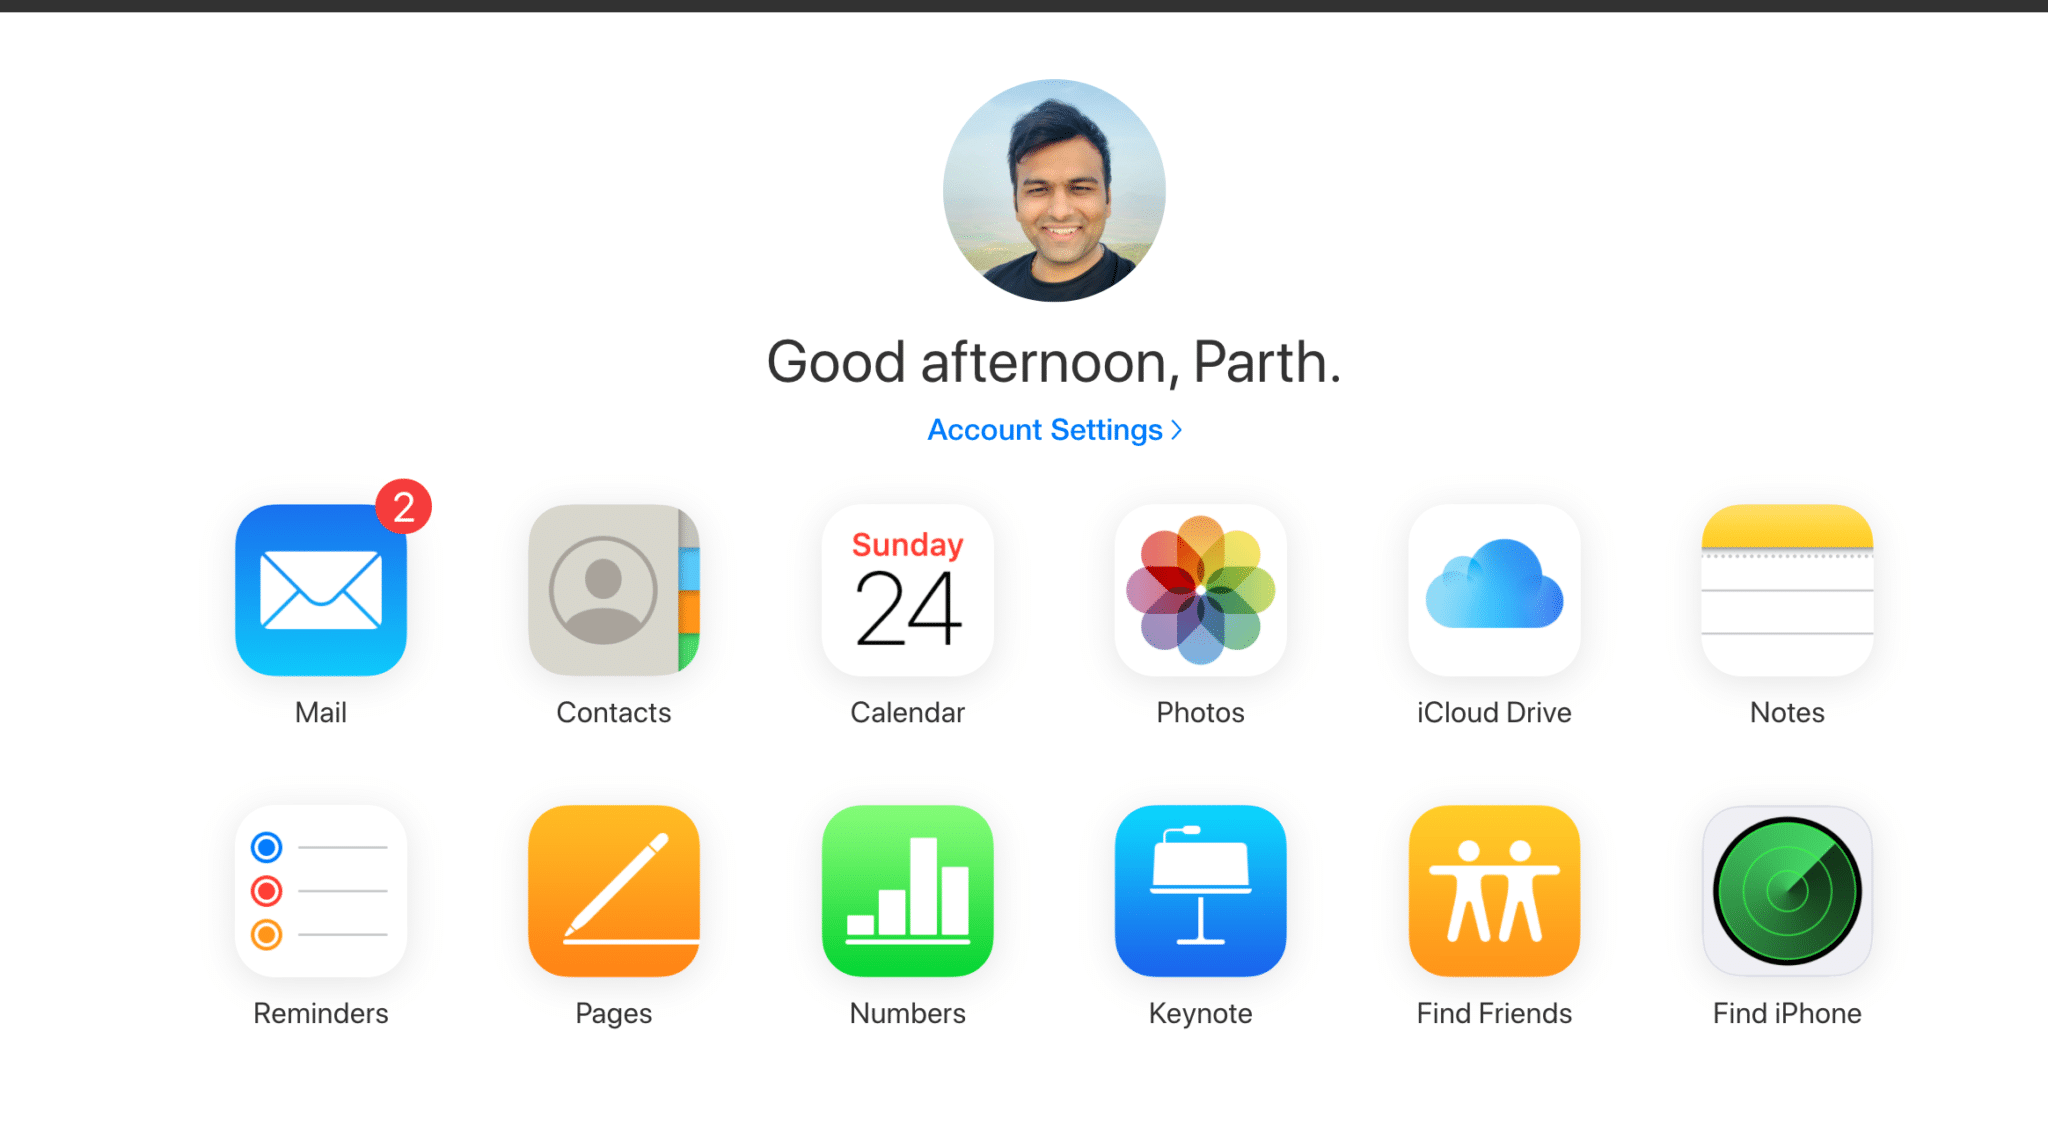
Step 4: Click the Photos tab and select the image you want to download to your device.
Step 5: Now, click on the down arrow button next to the cloud icon with the down arrow button in the upper right corner, then select Most compatible . Click the Download button and iCloud will download your selected photos in JPEG format.
