How to Connect Coaxial Cable Ends
Coaxial cable is used to transmit Internet and TV signals to homes and other buildings. These cables need connectors to plug into electrical devices (such as TVs) and transmit signals. If the coaxial cable does not have a pre-existing connector, you can easily attach it yourself. Just peel off the cover to expose the wires inside, attach the connector and press cos to secure. If used in a narrow space, you should use a perpendicular connector to avoid bending the cable too much..
Select and strip cables
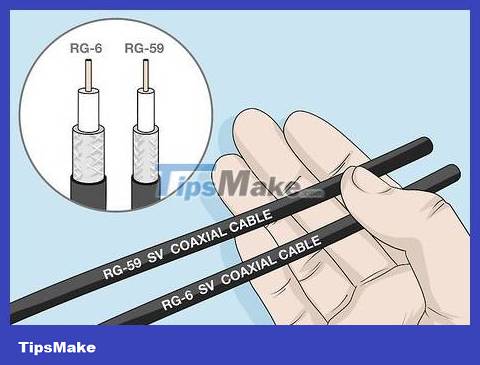
Determine whether the cable you have is RG59 or RG6. There are two common types of coaxial cable, and yours is probably one of them. The easiest way is to look at the rubber cover on the outside of the cable. The cable type will be printed here.
The difference between these two cables is that RG6 is larger and has a thicker shield than RG59. This makes RG6 stable and more widely used for television and Internet cables.
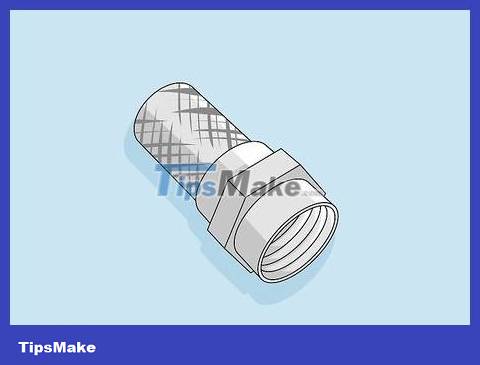
Prepare the appropriate connector for the cable type. The most common coaxial connector is type F. You can buy type F coaxial connectors appropriate to the cable diameter at electrical stores. The number of connectors you need to buy will depend on how many cables you need to connect.
There is also an N-type connector, but this type is rarely used in home installations.
F connectors also come in many designs, including press-in (by pressing cos) and threaded. Talk to the seller if you don't know which one to buy.
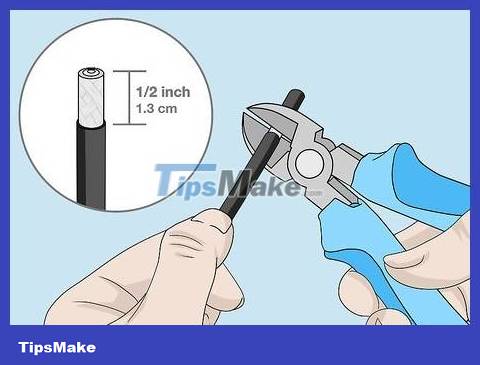
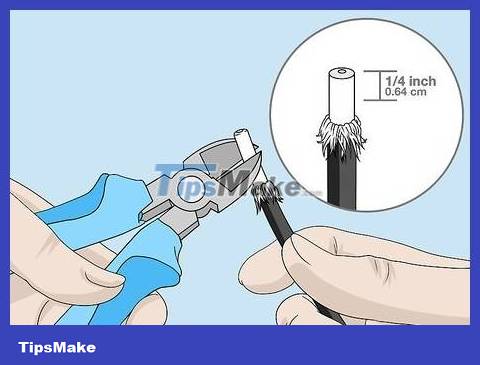
Cut about 1.3 cm of rubber sheath from the end of the cable. Use wire strippers or a razor. Measure about 1.3 cm from the end of the cable and cut around the outer sheath. Then peel off this cover to reveal the anti-interference mesh underneath.
Only cut the outer rubber cover, do not cut the entire cable. A cut that is too deep can damage the wire.
If you use a razor, be careful. Do not put your fingers in the cutting path of the blade, and hold the cable tightly.
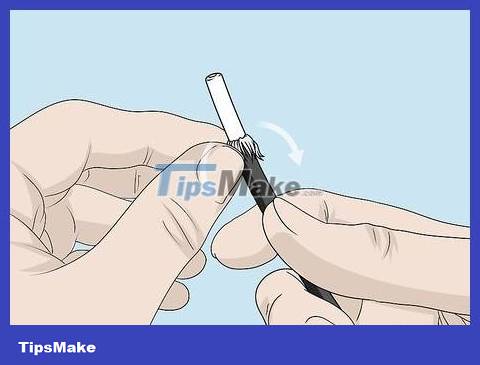
Peel down the metal mesh. This is the second layer of the cable. You can use your fingers or pliers and peel this mesh down. Fold down so that the metal mesh rests on the rubber cover below where you just cut.
Wire strippers can cut entire layers of mesh, so you need to be careful to use moderate force. If you cut too deep, you can damage the copper core in the middle of the cable.
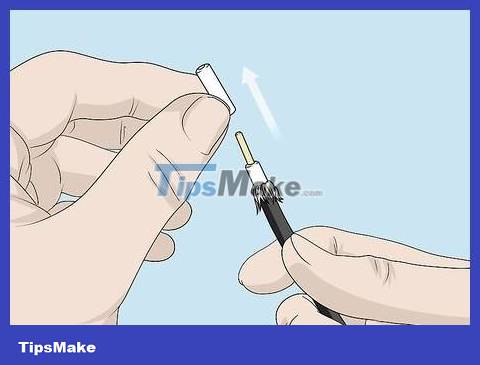
Cut about 0.6 cm of dielectric insulation from the end of the cable. Next is the dielectric layer surrounding the main conductor made from white plastic. Use wire strippers or a razor and carefully cut around the white plastic at a position 0.6 cm from the end of the cable. Then peel off this shell to reveal the copper core in the middle.
The plastic case can be covered with a thin layer of aluminum coated film.
Be especially careful when peeling off this plastic cover. If you affect the copper core, the signal transmission will be poor.
Remove any portion of the metal mesh that comes into contact with the conductor. If any piece of metal mesh comes into contact with the wire, the signal quality will be disturbed. Check again to make sure that the entire metal mesh is folded down and that no part is in contact with the wire.
Attach the press connector
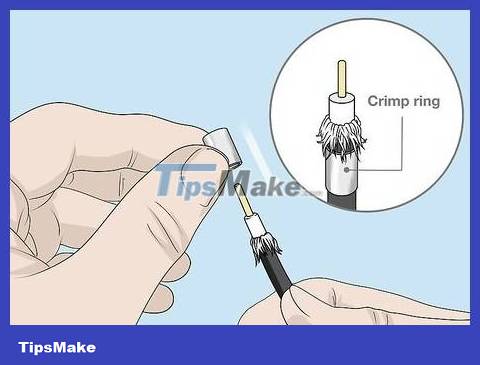
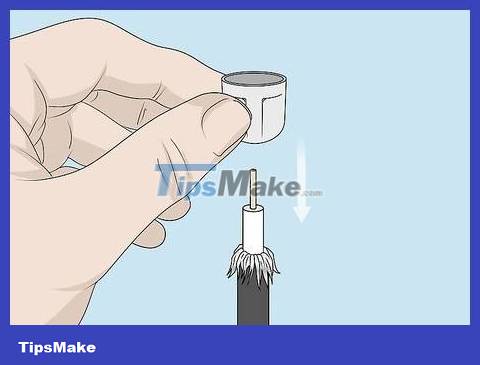
The jack connector is pressed into the cable. Insert the connector underneath the spot where you cut it and leave it there. Don't forget this step because otherwise you will have to disassemble the connector to put the jack in first.
Not all connectors use removable jacks. Some connectors are attached to the connector jack. You need to determine whether this type of connector uses a separate or continuous jack.
Attach the connector to the cable so that the copper core sticks out. One hand holds the cable, the other holds the connector. Attach the wire to the center of the connector and push until the copper core protrudes beyond the edge of the connector on the other side.
You will need to use force to push the connector between the rubber and white plastic housing. Try twisting the connector back and forth while attaching it to the cable.
If you are installing the cable outdoors, don't forget to use waterproof connectors. This type of connector usually has a rubber coating on the outside.
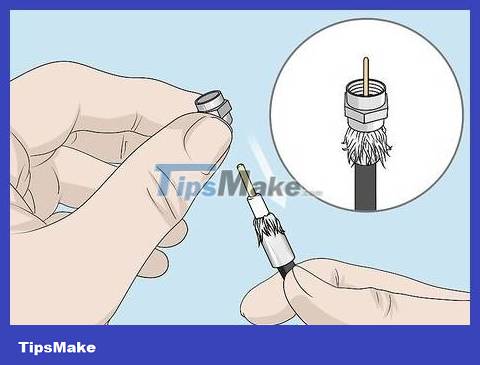
Press cos to secure the connector and cable. Cos crimping pliers will help you completely fix the jack, connector and cable, keeping the connection secure. Choose a die (or hole) that is the appropriate width for the cable you are using. Then, insert the cable into the cos presser and squeeze the handle until you hear a 'click' sound. It is done.
Some cos presses work differently. Follow the instructions depending on the tools you have.
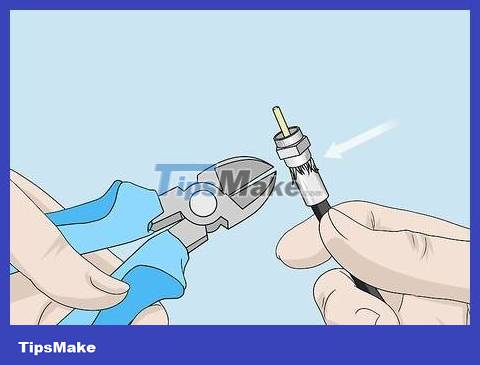
Trim the metal mesh sticking out below the connector. These pieces of metal can interfere with signals or lines. You need to check around the connector to see if there are any metal wires sticking out. If so, use pliers to cut the wire and trim it neatly.
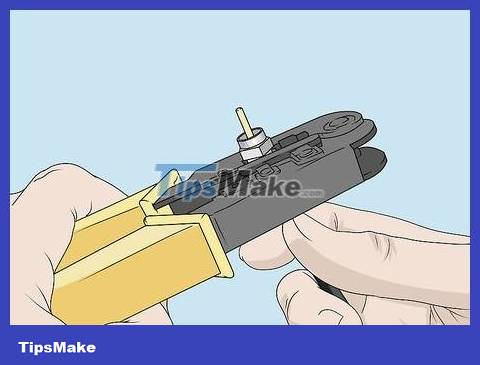
Attach the connector perpendicularly
Attach the connector base to the cable. Most right-angle connectors have a base that secures the housing together. Attach this base to the stripped end of the wire so you can screw it back on after installing the connector.
Don't forget to attach this base before installing the other parts of the connector. Otherwise, you will have to remove the connector to reattach the base.
Some sets of perpendicular connectors have a different structure. But in general, you should still follow this procedure with any right-angle connector.
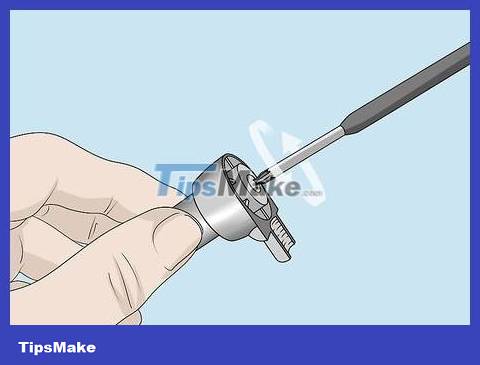
Loosen the screw inside the connector. Inside the upper connector shell there are screws that transmit the signal. Turn the screw counterclockwise to loosen it.
It is not necessary to completely remove the screws. You just need to loosen it enough to attach the wire.
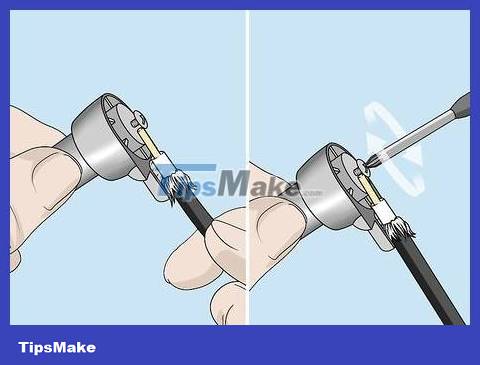
Attach the wire to the screw and tighten it. Place the cable into the connector housing so that the wire end touches the screw. Hold the cable still and turn the screw clockwise to tighten. Check to make sure the connection is tight and secure.
Tighten only until the screw fits tightly and holds the copper core. Do not tighten too tight or you may damage the wire.
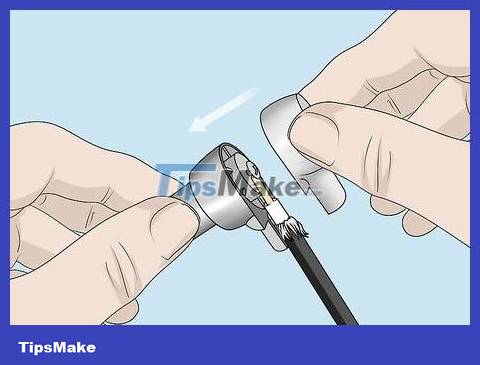
Install the back of the connector. Attach the back to the connector so that it lines up with the notches of the front part. Then, press the two connector pieces together (with the cable between).
Some connectors will snap together and make a 'click' sound when you press on them. Continue holding the two parts of the connector in case they do not automatically align.
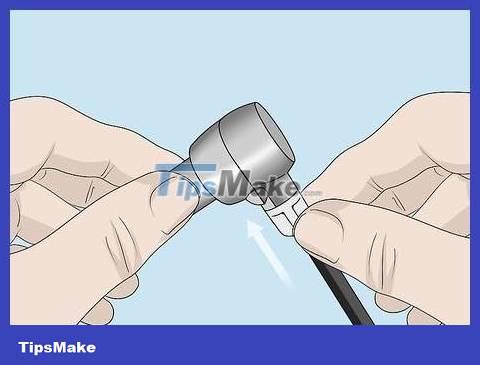
Push up the base you attached earlier and screw it into the connector. The base will secure the two pieces of the connector together. Push the base up against the connector and twist. Check again to make sure the connection is snug.
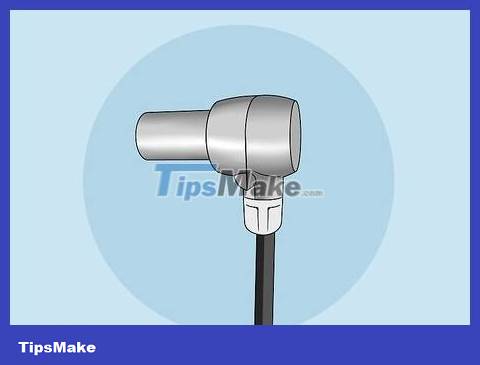
It is done.