Table of Contents
This practical guide explains how to Add Recycle Bin to File Explorer through clear, ordered steps. It also covers useful settings, common mistakes, and checks that can improve the final result.
Do you often find yourself searching for the Recycle Bin when managing your files in File Explorer? Wouldn't it be great if you could with minimal effort access the Recycle Bin in File Explorer? If the answer is yes, you've come to the right place!
This guide will show you all the steps required to show the Recycle Bin in File Explorer, regardless of whether you are using Windows 10 or Windows 11. Moreover, there are multiple methods to do it, depending on your preference.
Add Recycle Bin to File Explorer by Pinning It to Quick Access
This is probably the easiest method to show the Recycle Bin in File Explorer and is also the favorite method. Here is how to do it in both Windows 10 and Windows 11:
1. How to Pin Recycle Bin to File Explorer in Windows 10
First, launch File Explorer—a quick way is to press Win + E On your keyboard. Then, drag the Recycle Bin icon from the desktop to the Quick access section in the left pane of File Explorer.
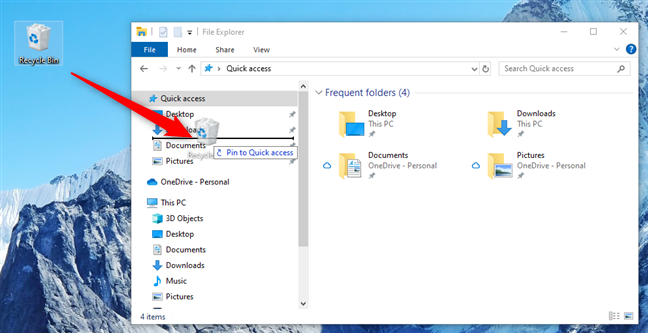
What you will get after doing this is a neat Recycle Bin entry in the Quick access list from File Explorer.

2. How to Pin Recycle Bin to File Explorer in Windows 11
In Windows 11, the process is even easier. To show the Recycle Bin in File Explorer, right-click or press and hold the Recycle Bin icon on the desktop, then select Pin to Quick access From the context menu.
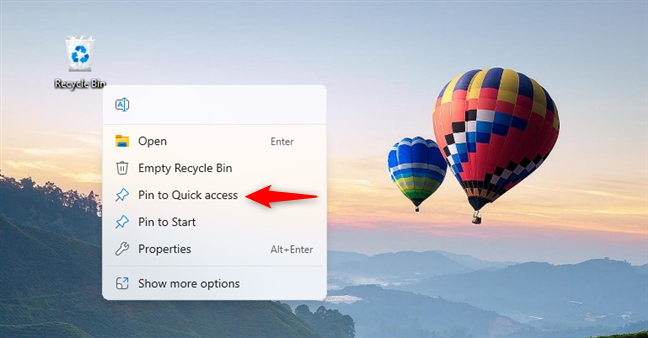
Alternatively, you can also drag the Recycle Bin icon to the Quick access list in File Explorer, just like in Windows 10.
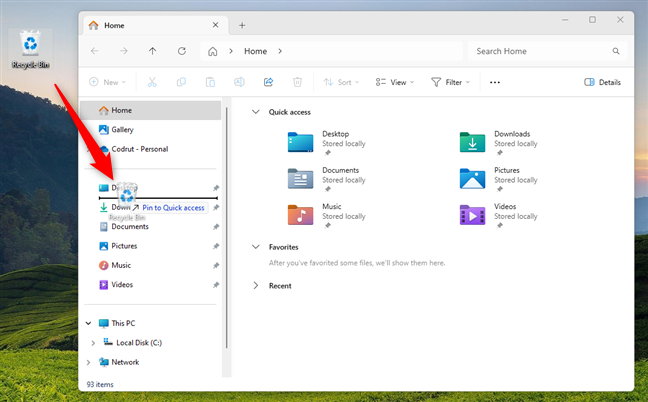
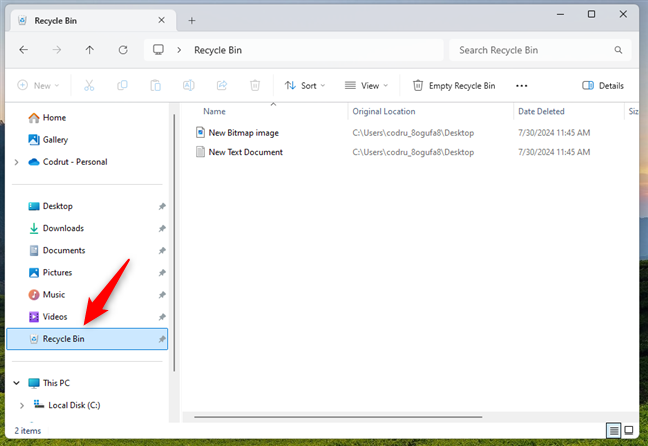
In both cases, you'll see the Recycle Bin listed in the Quick access panel on the left side of File Explorer.
Add Recycle Bin to File Explorer by Showing All Folders
Another way to get the Recycle Bin in File Explorer is to set the file manager to show all the folders you need in Windows. Unfortunately, this means that in addition to the Recycle Bin, you will also see other items like Libraries or Control Panel, which you may not want. However, some people may prefer this method, so here's how:
1. How to Add Recycle Bin to File Explorer in Windows 10 by Enabling "Show All Folders"
To make Windows 10's File Explorer show all folders, open it, select the View Tab at the top, and click the Options Button from the ribbon interface. Then, in the Folder Options Window, go to the View tab, check theShow all folders Setting, and click OK.
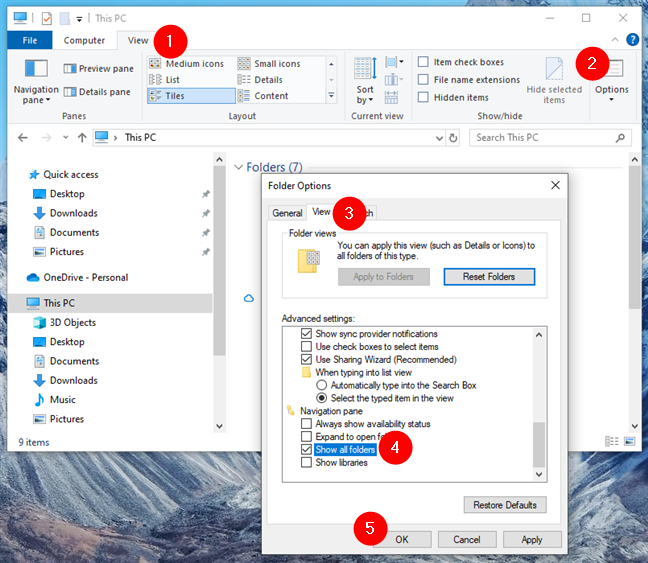
You should then immediately see the Recycle Bin added to the bottom of the folder list in File Explorer's navigation panel.
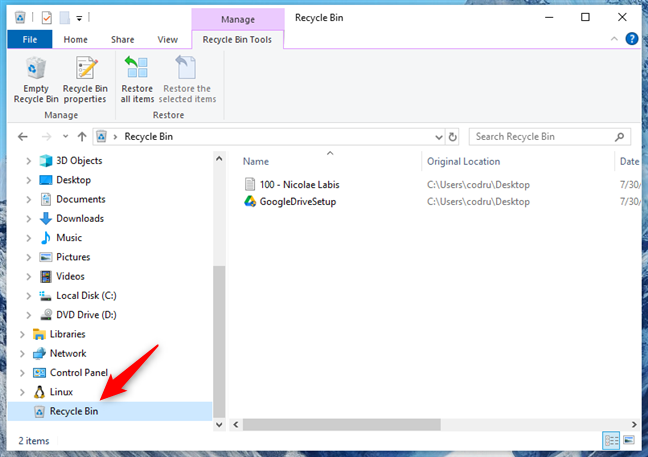
And that's it! Now, let's see how to do the same in Windows 11:
2. How to Add Recycle Bin to File Explorer in Windows 11 by Enabling "Show All Folders"
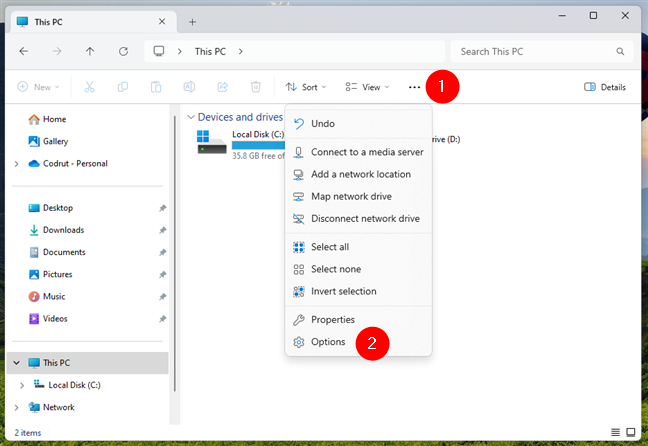
If you're using Windows 11, open File Explorer, click the … Button in the top toolbar, and select Options from the menu that appears.
The Folder Options window will open. In it, select the View tab, enable theShow all folders Option in the Advanced settings List, and click OK .
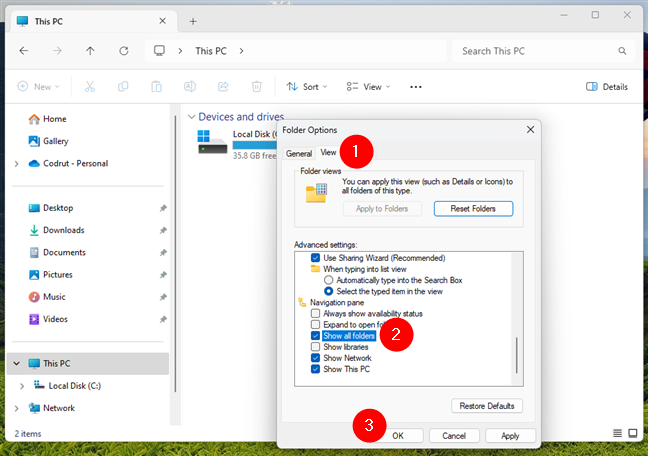
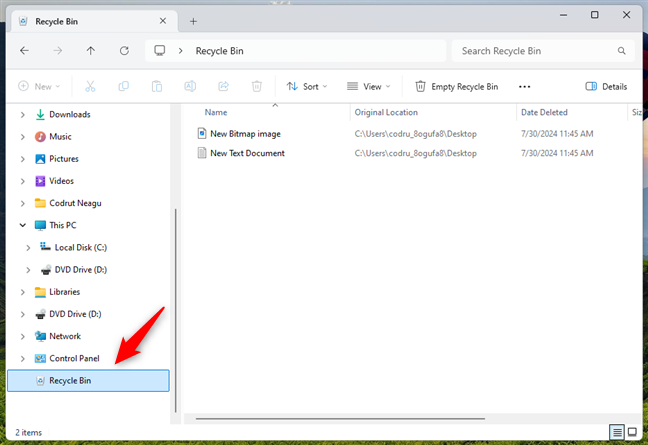
The Folder Options window then closes and the Recycle Bin is immediately displayed in the File Explorer folder list on the left. Like this:
Add Recycle Bin as a Drive in File Explorer Using Windows Registry
This method involves editing the Windows Registry, so you should proceed with caution and only make the changes that the article tells you to make. Any other changes you make could negatively impact your user experience or even cause Windows to stop working. Please follow the next steps exactly as described, regardless of whether you are using Windows 10 or Windows 11:
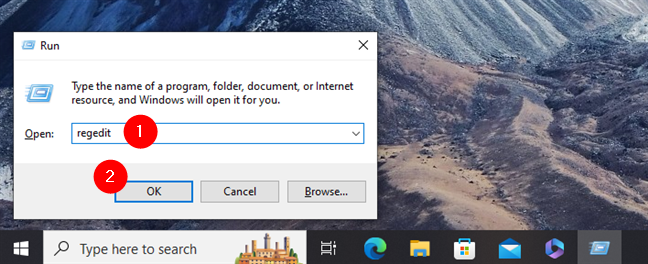
Open the Registry Editor. A quick way is to press Win + R On your keyboard to launch the Run dialog box, type Regedit , and press Enter .
In the Registry Editor window, navigate to this registry key folder:
ComputerHKEY_LOCAL_MACHINESOFTWAREMicrosoftWindowsCurrentVersionExplorerMyComputerNameSpace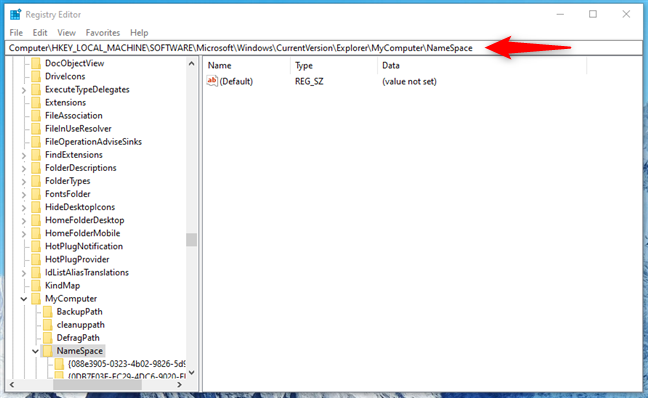
Now, you need to create a new key in your Windows Registry. Right-click or press and hold on an empty space in the NameSpace Folder, then go to New > Key In the context menu that appears.
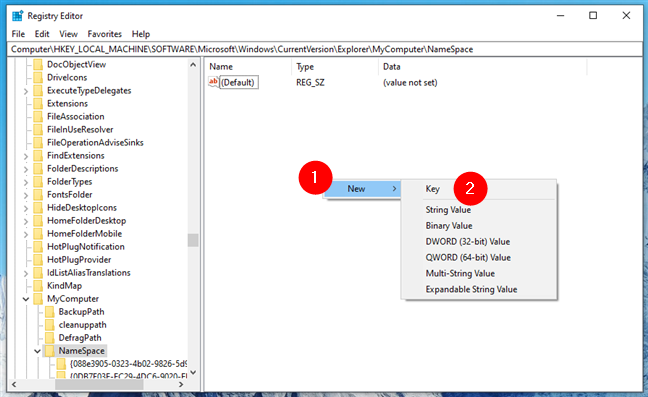
A new key will be added to the Windows Registry immediately. Instead of the default name, enter this exact text:
{645FF040-5081-101B-9F08-00AA002F954E}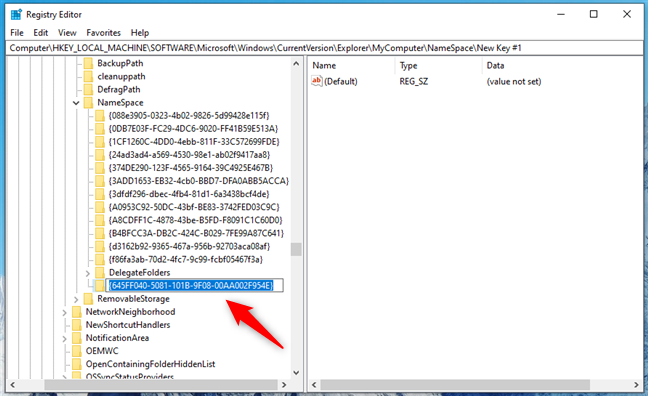
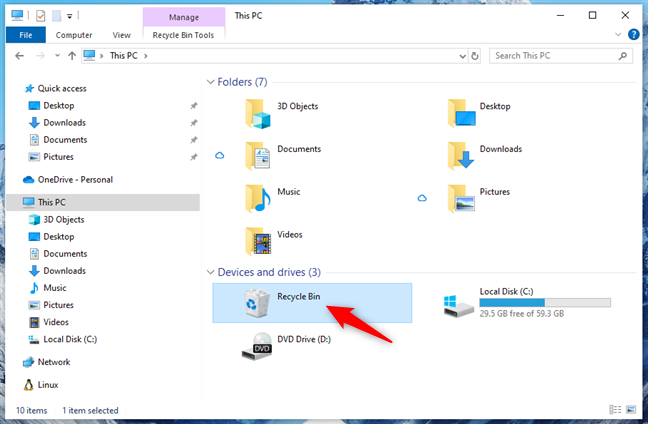
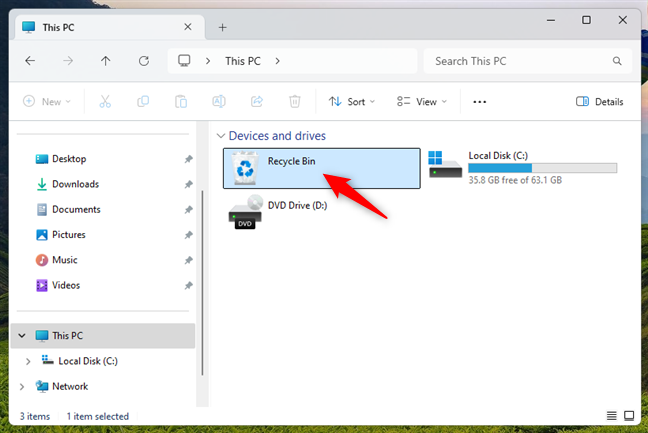
Then, close Registry Editor and check This PC In File Explorer. The Recycle Bin should now be listed there, along with any other drives you might have on your computer. Here's what it looks like in Windows 10:
And here's the Recycle Bin in Windows 11's File Explorer:
That's it!
As you can see, adding the Recycle Bin to File Explorer is something you can do with minimal effort. Moreover, there are many various methods to do it. If you know other ways to make the Recycle Bin appear in File Explorer, feel free to share them in the comments section below!
FAQ
How do I Add Recycle Bin to File Explorer?
Follow the steps in this guide in order, verify each setting before continuing, and check the result after every major change.
What should I prepare before I Add Recycle Bin to File Explorer?
Confirm compatibility, install current updates, save important work, and back up data before changing system or application settings.
What can I do if add Recycle Bin to File Explorer does not work?
Review permissions and requirements, restart the relevant device or app, repeat the steps carefully, and use official support resources when the issue continues.
Related Articles
 Tips for Using Recycle Bin More Effectively9 minutes read
 5 Recycle Bin Settings on Windows 11 You Should Know7 minutes read
 How to Fix File Explorer Lag on Windows 11: Step-by-Step Guide8 minutes read
 How to Restore the Recycle Bin Icon Lost in Windows 105 minutes read
 Steps to Fix Slow Windows File Explorer6 minutes read
 Files Is a Windows File Explorer Alternative That Meets All User Needs6 minutes read
Reader Comments 0
Sign in with email or Google to join the discussion.