Table of Contents
You can connect Voice.ai to n8n with the @voice-ai-labs/n8n-nodes-voice-ai community package. If the node appears in n8n's Nodes Panel with an Install button, install it there. Otherwise, an instance owner can install the package from Settings > Community Nodes on a self-hosted instance.
After installation, create a Voice.ai developer API key, save it in an n8n credential, and run a short text-to-speech test. Do not paste the key into a Code, Set, or sticky-note node.
Before you start: check your n8n environment
| Environment | What you can install | Installation path |
|---|---|---|
| n8n Cloud | Verified community nodes available in the Nodes Panel | Canvas > Nodes Panel > Install |
| Self-hosted n8n | Verified nodes and, when enabled, unverified npm community packages | Nodes Panel or Settings > Community Nodes |
n8n's current documentation says unverified community nodes are not available on n8n Cloud. On self-hosted deployments, N8N_COMMUNITY_PACKAGES_ENABLED must be true; this is the documented default, but administrators can disable it. Review n8n's community-node installation rules before changing a production instance.
Step 1: Find and install the Voice.ai node
- Open a workflow. Select + on the canvas or press N to open the Nodes Panel.
- Search for Voice AI. Confirm that the result refers to Voice.ai and the expected publisher/package; similarly named voice products are separate integrations.
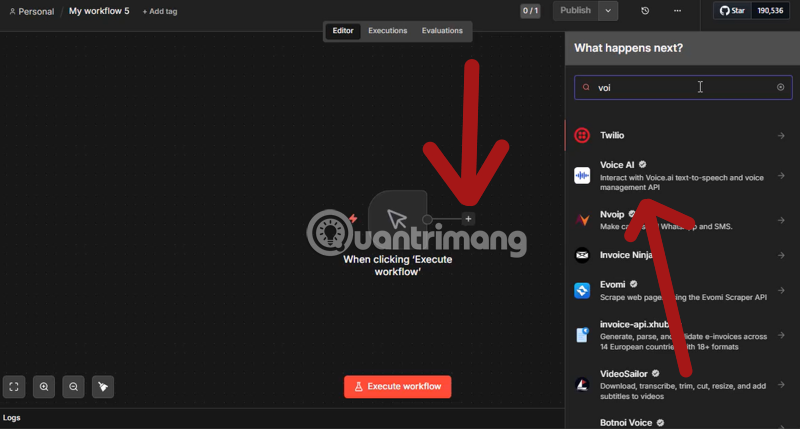
- If the result offers Install or Install Node, review the package details and install it. n8n requires an instance owner to approve a verified node before other members can use it.
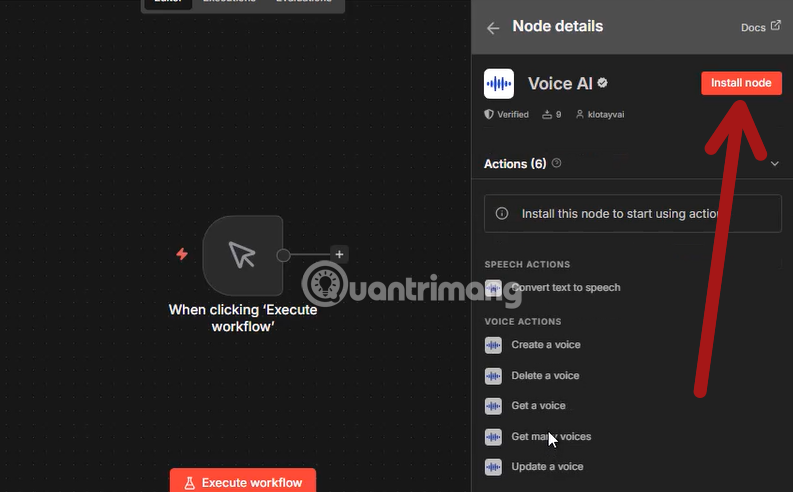
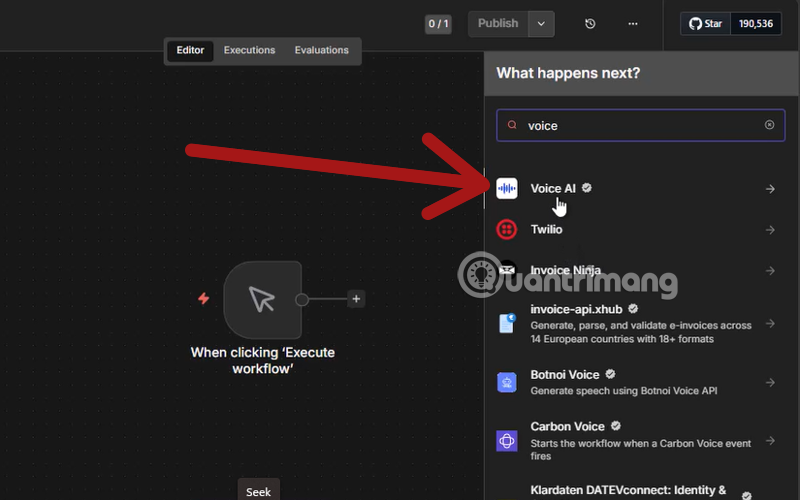
If the node does not appear in the panel:
- n8n Cloud: you cannot install an unverified npm package. Use a verified voice integration, connect the Voice.ai API with the built-in HTTP Request node, or move the workflow to a self-hosted instance after reviewing the operational cost.
- Self-hosted: go to Settings > Community Nodes > Install and enter
@voice-ai-labs/n8n-nodes-voice-ai. n8n documents this npm installation route for self-hosted instances. Check the published package and version history before approval.
Step 2: Create a Voice.ai API key
- Open the Voice.ai developer dashboard and sign in.
- Open the developer/API-key area.
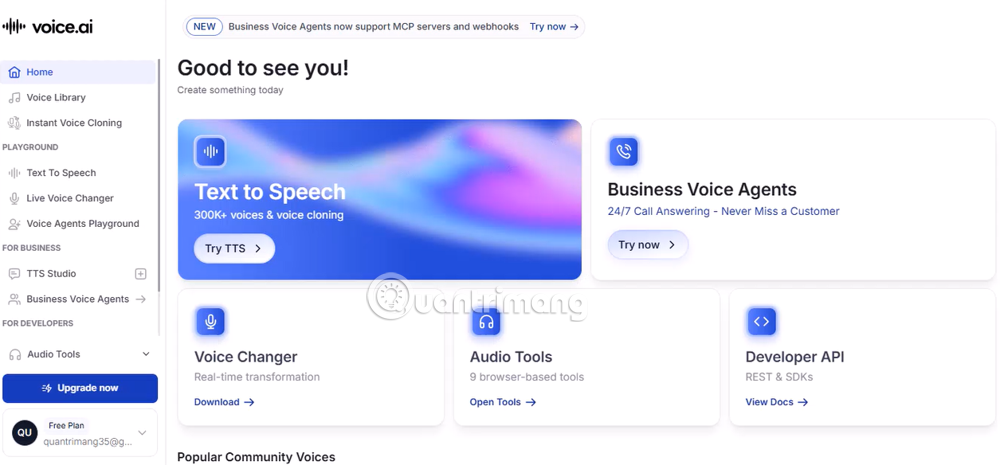
- Select + API Key.
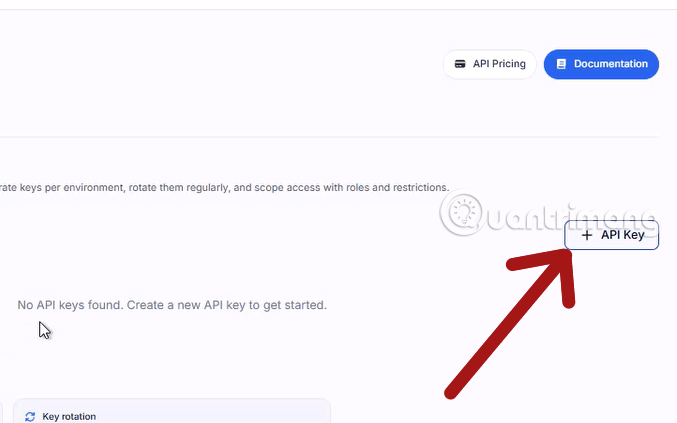
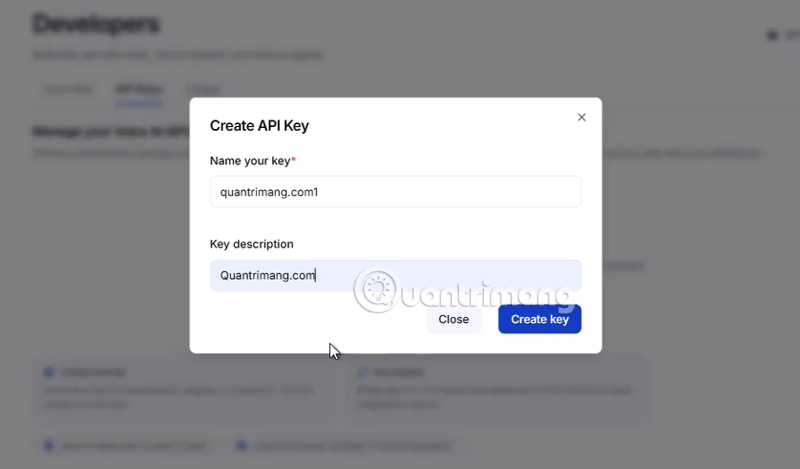
- Give the key a descriptive name such as n8n-production-tts. If separate development and production workflows exist, create separate keys so either one can be revoked independently.
- Create the key and copy it to a password manager or approved secrets store. Never place it in screenshots, exported workflow JSON, chat messages, source control, or client-side code.
Step 3: Save the credential in n8n
- Return to the workflow and add the Voice.ai node.
- In the node's credential field, select Create new credential or Set up credential.
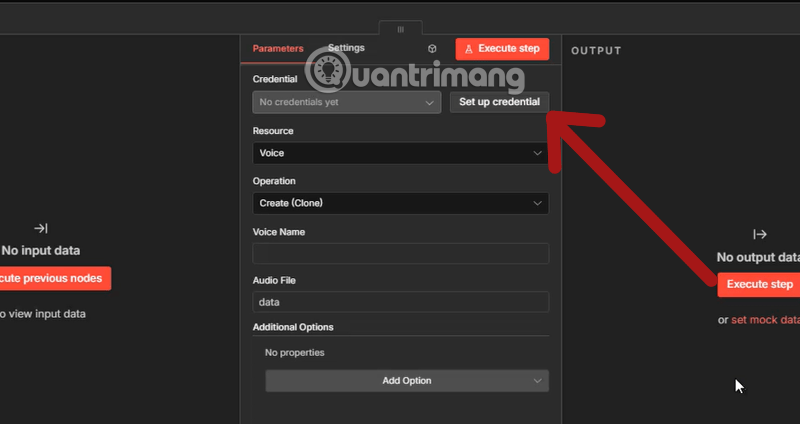
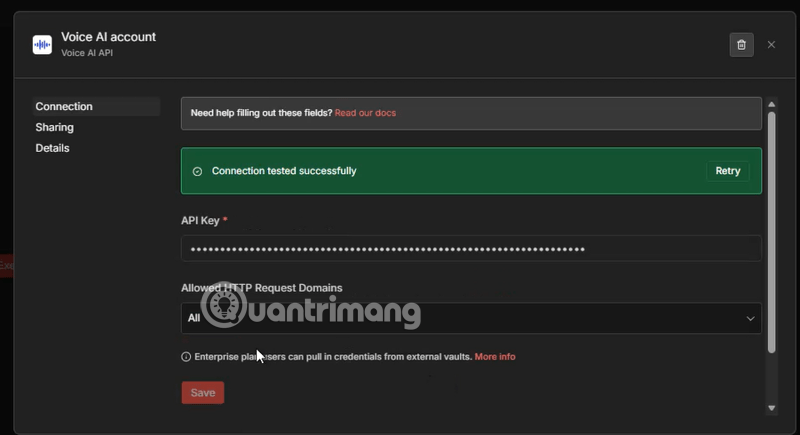
- Paste the API key into the credential's API-key field, name the credential clearly, and save it.
- Limit credential sharing to the workflows and users that need it. n8n encrypts stored credentials using the instance encryption key, so self-hosted administrators should back up and protect that key.
Step 4: Run a small text-to-speech test
- Add a Manual Trigger before the Voice.ai node.
- Select a text-to-speech operation exposed by your installed package version.
- Choose an available voice and enter one short sentence.
- Execute the node and inspect the output. Confirm whether the node returns binary audio, a download URL, or job metadata; downstream handling depends on that output type.
- Only after the test succeeds, connect storage, publishing, or notification nodes.
The package is described as a Voice.ai text-to-speech and voice-management integration. Do not assume it performs speech-to-text, live phone calls, or real-time voice-agent streaming. Those jobs may require another verified integration, a telephony provider, a webhook, or the HTTP Request node.
Practical workflow patterns
Create an audio version of approved text
Trigger → retrieve approved text → optional text cleanup → Voice.ai text to speech → store the audio → notify an editor. Keep a human approval step before publication so a bad summary or pronunciation is not distributed automatically.
Generate voice prompts for an application
Database or form trigger → validate fields → choose a voice → generate audio → save the returned file reference. Validate text length and reject unsupported markup before sending it to the provider.
Connect an API without a community node
If the package is unavailable, use n8n's HTTP Request node with Voice.ai's current API documentation. Store authentication in a generic credential, import a documented cURL example if available, and test one endpoint before building a larger workflow. TipsMake's Supabase-to-n8n guide shows the same general pattern of creating a service key, saving a credential, testing a node, and then adding production controls.
Security and production checks
- Review the package: confirm the publisher, repository, current version, license, release history, and unresolved security reports.
- Pin and test upgrades: clone a workflow or use a staging instance before updating a community node. A new package version can change parameters or output data.
- Rotate exposed keys: revoke and replace a key immediately if it appears in an execution log, export, screenshot, or repository.
- Minimize stored audio: voice data can contain personal or confidential information. Set retention and access rules before saving it.
- Handle failures: add retry limits for temporary errors, but route authentication errors, quota errors, and invalid input to review instead of retrying indefinitely.
- Monitor cost and quotas: long text, repeated executions, and retry loops can create unexpected usage.
Community nodes execute code inside the n8n instance. “Verified” means n8n has vetted a package against its program requirements; it does not remove the need for access control, testing, updates, and vendor review. If managing community code is not acceptable for your environment, use a built-in HTTP Request integration or compare n8n alternatives with the required voice provider support.
Troubleshooting
The Voice.ai result does not appear in search
Confirm the exact package name and whether your instance allows that installation type. Cloud users can search only the verified nodes made available by n8n. Self-hosted administrators should verify that community packages are enabled and restart only if their deployment method or package documentation requires it.
The credential test fails
Check for extra spaces in the key, verify that the key is active, and confirm that the workflow uses the intended credential. Recreate the key if it may have been exposed. A 401 or 403 response is normally an authentication or permission problem, not a reason to retry repeatedly.
The node runs but no playable audio is visible
Inspect the node's output panel. If it returns binary data, open the Binary output and pass that property to a storage node. If it returns a job ID, the API may require a later status check. Follow the package documentation for the installed version rather than assuming every operation is synchronous.
Related Articles
 KDE Connect - Download the Latest KDE Connect Here4 minutes read
 How to Connect iPhone to Linux PC Using KDE Connect8 minutes read
 How to Connect to the Network for Android TV Box6 minutes read
 How to Connect Laptop to TV? 5 Ways to Connect the TV to Laptop6 minutes read
 5 Simple Ways to Connect Microphone to PC6 minutes read
 KDE Connect Is Officially Available on iPhone3 minutes read
Reader Comments 0
Sign in with email or Google to join the discussion.