Guide to creating a quiz website on Canva AI
In addition to using quiz templates on Canva, we can also use Canva AI to create a quiz website for students to take whenever they need to.
Table of Contents
Besides using quiz templates on Canva , we can also use Canva AI to create a quiz website for students to take whenever needed. Each student's name can be clearly written on the quiz so that teachers can compile a list of answers. Below is a guide on creating a quiz website using Canva AI.
How to create a quiz website using Canva AI
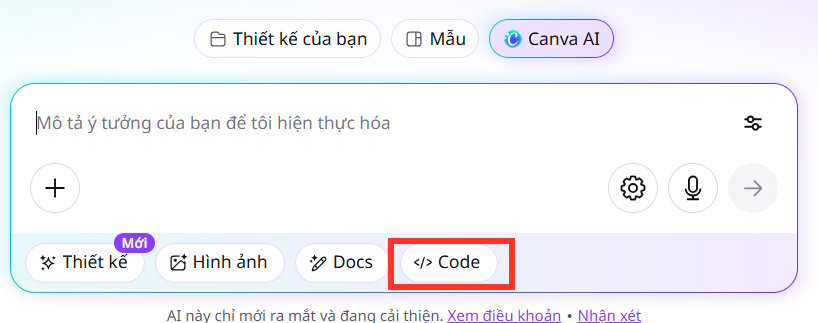
Step 1:
First, go to Canva, then select Canva AI , and then select Code .
Step 2:
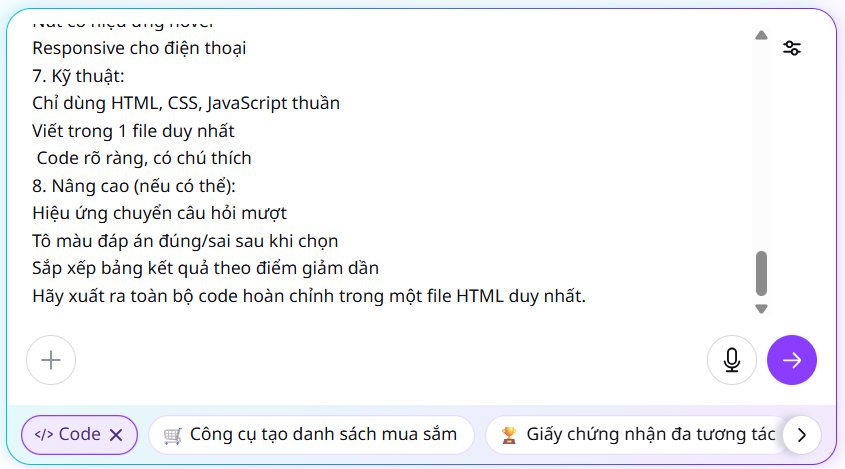
Next, we need to enter commands to start building a quiz website for students. You can use ChatGPT to write the website creation command in Canva, following the prompt template below.
Hãy tạo một website trắc nghiệm môn Lịch sử lớp 7 bằng HTML, CSS và JavaScript, tất cả nằm trong **một file duy nhất (index.html)**. Yêu cầu chi tiết: 1. Giao diện mở đầu (màn hình nhập thông tin): Tiêu đề: "Trắc nghiệm Lịch sử lớp 7" Người dùng phải nhập: Họ và tên (input text) Lớp (input text hoặc dropdown) Nút "Bắt đầu" Kiểm tra: nếu chưa nhập đủ thì báo lỗi 2. Phần câu hỏi trắc nghiệm: Có đúng 20 câu hỏi lịch sử lớp 7 Mỗi câu có 4 đáp án (A, B, C, D) Chỉ được chọn 1 đáp án Có nút "Câu tiếp theo" Hiển thị tiến trình (ví dụ: Câu 5/20) 3. Tính điểm: Mỗi câu đúng được 1 điểm Tự động tính và lưu điểm khi làm bài 4. Kết quả cuối cùng: Hiển thị: Họ tên Lớp Điểm số (ví dụ: 15/20) Nhận xét: 16–20: Giỏi 11–15: Khá 6–10: Trung bình Dưới 6: Cần cố gắng Nút "Làm lại" 5. Lưu dữ liệu (LocalStorage): Sau khi nộp bài, lưu kết quả vào LocalStorage dưới dạng danh sách Mỗi bản ghi gồm: Họ tên Lớp Điểm Thời gian làm bài Tạo thêm một phần "Bảng kết quả" hiển thị: Danh sách tất cả học sinh đã làm bài Hiển thị dạng bảng (table) Có nút "Xóa dữ liệu" 6. Thiết kế: Giao diện đẹp, hiện đại, dễ nhìn Căn giữa nội dung Nút có hiệu ứng hover Responsive cho điện thoại 7. Kỹ thuật: Chỉ dùng HTML, CSS, JavaScript thuần Viết trong 1 file duy nhất Code rõ ràng, có chú thích 8. Nâng cao (nếu có thể): Hiệu ứng chuyển câu hỏi mượt Tô màu đáp án đúng/sai sau khi chọn Sắp xếp bảng kết quả theo điểm giảm dần Hãy xuất ra toàn bộ code hoàn chỉnh trong một file HTML duy nhất.
Please wait a moment for Canva AI to generate the code and design the quiz website based on the description you provided.
Step 3:
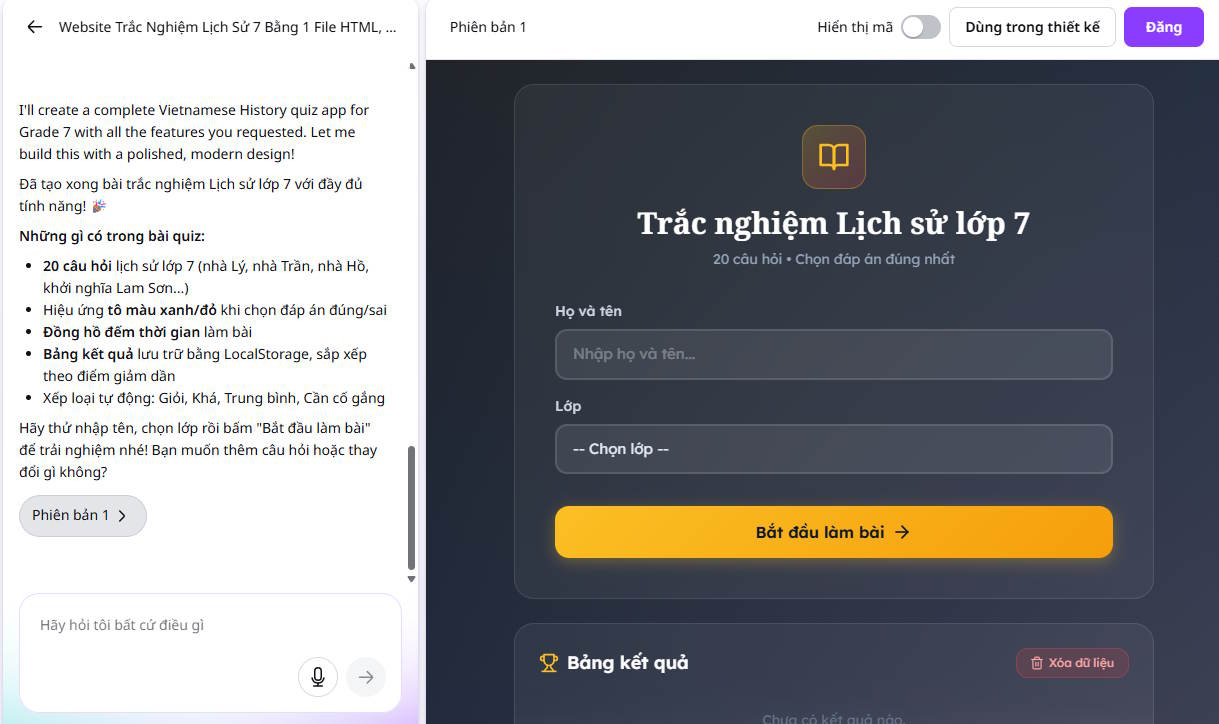
At this point, you will see the design quiz website created in Canva AI. If teachers wish to edit any part of the content, they can continue entering commands to make changes.
Step 4:
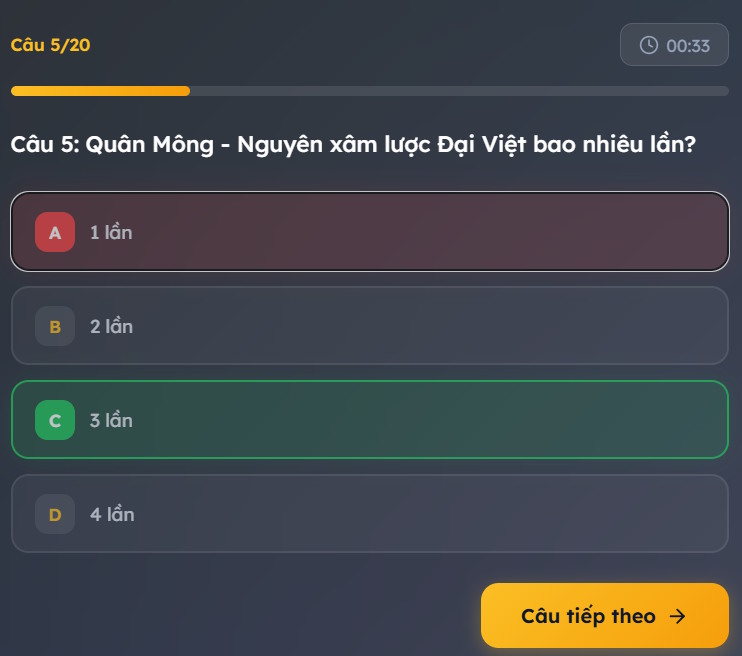
Now let's try out the quiz website created on Canva AI. The name and grade section will display the initial interface for students to fill in before starting the quiz.
Each question will have a countdown timer; if teachers don't want a countdown, they can enter a command to remove this part.

If a student answers a question incorrectly, they will receive immediate feedback.
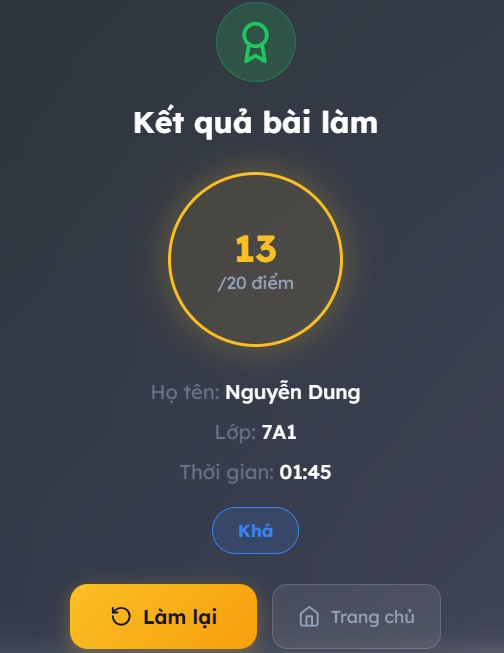
At the end of each test, there will be a summary of the scores and comments based on those scores.
Step 5:
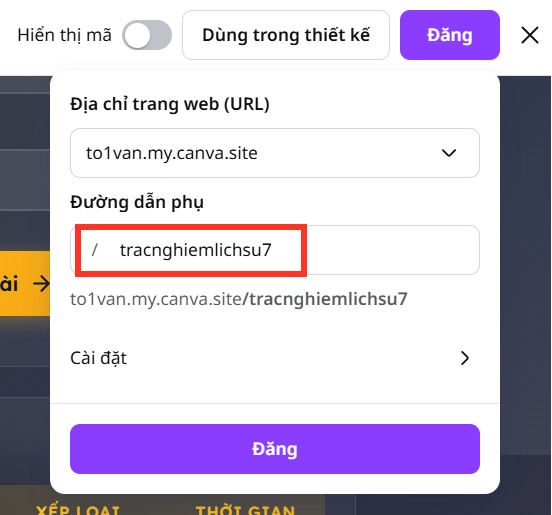
Teachers click on "Post," then enter a name for the website URL of the quiz, and then click the "Post" button below.
Teachers share this link with the student group, and the ranking list of students who have completed the assignment is also updated continuously.

Was this article helpful?
Your feedback helps us improve.
Related Articles
 Guide to creating 3D designs using AI in Canva3 minutes read
 Guide to quickly creating AI quiz questions4 minutes read
 Quick guide to designing greeting cards on Canva AI2 minutes read
 How to create mind maps using Canva AI5 minutes read
 Instructions for creating QR codes on Canva3 minutes read
 This is how to create multiple-choice question slides in Canva.3 minutes read
Reader Comments 0
Sign in with email or Google to join the discussion.