Table of Contents
The Google Sheets node in n8n can read, append, update, and remove spreadsheet data as part of a workflow. A reliable setup has four parts: a clean header row, the right Google credential, a clearly selected operation, and a test using sample data before the workflow is activated.
This guide focuses on the built-in Google Sheets node. Node labels can change between n8n releases, so use the operation's description and the current official n8n Google Sheets documentation when the interface differs from the screenshots.
Prepare the spreadsheet first
- Put stable, unique column names in the first row; avoid blank or duplicate headers.
- Use one row per record and keep each column's data type consistent.
- Add a unique ID column if the workflow will update existing rows. Names and email addresses alone may not be unique.
- Test against a copy of important data until append and update behavior is confirmed.
- Give the connected Google account only the access required for the chosen spreadsheet.
If you are new to the spreadsheet interface itself, review how to use Google Sheets before building the automation.
1. Add the Google Sheets node
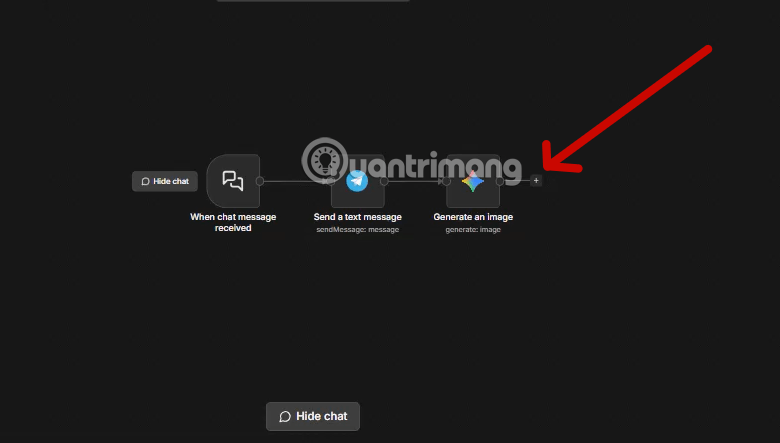
Open the n8n workflow editor, select the plus button after the node that will supply the data, and search for Google Sheets.
Select Google Sheets from the app list. Use the regular Google Sheets node for an action performed during a workflow; use the Google Sheets Trigger when a sheet change should start the workflow.
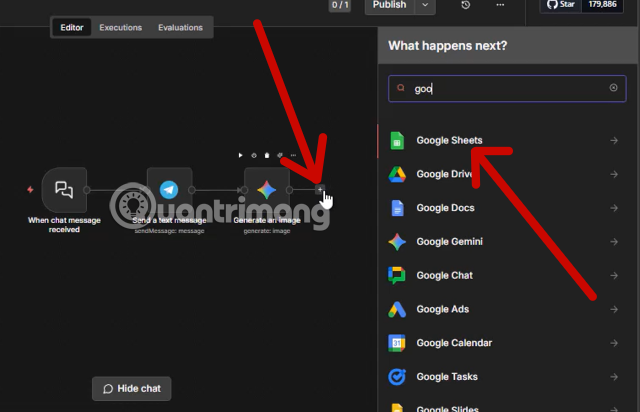
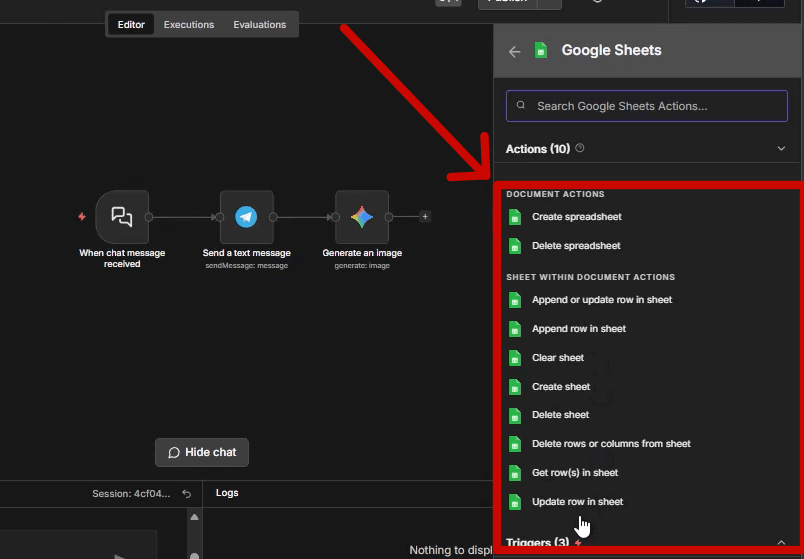
2. Choose the operation that matches the job
| Goal | Typical operation | Important check |
|---|---|---|
| Read matching data | Get Row(s) | Confirm filters and whether all matches or only the first match should be returned |
| Add a new record | Append Row | Map every incoming field to the intended header |
| Change an existing record | Update Row | Match on a stable unique column to avoid updating the wrong row |
| Add or update | Append or Update Row | Choose a reliable matching column and test both branches |
| Clear or remove data | Clear or Delete | Test on a copy and verify the selected sheet or range |
The available list depends on the selected resource and n8n version. Read the operation description rather than relying on an older label such as “Read Row.”
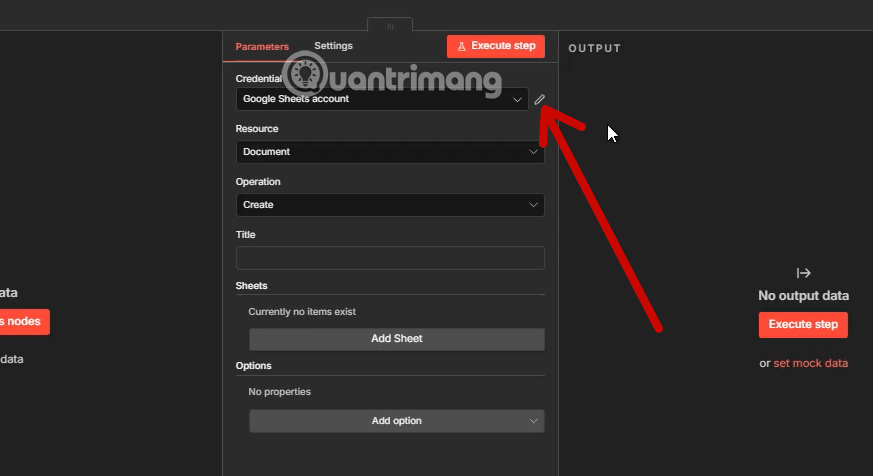
3. Connect a Google credential
In Credential to connect with, choose an existing Google Sheets credential or create a new one.
For n8n Cloud
When managed Google OAuth is available for the node, select the account-connection option, sign in to the intended Google account, and review the requested permissions. You do not need to create a Google Cloud OAuth client for a supported managed connection.
For self-hosted n8n
A self-hosted instance normally uses a custom Google OAuth2 credential:
- Create or select a project in Google Cloud.
- Enable the Google Sheets API. Enable the Google Drive API as well when the n8n operation needs to find or manage spreadsheet files through Drive.
- Configure the OAuth consent screen for the correct audience and add the test users required by the app's current publishing status.
- Create an OAuth client with the Web application type.
- Copy the exact OAuth redirect URL displayed by n8n and add it as an authorized redirect URI in the Google client. The scheme, domain, port, and path must match.
- Copy the client ID and client secret into the n8n credential, save it, then use the Google sign-in button to authorize the connection.
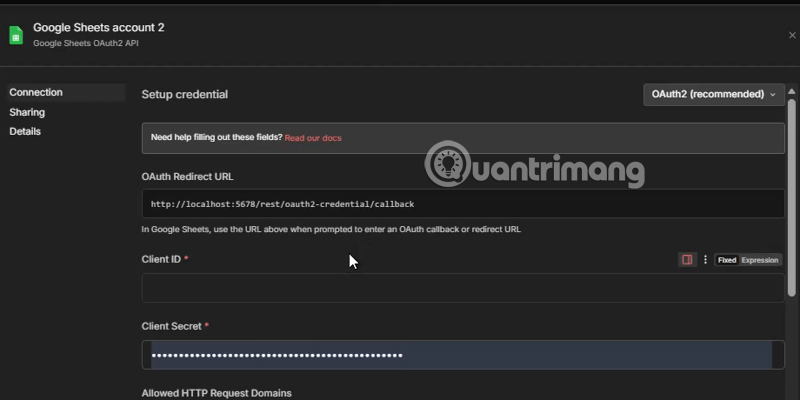
The client secret is a credential: do not paste it into workflow fields, screenshots, support posts, or source control. For a focused walkthrough, see how to create a Google client ID and client secret for n8n.
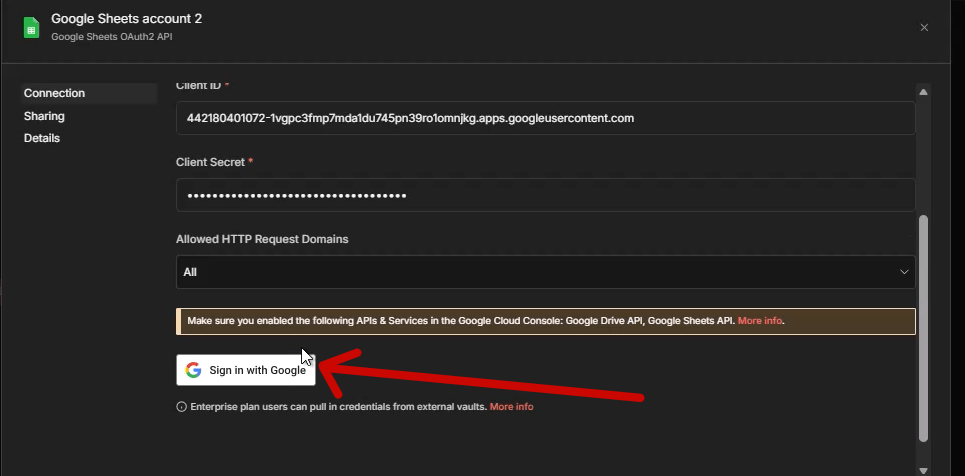
4. Select the document and sheet
Choose the spreadsheet by list, URL, or ID, then select the sheet within that document. An ID remains stable when a file is renamed, but it does not protect the workflow if the file is deleted or the connected account loses access.
Next, map input data to sheet columns. In automatic mapping, incoming JSON field names generally need to match the header names. In manual mapping, explicitly select the source expression for each destination column. Inspect the incoming data from the previous node before mapping.
5. Test the node before activating the workflow
- Pin or provide one representative input item.
- Select Execute step.
- Inspect the node output and the actual spreadsheet row.
- Test empty values, missing matches, duplicate IDs, dates, and numeric fields.
- Only activate the workflow after the normal path and the failure path behave as intended.
For workflows that run on a schedule, compare n8n with the other approaches in GitHub Actions, Zapier, n8n, and cron.
Make the integration reliable
- Avoid accidental duplicates: Store a source record ID and use an append-or-update pattern when the same event can arrive more than once.
- Keep headers stable: Renaming or duplicating a header can break automatic mapping. Treat the header row as a schema.
- Handle partial data: Decide whether a missing value should leave the existing cell unchanged or replace it with a blank.
- Control date formats: Send an unambiguous date or timestamp and verify how Google Sheets interprets it under the sheet locale.
- Plan for limits and failures: Batch large updates, add retries with limits, and route errors to a log or alert rather than silently discarding items.
- Protect destructive operations: Restrict delete and clear steps with explicit filters, and test them on a disposable sheet.
When Google Sheets is the wrong storage layer
Sheets works well for lightweight collaboration, reporting, and moderate workflow volumes. It is not a substitute for a transactional database when you need strict concurrency control, complex relationships, or high write volume. As a workflow grows, use Sheets as a reporting or review surface and keep authoritative records in a database designed for that workload.
Related Articles
 How to Add ChatGPT to Google Sheets3 minutes read
 Google Sheets: Things You Need to Know Before Using It6 minutes read
 How to Connect Gmail to n8n via Google Cloud Console9 minutes read
 Tricks Using Google Sheets Should Not Be Ignored7 minutes read
 How to Create Graphs, Charts in Google Sheets5 minutes read
 How to Align Spreadsheets Before Printing on Google Sheets3 minutes read
Reader Comments 0
Sign in with email or Google to join the discussion.