Fix computer error not finding Wifi network successfully
When your computer can't find a familiar Wifi, there may be two situations. First, your computer can't connect to a specific network. Second, you don't see any Wifi network when you open the network list. To fix this, we will do the following.
I. Fix the error of the computer not recognizing the Wifi network
In this case, we must create a mandatory connection for the computer by: Go to Control Panel, select Network and Internet => Network and Sharing => Manage Wireless Networks.
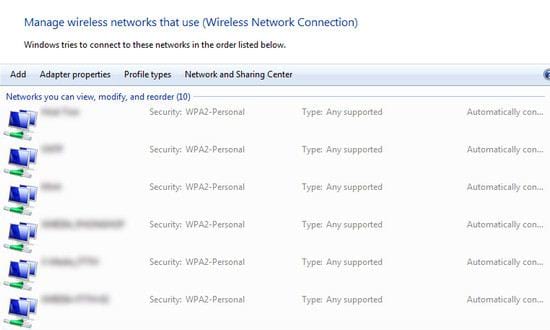
We divide into 2 smaller cases:
+ Here, if the network name you want to connect to is displayed, right-click on that icon and select Properties, then select Connect even if the network is not broadcasting its name (SSID)
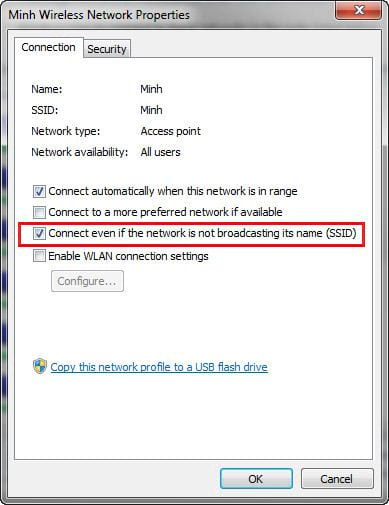
+ If the network name is not displayed here, click on Add and select Manually connect to a wireless network then fill in the required information.


Finally, check the router and restart the device to ensure a good, stable signal.
II. Computer, laptop cannot find any Wifi network
In this case, when observing the Wifi connection on your computer, there will be a red dash or exclamation mark icon.
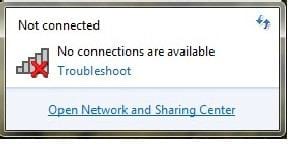
There are many reasons for this and here are some solutions:
1. Check the Wifi on/off button on your laptop
This may be you accidentally or someone else pressed the Wifi connection off button on your laptop. The solution now is that you just need to turn the Wifi detector back on. Each laptop line will have a different way to turn it on, usually we will use the key combination Fn + F1,2.9. For example:
- For Asus or Dell computers it will be: Fn+F2
- For Lenovo computers it will be: Fn+F5
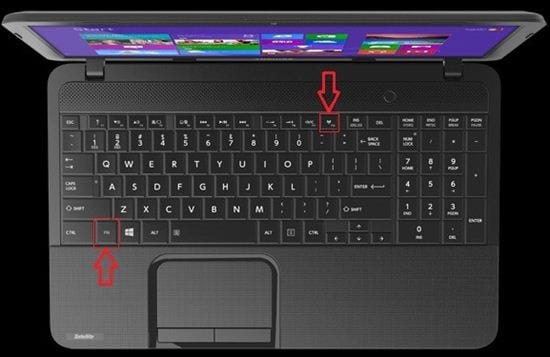
However, there will be other computer lines that have a separate button to turn Wifi on and off.
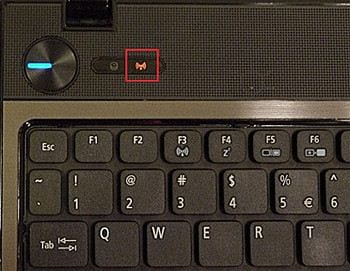
2. Restart Wifi Router
Sometimes there is a conflict in the Wifi Router that makes your computer or laptop unable to connect to Wifi. To solve this, try restarting your Wifi Router, it will most likely fix the conflict and your computer will connect normally again.
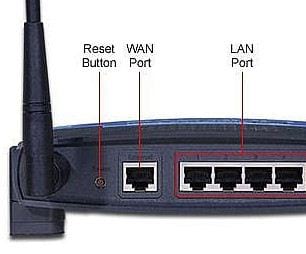
3. Check if Wifi Driver is faulty or not installed
Missing or corrupted Wifi Driver is also one of the main reasons why your computer cannot connect to Wifi. You can check the Wifi Driver again by right-clicking on My Computer (This PC if you use Windows 10) and selecting Manage .
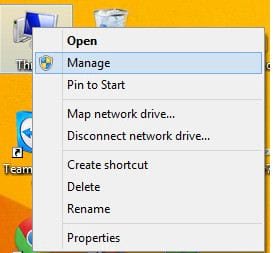
Next, click on Device Manager and select Network adapters .
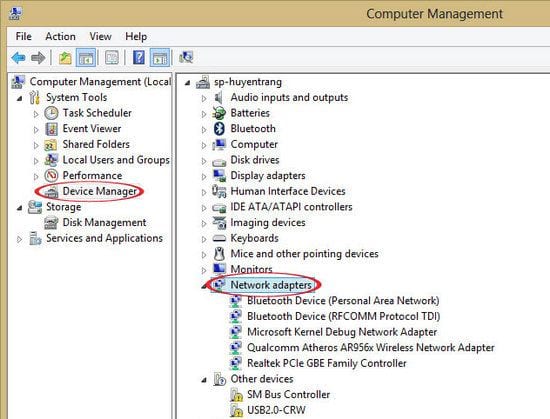
You observe if there is any yellow exclamation mark icon. If there is, it means that the wifi driver is not installed.
Next, you need to reinstall the Wifi Driver. There are many ways here, you can download the Driver from the manufacturer's homepage or use automatic Driver installation software such as DriverEasy for example.
4. Computer infected with Virus
Viruses are also one of the reasons why computers cannot connect to Wifi. The cause of virus infection here may be because you use Crack software or do not have anti-virus software to protect. So the solution now is that you need to install a reputable anti-virus software and remove viruses as well as malicious applications. To find effective anti-virus software, you can refer to the article Top best anti-virus software 2017 that we have shared.
5. Error due to antivirus software blocking wifi network
If you are using anti-virus software, it is very possible that this anti-virus software has taken control of network information, causing it to accidentally conflict with the wifi network you are using, so turn off the network censorship feature of the anti-virus software.
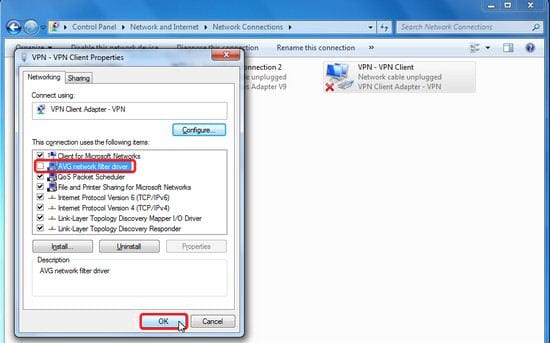
Here is an example of you are using AVG antivirus software. To turn off network censorship, do the following:
First, open Network and Sharing Center => go to Change Adapter Settings . Next, right-click on Local Area Connection and uncheck AVG network Filter driver and click OK .
Above are instructions on how to fix the error of the computer not finding the Wifi network. Hopefully through the article you have fixed your problem. Good luck. If you are a wifi modem administrator, regularly change the wifi password for your device, the steps to change the wifi password are quick and do not take too much of your time.
You should read it
- Connect your Windows 7 computer to the hidden Wifi network
- How to set up Wifi priority mode on Android and iPhone
- How to check who is using Wifi temple, your home WiFi theft
- Turn on WiFi on Windows 7 to fix laptop errors not found WiFi network
- How to view saved Wifi passwords on Windows 7/8/10
- Wi-Fi security is better than hiding the SSID
 How to Build a Random Word Generator Using Bash in Linux
 How to merge PDF files, merge and join multiple PDF files into a single file
 How to clean up iPhone junk, delete junk files to free up iPhone storage
 Can free VPNs be trusted?
 Good sayings about mothers, meaningful and touching
 Happy New Year to your lover, rekindle your love