Table of Contents
Most Windows 10 and 11 computers should use the 64-bit TeamViewer Remote client. Check the Windows system type first, then download the appropriate module directly from TeamViewer. Choose the full client to provide and receive support, QuickSupport for a temporary attended session, or Host for managed unattended access.
Check whether Windows is 64-bit
- Open Start > Settings > System > About.
- Under Device specifications, find System type.
- If it says a 64-bit operating system, download the 64-bit TeamViewer client. A 32-bit Windows installation requires the 32-bit client.
TeamViewer states that its 32-bit client can run on 64-bit Windows, but recommends the matching 64-bit version. The 64-bit client can use more memory, which can help with several simultaneous sessions or high-resolution remote displays.
Choose the right TeamViewer download
| Module | Use it when | Installation |
|---|---|---|
| TeamViewer Remote full client | You need to provide support, receive support, or manage devices | Installed application |
| TeamViewer QuickSupport | A user needs temporary attended help | Lightweight executable; no full installation |
| TeamViewer Host | An organization needs approved unattended access to a managed device | Installed service with device assignment |
Do not install Host merely for a one-time support call. Conversely, do not treat QuickSupport as a persistent management agent. Choose the smallest module that meets the actual access requirement.
Download TeamViewer 64-bit safely
- Open the official TeamViewer for Windows page.
- Select the required module and the 64-bit Windows download.
- Save the file to a known folder such as Downloads.
- Before running it, right-click the file, select Properties, and inspect the digital signature when available. Stop if the signature is invalid or the publisher is unexpected.
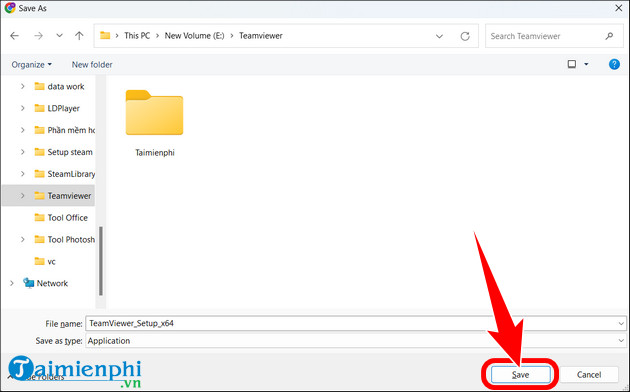
Avoid third-party download wrappers and pages that advertise a fixed old release such as “TeamViewer 15.” The product version changes; the official download page is the correct source for the current supported build.
Install the full TeamViewer client
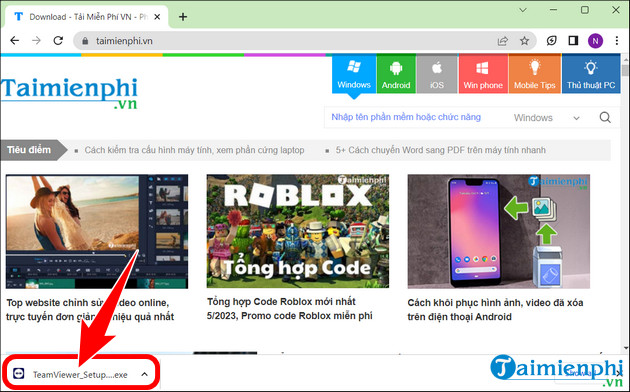
- Open the TeamViewer setup file.
- Review the Windows security prompt and confirm the expected publisher before approving it.
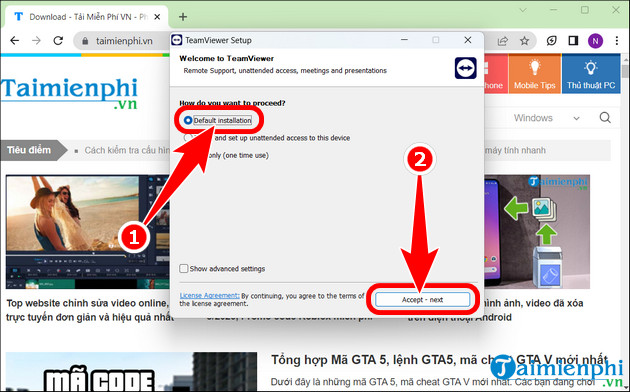
- Choose Default installation for a normal full-client setup, then select Accept - next or the equivalent button in the current installer.
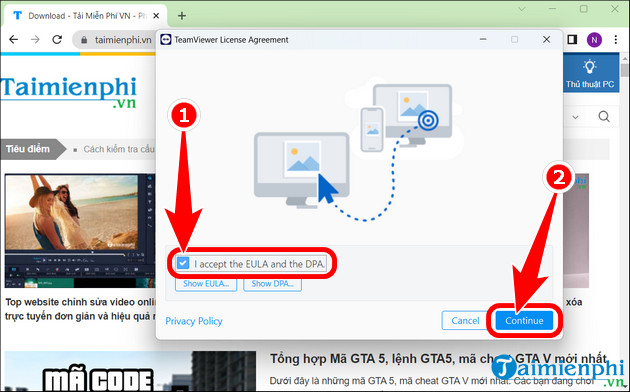
- Read the license and data-processing terms. Select the acceptance checkbox only if you agree, then continue.
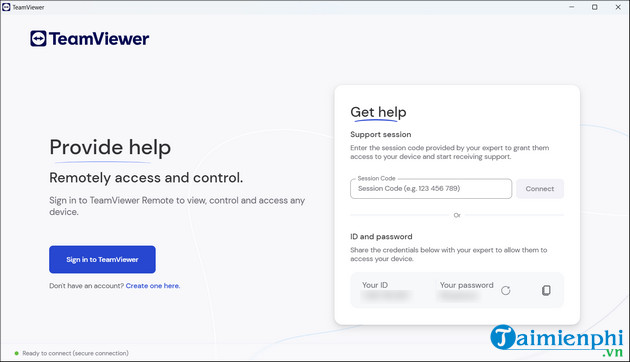
- Wait for installation to finish and open TeamViewer.
- Sign in if your workflow uses a TeamViewer account or managed devices.
Start an attended remote-support session
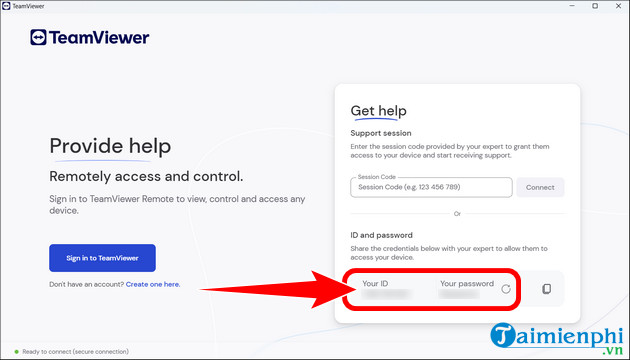
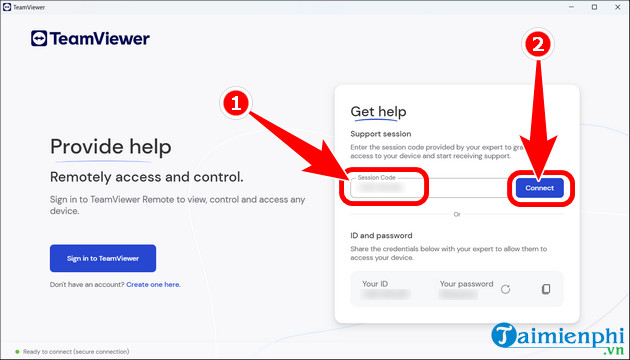
The current TeamViewer Remote interface can use a session code or invitation link. Some configurations and older interfaces also show a TeamViewer ID and temporary password. Follow the method displayed by both participants rather than assuming every installation uses the same fields.
If the remote user provides a session code
- Enter the code in the session area or open the verified invitation.
- Check the displayed participant or device details.
- Ask the remote user to accept the session and choose the permissions appropriate to the task.
- Explain sensitive actions before opening settings, files, or administrator prompts.
If the remote device provides an ID and password
- Enter the authorized partner ID in TeamViewer.
- Select Connect.
- Enter the current password supplied by the person at the remote computer.
- End the session as soon as the agreed work is complete.
The two computers do not always need the exact same TeamViewer build. However, both should run supported, compatible versions, and updating both ends is the first step when a version warning or connection failure appears.
Switch from 32-bit to 64-bit TeamViewer
TeamViewer does not automatically convert an installed 32-bit client to 64-bit. Its official migration procedure preserves the device ID when settings are kept:
- Exit TeamViewer and uninstall the 32-bit version.
- When asked, do not select Remove settings.
- Download the 64-bit client from TeamViewer's site.
- Install it normally and sign in again if the previous client used an account.
- Confirm that the TeamViewer ID, assignment, and access configuration remain correct.
Back up or document important enterprise settings before a managed migration. The 32-bit and 64-bit clients use different Windows registry paths, so deployment scripts and policy tooling may need adjustment.
Licensing: personal versus commercial use
TeamViewer's free version is for personal use, such as connecting between personal devices or helping friends and family. Work-related access, customer support, organization use, revenue-generating activity, and connecting to a work computer require an appropriate commercial license. Installing the 64-bit client does not change those terms.
Security checks after installation
- Turn on automatic updates or regularly use Check for new version.
- Protect the TeamViewer account with strong authentication and review assigned devices.
- Use temporary attended access for one-time support instead of creating a permanent password.
- Enable unattended access only on devices you own or administer and only when there is a continuing need.
- Never disclose a session code, ID, password, or approval prompt to an unsolicited caller.
- Remove Host, Easy Access, device assignment, or startup access when it is no longer required.
For version-specific installation details, see TeamViewer's official download and installation guide. To compare TeamViewer with other approaches, see TipsMake's remote computer control software overview and its list of remote access tools.
If installation or connection fails
- Wrong architecture: confirm the System type and remove the other TeamViewer architecture before installing; both cannot run side by side.
- Installer blocked: use the official package, check its signature, and ask the administrator on a managed PC. Do not disable antivirus protection.
- Older Windows version: check TeamViewer's current supported-operating-system table. A current client may not support an obsolete Windows release.
- No session connection: check Internet access, TeamViewer service status, firewall policy, system time, and whether the remote user accepted the session.
- Commercial-use warning: verify the use case and license. Reinstalling or changing from 32-bit to 64-bit does not resolve a licensing classification.
- Unexpected account or device assignment: stop and verify ownership before granting access or signing in.
Remote desktop software provides extensive access. Use it only with explicit authorization, keep the person receiving attended support informed, and disconnect immediately if the session moves outside the agreed task.
Related Articles
 How to Download the Latest Teamviewer 14 for New Users3 minutes read
 How to Installing and Using Teamviewer: Step-by-Step Guide3 minutes read
 What Is TeamViewer? Explained2 minutes read
 How to Use Teamviewer10 minutes read
 Teamviewer 15.1.5: Supporting Software, Free Remote Access4 minutes read
 How to Use Teamviewer Without Installation4 minutes read
Reader Comments 0
Sign in with email or Google to join the discussion.