Table of Contents
To create videos from photos to preserve beautiful memories, users can use professional tools like Adobe Premiere or, more simply.
Creating a video from photos in the simplest way.
First, download ProShow Producer from here.
>> Refer to the instructions on how to install ProShow Producer here.
Step 1: After downloading ProShow Producer, proceed with the installation first. You can refer to the instructions above to learn how to install ProShow Producer before creating a video from photos in the simplest way.

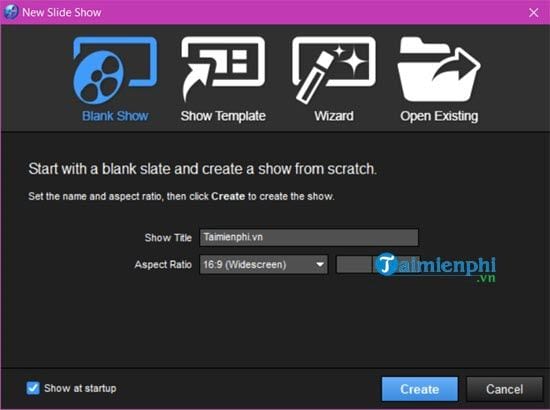
Step 2: Next, open the software. There are four options for the user, and here we choose "blankshow" for the easiest operation.
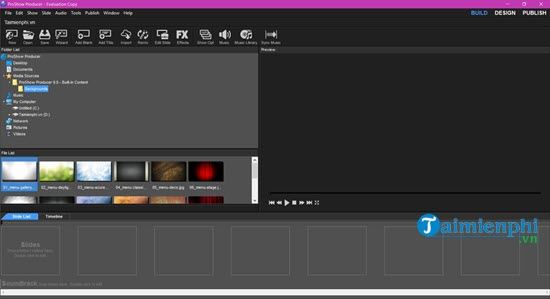
Step 3: The ProShow Producer interface has appeared. Now let's start creating a video from the photos already on your computer.
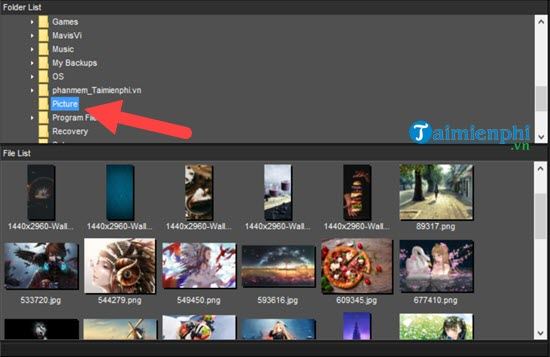
Step 4: In the Folder List section, select the folder on your computer where your photos are stored.
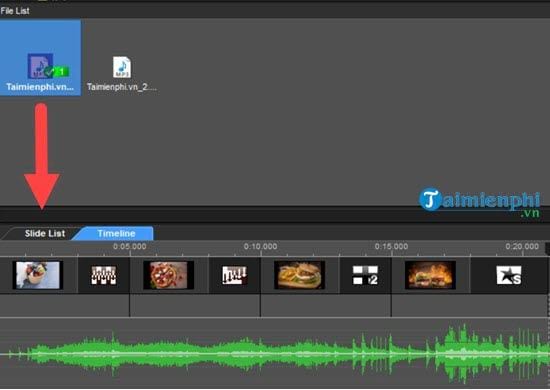
Step 5: Then, in the File List section, simply select one or more photos at a time and drag them down to the Timeline of ProShow Producer.
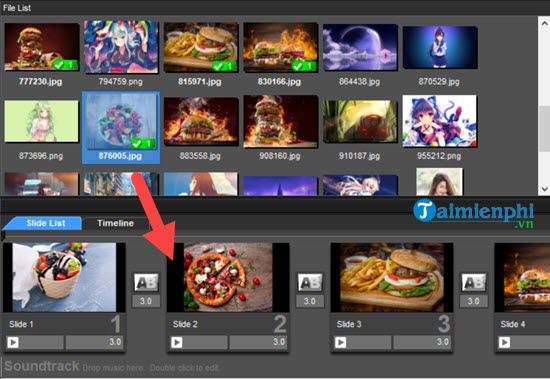
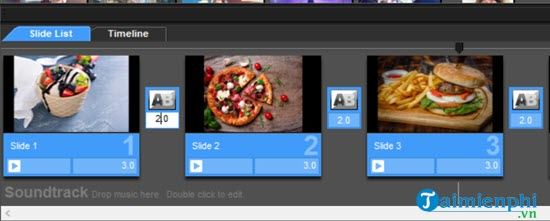
Step 6: Here we have the option to click each slide to adjust the display time (in seconds).
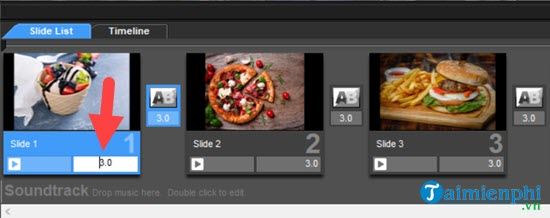
Alternatively, you can hold down Shift and click all the slides, then adjust the duration of one slide; all the remaining slides will be adjusted accordingly.
Note: This applies to all effects if you select multiple ones.
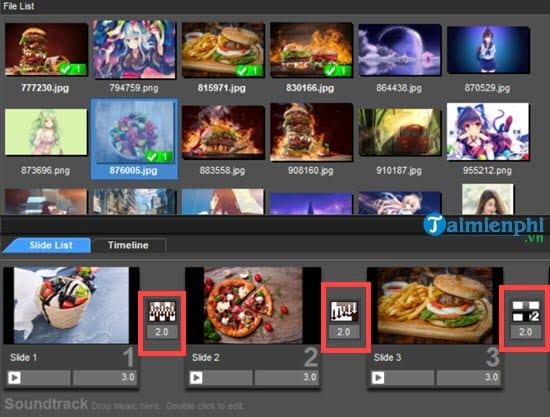
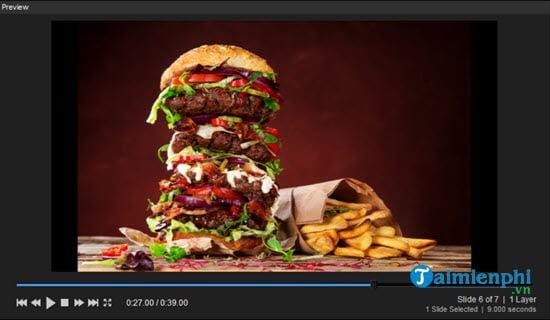
Step 7: The next step is to add effects to each slide or multiple slides using the method above. There are hundreds of effects available, and if you don't know which one to choose, just leave it random by clicking on the "?" icon. You can then edit it later if you feel it's not suitable.
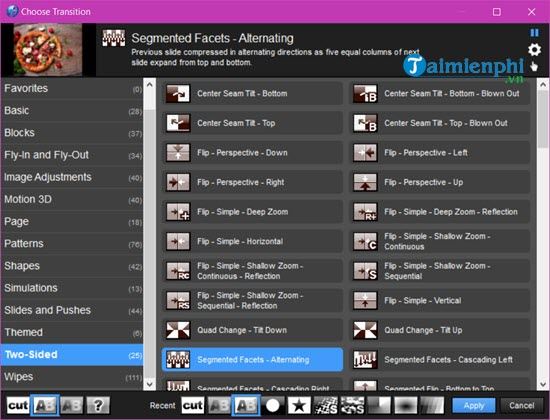
You can customize each slide to have identical or different effects; ideally, they should be different to make the video more dynamic.
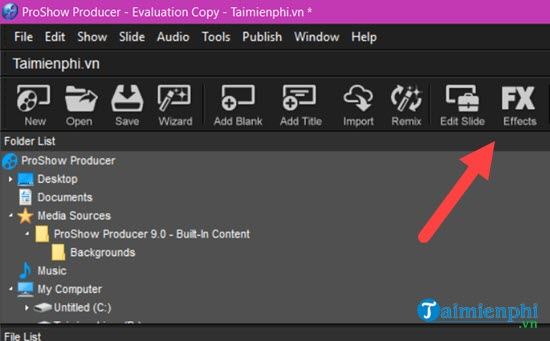
Step 8: Besides adjusting the effects for individual photos, we can also adjust the effects for the entire template video using Effect FX .
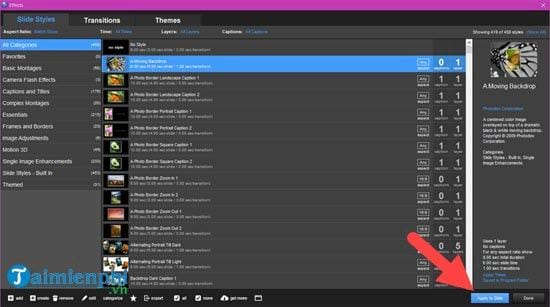
Step 9: Here, simply select any effect and assign it to the desired effect. Creating a video from photos is almost complete.
Step 10: You're almost there! Now you need to add some music to your video. Locate the folder containing your songs.
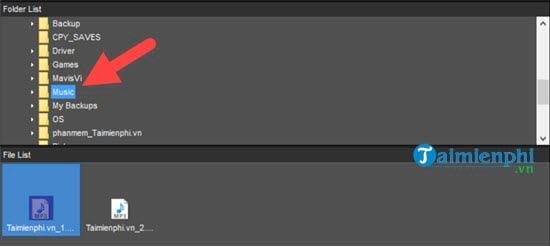
Step 11: Similar to the image, we just need to drag and drop it onto the Timeline to make the music play in sync with the image.
Step 12: Finally, review your entire video to see if there are any further edits or changes needed before exporting it.
Step 13: To export, select the Publish option in the upper right corner.
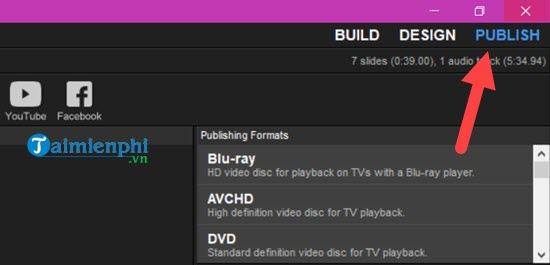
Next, select the video icon to export; this is a common video export method in ProShow Producer.

Step 14: Choose the desired video output resolution. This will depend on your image resolution and your preferences. Once you've made your decision, click Create.
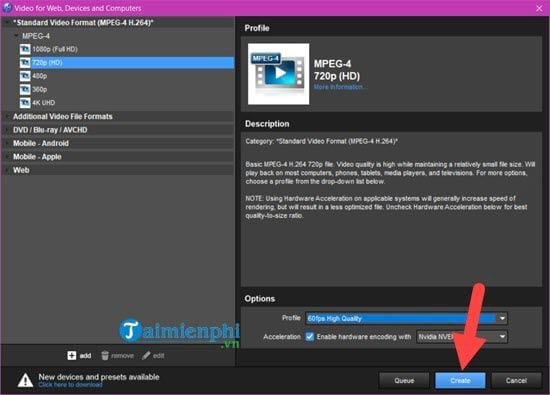
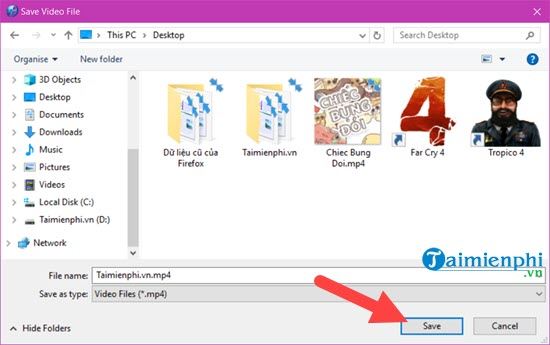
Finally, name the file and click save, and you're done! That's the simplest way to create a video from photos.
Above is a guide on how to create a video from photos in the simplest way. TipsMake believes that although the article is a bit long, the steps are completely simple, and users can easily follow the steps to create a complete video themselves, or even more creatively if they are already proficient in using ProShow Producer.
For non-professionals, creating videos from photos using ProShow Producer is a simple and effective starting point. This method is not only used by beginners but also by professionals and semi-professionals alike.
But that's for Windows users. So, what options are there for MacBook users to create videos from photos on their MacBook? If you're wondering about this, check out How to create videos from photos on a MacBook for detailed instructions.
Frequently Asked Questions
What should you know about detailed instructions on how to create a video from photos in the?
To create videos from photos to preserve beautiful memories, users can use professional tools like Adobe Premiere or, more simply.
Do the steps or features vary by device or software version?
They can. Menu names, available settings, and compatibility may differ by device, region, account type, or software version, so check the options shown on your own screen.
What should you do if the recommended method does not work?
Repeat the steps in order, confirm that the requirements are met, and restart the relevant app or device when appropriate. Also check for updates and review any error message before trying again.
Was this article helpful?
Your feedback helps us improve.
Related Articles
 The Simplest Way to View Photos on iCloud Using Your Phone or Computer Explained6 minutes read
 Google Photos Integrates Veo 3: Upgraded AI Photo-to-video Feature4 minutes read
 How to Create a Video That Beats Photos to Music on Tiktok4 minutes read
 Create Cute Drawings from Photos Using AI6 minutes read
 How to Make Video from Photos with Proshow Gold Is Extremely Simple6 minutes read
 Creating Videos from Photos Using Grok9 minutes read
Reader Comments 0
Sign in with email or Google to join the discussion.