Create a rescue SD card for Mac OS X operating system
MacBook Pros and Apple iMacs have begun to support Secure Digital memory card (SD) slots. You can easily use this connector to transfer data, from videos, photos ... from camera to Mac.
MacBook Pros and Apple iMacs have begun to support Secure Digital memory card (SD) slots. You can easily use this connector to transfer data, from videos, photos . from camera to Mac.
With the following tips, you can also create an SD card that can boot into the operating system, very useful and handy when rescuing data.

SD card can boot into Mac OS X is a really handy rescue tool
Necessary conditions:
-
MacBook Pro or iMac 2009 integrated SD slot
-
The DVD disc installs Mac OS X operating system
-
Recommended to use high-speed SD card (such as SanDisk Extreme III 16GB or 32GB or SanDisk Extreme III 8GB card). Note: other SD cards may work but the speed will be slower.
-
Disks install applications, rescue tools you want to use
Steps to create an SD card can boot:
Option to prepare Mac OS X on SD card
1. Plug the SD card into the dedicated slot of the MacBook Pro or iMac.
2. Run the Disk Utility application. From Macintosh HD> Applications> Utilities
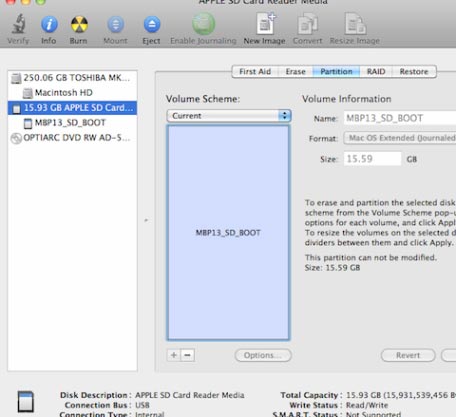
3. Select the SD card on the left side of Disk Utility
4. Click Partition ; Then, in the Volume Scheme customization, change to a partition
5. Fill in the Volume Information section with the following information:
Name: MPB13_SD_BOOT
Format: Mac OS Extended (Journaled)
Size: 15.59 GB for 16GB SD card
6. Click the Options button and select GUID Partition Table , then click OK .
7. Click Apply and then click Partition.
Disk Utility will prepare and format the SD card. Next, you can install Mac OS X on the card.
Install Mac OS X on SD card:
Install applications, tools to fix system and rescue errors
1. Insert the Mac OS X installation disc into the MacBook Pro or iMac
2. Double-click the Mac OS X installation icon
Note : on the installation screen, the system will notify you that it needs at least 11.6 GB to contain Mac OS X. That means the 8 GB SD card is not enough to contain. We will solve this problem in a moment.
3. Select Destination as SD card you have prepared
4. Click Continue
5. At the screen showing the installation process, click Customize
6. You will be presented with a list of installed applications. Please uncheck: Printer Drivers , Additional Fonts, Language Translations and X11 . As a result, the installation capacity of Mac OS X Leopard will be reduced to 6.2GB. Click Done .
7. Click Install and Mac OS X will start installing on the SD card. This process will take more than 1 hour. When finished, select the parameters by default.
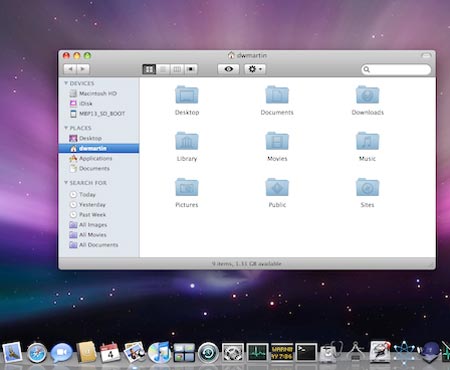
At this point, you can boot into the Mac from the SD card itself. Please restart the Mac when holding the Option button. Go to Startup Manager , you just need to select the SD card to finish.
Once your SD card is ready to boot, the last job is to select the application you want to install. You should install some useful software such as DiskWarrior, Drive Genius 2, FileSalvage, and TechTool Pro 5, which are very effective for rescue. In addition, your rescue SD card should also have system diagnostic tools such as Activity Monitor, Console, Terminal, Disk Utility and System Profiler.
Was this article helpful?
Your feedback helps us improve.
Related Articles
 Rescue the system with these 5 bootable Windows PE recovery disks6 minutes read
 How to create Windows PE rescue disk7 minutes read
 How to create versatile USB Boot, USB boot rescue4 minutes read
 Rescue Cut answers from 1 - 1002 minutes read
 How to create USB boot versatile, USB rescue by DLC Boot4 minutes read
 How to install Rescue Cut on the computer3 minutes read
Reader Comments 0
Sign in with email or Google to join the discussion.