Table of Contents
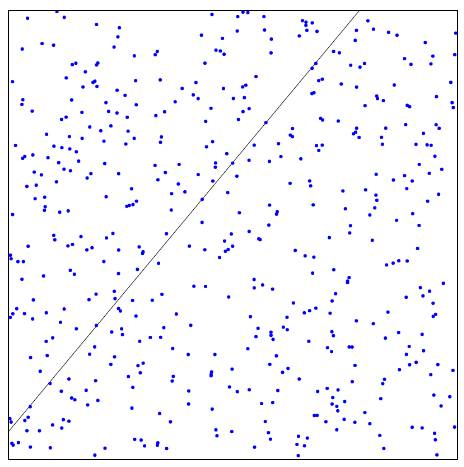
A perceptron is a small binary classifier that learns a straight-line decision boundary from labeled examples. In this example, each point has an x and y coordinate. We label points above y = 1.2x + 50 as 1 and points on or below it as 0, then train the model to recover a similar separation.
If you need the basic model first, see what a perceptron is. The line itself follows the slope-and-intercept form illustrated in TipsMake's linear graph guide.
How the update works
The model computes score = w0*x + w1*y + b. It predicts 1 when the score is greater than zero and 0 otherwise. The bias b moves the decision boundary away from the origin; it is a separate parameter here, so callers pass exactly two inputs.
For each labeled point, calculate error = label - prediction. Then update each weight with weight += learningRate * error * input and the bias with bias += learningRate * error. A correct prediction has zero error and causes no update. This is the single-layer perceptron learning rule, not backpropagation through multiple layers.
Run a complete JavaScript example
Paste the following code into a browser developer console or a JavaScript environment. It generates training points, trains for at most 1,000 passes, and checks a separate set of newly generated points. The inputs are divided by 100 so the coordinate values and bias update are on more comparable scales.
class Perceptron {
  constructor(rate = 0.1) {
    this.weights = [0, 0];
    this.bias = 0;
    this.rate = rate;
  }

  predict([x, y]) {
    const score = this.weights[0] * x + this.weights[1] * y + this.bias;
    return score > 0 ? 1 : 0;
  }

  train(inputs, label) {
    const error = label - this.predict(inputs);
    this.weights[0] += this.rate * error * inputs[0];
    this.weights[1] += this.rate * error * inputs[1];
    this.bias += this.rate * error;
    return error !== 0;
  }
}

const line = x => 1.2 * x + 50;
function sample() {
  const x = Math.random() * 200 - 100;
  const y = Math.random() * 200 - 100;
  return {
    inputs: [x / 100, y / 100],
    label: Number(y > line(x))
  };
}

const training = Array.from({ length: 200 }, sample);
const model = new Perceptron(0.1);
let epochs = 0;
for (let pass = 0; pass < 1000; pass++) {
  let mistakes = 0;
  for (const point of training) {
    if (model.train(point.inputs, point.label)) mistakes++;
  }
  epochs = pass + 1;
  if (mistakes === 0) break;
}

const test = Array.from({ length: 50 }, sample);
const correct = test.filter(p => model.predict(p.inputs) === p.label).length;
console.log({ epochs, correct, total: test.length, weights: model.weights, bias: model.bias });
The output reports the number of passes, correct predictions on 50 newly generated points, and the learned parameters. Because the samples are random, those numbers change each run. Inspect the correct count rather than assuming that zero training mistakes proves perfect performance on unseen data. You can also try model.predict([x / 100, y / 100]) for a new point in the original coordinate system.
What the example can and cannot learn
A single perceptron draws a linear boundary. It can separate this deliberately linearly labeled dataset, but it cannot represent a curved or XOR-style boundary with one line. Noisy or contradictory labels can prevent a pass with zero mistakes; the loop's maximum keeps the example from running forever. The scikit-learn perceptron documentation also treats this as a linear classifier. To check predictions visually, see TipsMake's perceptron test example.





Reader Comments 0
Sign in with email or Google to join the discussion.